TEAC DM-4800 DM-4800 Owner's Manual - Page 30
UTILITY copying, Copying within a module
 |
View all TEAC DM-4800 manuals
Add to My Manuals
Save this manual to your list of manuals |
Page 30 highlights
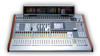
2 - Basic operational concepts : UTILITY copying UTILITY copying This screen allows various parameters to be copied within and between channel modules. It also allows the protection of various parameters to stop them being overwritten when they are copied and pasted between channels. Press the UTILITY key (ALT + 9) to access this screen. Copying within a module The top half of the screen is used to control these functions, which allow the pan/balance settings and levels to be copied between aux busses and busses (including the stereo buss). This may be useful when setting up a studio monitor mix, for example, and the levels and pans of the aux sends used for the monitor mix should initially be set to the same as the channels. 1 Check either of the two checkboxes (PAN/BAL and/or LEVEL) to select the settings to be copied. 2 In either of the two boxes associated with these checkboxes, the top row copies settings from the aux to buss, and the second row copies them from buss to aux. Naturally, it is not possible to select both in the same box, though it is possible to select CH -> AUX in one box and AUX -> CH in the other. 3 Select the source and the destination parameters as explained here. Figure 2.25: UTILITY copy screen. TIP You can also use the PARAMETER EDIT SCREEN key (above the COPY and PASTE keys) to bring up this screen. • For pan/balance copying, linked pairs of aux sends and busses are available, or an ALL selection is also available. Note that individual aux and busses are not available. • The STEREO buss is available as a destination. • The aux sends are selectable individually or as linked pairs as sources or destinations for level copying. • Channels are divided into blocks of eight: 1-8, 9-16, 17-24, 25-32 33-40, 41-48, 49-56, 57-64 and ALL. Individual channels cannot be selected. This applies to both pan/balance and level copying. 4 Move the cursor to the on-screen COPY button and press ENTER. A confirmation popup message appears. 5 Press ENTER again to confirm the copy, or a cursor key to cancel. If neither of the checkboxes is checked when you press the COPY button, an error message is displayed. 30 TASCAM DM-4800 User's Manual
-
 1
1 -
2
-
3
-
4
-
5
-
6
-
7
-
8
-
9
-
10
-
11
-
12
-
13
-
14
-
15
-
16
-
17
-
18
-
19
-
20
-
21
-
22
-
23
-
24
-
 25
25 -
 26
26 -
 27
27 -
 28
28 -
 29
29 -
 30
30 -
 31
31 -
 32
32 -
 33
33 -
 34
34 -
 35
35 -
36
-
37
-
38
-
39
-
40
-
41
-
42
-
43
-
44
-
45
-
46
-
47
-
48
-
49
-
50
-
51
-
52
-
53
-
54
-
55
-
56
-
57
-
58
-
59
-
60
-
61
-
62
-
63
-
64
-
65
-
66
-
67
-
68
-
69
-
70
-
71
-
72
-
73
-
74
-
75
-
76
-
77
-
78
-
79
-
80
-
81
-
82
-
83
-
84
-
85
-
86
-
87
-
88
-
89
-
90
-
91
-
92
-
93
-
94
-
95
-
96
-
97
-
98
-
99
-
100
-
101
-
102
-
103
-
104
-
105
-
106
-
107
-
108
-
109
-
110
-
111
-
112
-
113
-
114
-
115
-
116
-
117
-
118
-
119
-
120
-
121
-
122
-
123
-
124
-
125
-
126
-
127
-
128
-
129
-
130
-
131
-
132
-
133
-
134
-
135
-
136
-
137
-
138
 |
 |
