TEAC DM-4800 DM-4800 Owner's Manual - Page 35
Setting the date and time, Naming the DM-4800, Creating a new project
 |
View all TEAC DM-4800 manuals
Add to My Manuals
Save this manual to your list of manuals |
Page 35 highlights
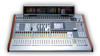
2 - Basic operational concepts : About projects and libraries Setting the date and time To set the date on the DM-4800, follow the steps below: 1 Enter the UTILITY screen, and jump to the SYSTEM page: Figure 2.30: Setting the date and time 2 Move the cursor to the DATE UTILITY section of the screen. Naming the DM-4800 Note that it is possible to provide your mixer with a unique identifying name, which is useful if you are working in a facility with more than one unit. Creating a new project When creating a new project, the project can be created from scratch, with manually selected sampling frequency, surround mode and mixer settings, taking the settings from a selected prior project that acts as a template, from preset library settings, or from the current settings. 3 Use the cursor and wheel to set the date and time. Note that the month is a three-letter abbreviation of the English month name (JAN, FEB, MAR, APR, MAY, JUN, JUL, AUG, SEP, OCT, NOV, DEC) and the hours are set in 24-hour ("military") format. 4 When you have set the values, press ENTER. The DM-4800 shows a confirmatory pop-up message (Date change was applied). The calendar in the DM-4800 takes account of the different month lengths, including leap years (valid up to and including the year 2099-you may want to consider an upgrade after that time!). More seriously, the clock is backed up by the DM4800's internal battery. This battery should last for several years. In the event of the battery running low, (you can use the UTILITY/SYSTEM screen to check), consult your TASCAM supplier. Use the MIXER NAME field to the right of the date and time field to set this value. This name will be shown on the screen of the TASCAM Mixer Companion software to identify the unit. 1 With the ALT indicator lit, press PROJECT so that the NEW PROJECT page is shown: Figure 2.31: The NEW PROJECT page TASCAM DM-4800 User's Manual 35
-
 1
1 -
2
-
3
-
4
-
5
-
6
-
7
-
8
-
9
-
10
-
11
-
12
-
13
-
14
-
15
-
16
-
17
-
18
-
19
-
20
-
21
-
22
-
23
-
24
-
25
-
26
-
27
-
28
-
29
-
 30
30 -
 31
31 -
 32
32 -
 33
33 -
 34
34 -
 35
35 -
 36
36 -
 37
37 -
 38
38 -
 39
39 -
 40
40 -
41
-
42
-
43
-
44
-
45
-
46
-
47
-
48
-
49
-
50
-
51
-
52
-
53
-
54
-
55
-
56
-
57
-
58
-
59
-
60
-
61
-
62
-
63
-
64
-
65
-
66
-
67
-
68
-
69
-
70
-
71
-
72
-
73
-
74
-
75
-
76
-
77
-
78
-
79
-
80
-
81
-
82
-
83
-
84
-
85
-
86
-
87
-
88
-
89
-
90
-
91
-
92
-
93
-
94
-
95
-
96
-
97
-
98
-
99
-
100
-
101
-
102
-
103
-
104
-
105
-
106
-
107
-
108
-
109
-
110
-
111
-
112
-
113
-
114
-
115
-
116
-
117
-
118
-
119
-
120
-
121
-
122
-
123
-
124
-
125
-
126
-
127
-
128
-
129
-
130
-
131
-
132
-
133
-
134
-
135
-
136
-
137
-
138
 |
 |
