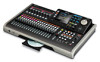
TEAC DP-24 DP-24 Owner's Manual - Page 13
Listening to the demo song, Press the F2
 |
View all TEAC DP-24 manuals
Add to My Manuals
Save this manual to your list of manuals |
Page 13 highlights
2 - Quick Guide •• When the power is on, do not cut the power to the unit by, for example disconnecting the power cord. All settings made since the last time you saved will not be saved. If you cut the power while an SD card is being accessed, all recorded songs and data may be damaged and cannot be recovered. •• Before turning the power ON, minimize the headphones volume and the volume on any monitoring system connected to this unit. TIP If an amplifier or powered speakers are connected to the MONITOR OUT jacks, you can monitor using speakers. Listening to the demo song The included SD card in the unit contains a demo song. We will use this demo song to practice listening to and mixing a recording. 1. Press the HOME button to open the Home screen. 5. Use the JOG/DATA dial or the CURSOR (5/b) buttons to select LOAD, and then press the F4 (t) button. The SONG LOAD pop-up window appears. 6. Press the F2 (YES) button to load the demo song. The demo song is loaded and the display returns to the SONG LIST screen. 2. When the recorder is stopped, press the MENU button to open the MENU screen. 3. Use the JOG/DATA dial or the CURSOR (5/b/g/t) buttons to select (green highlight) SONG, and then press the F4 (t) button. The SONG LIST screen appears. 7. Press the HOME button to return to the Home screen. 8. Press the PLAY (7) button, and raise the TRACK 1 to 23/24 faders, the STEREO fader and the MONITOR LEVEL knob to listen to the demo song. The STEREO fader adjusts the overall volume of TRACK 1 to 23/24. The standard position of the STEREO fader is 0dB. Use TRACK 1 to 23/24 faders to adjust the balance of the tracks. Use the MONITOR LEVEL knob to adjust the final monitoring volume. 9. Press the MIXER button to open the Mixer screen. 4. Use the JOG/DATA dial or the CURSOR (5/b) buttons to select DEMO SONG, and then press the F4 (t) button to open a sub-menu. 10.Press the SOURCE button to select INPUT A to H, or press the SELECT button to select a track to be set, and then use the PAN knob to set the stereo signal position of each track. 13 TASCAM DP-24
-
 1
1 -
2
-
3
-
4
-
5
-
6
-
7
-
 8
8 -
 9
9 -
 10
10 -
 11
11 -
 12
12 -
 13
13 -
 14
14 -
 15
15 -
 16
16 -
 17
17 -
 18
18 -
19
-
20
-
21
-
22
-
23
-
24
-
25
-
26
-
27
-
28
-
29
-
30
-
31
-
32
-
33
-
34
-
35
-
36
-
37
-
38
-
39
-
40
-
41
-
42
-
43
-
44
-
45
-
46
-
47
-
48
-
49
-
50
-
51
-
52
-
53
-
54
-
55
-
56
-
57
-
58
-
59
-
60
-
61
-
62
-
63
-
64
-
65
-
66
-
67
-
68
-
69
-
70
-
71
-
72
-
73
-
74
-
75
-
76
-
77
-
78
-
79
-
80
-
81
-
82
-
83
-
84
-
85
-
86
-
87
-
88
-
89
-
90
-
91
-
92
-
93
-
94
-
95
-
96
-
97
-
98
-
99
-
100
-
101
-
102
-
103
-
104
-
105
-
106
-
107
-
108
 |
 |
