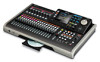
TEAC DP-24 DP-24 Owner's Manual - Page 36
Preparing an SD card for use, Recorder modes, Connecting other equipment, Front panel
 |
View all TEAC DP-24 manuals
Add to My Manuals
Save this manual to your list of manuals |
Page 36 highlights
4 - Preparation 4. Use the CURSOR (g/t) buttons to move the cursor (blue highlight) to the desire item, and then use the JOG/DATA dial to change the value. 5. After making the settings, press the F2 (YES) button to return to the Home screen. NOTE •• The time indication stops while time being set. •• You can automatically add the date you have set to file names by specifying Song Name Type on the PREFERENCE menu. Preparing an SD card for use In order to use an SD card in this unit, you must format it first. CAUTION The included SD card is already formatted, so formatting it is not necessary. Formatting the supplied SD card erases the demo song previously stored. 1. Confirm that the SD card is loaded and turn the power on. 2. A pop-up message "Invalid Card" appears when a new SD card or an SD card formatted for use with another device is installed in the unit. 3. You can also reformat a card in this unit at any time. (See "Quick formatting an SD card" on page 78 and "Full formatting an SD card" on page 79.) To clear the pop-up message, press the F1 button. Recorder modes This unit has four recorder modes. Multi Track Use this mode to operate the unit as a multitrack recorder. Bounce Use this mode to perform track bouncing. (See "Bouncing tracks" on page 53.) Mixdown Use this mode to mix down tracks to create a master file. (See "Mixing down tracks" on page 68 and "Creating a master file" on page 69.) Mastering Use this mode to play back the master files that you have created and apply effects and tailor them to suit your preferences (mastering). (See "Checking the master file" on page 70 and "Finishing up a master file (mastering) " on page 71.) When the unit starts up, it defaults to Multi Track mode of the Recorder mode, regardless of the mode used last before shutting down. When Recorder mode is any mode other than Multi Track mode, many of the usual operations using the screen are unavailable. In this manual, the Multi Track mode is the Recorder mode explained unless otherwise noted. Connecting other equipment This section shows examples of how to connect other devices to this unit. Precautions before making connections •• Turn off (standby) this unit and all devices that you will connect beforehand. •• Supply power to all the devices from the same line. When using a power strip, for example, use one with a cable that has a high electric current capacity in order to minimize power voltage variations. Front panel Foot switch TASCAM RC-3F (Optional) Headphones 36 TASCAM DP-24
-
 1
1 -
2
-
3
-
4
-
5
-
6
-
7
-
8
-
9
-
10
-
11
-
12
-
13
-
14
-
15
-
16
-
17
-
18
-
19
-
20
-
21
-
22
-
23
-
24
-
25
-
26
-
27
-
28
-
29
-
30
-
 31
31 -
 32
32 -
 33
33 -
 34
34 -
 35
35 -
 36
36 -
 37
37 -
 38
38 -
 39
39 -
 40
40 -
 41
41 -
42
-
43
-
44
-
45
-
46
-
47
-
48
-
49
-
50
-
51
-
52
-
53
-
54
-
55
-
56
-
57
-
58
-
59
-
60
-
61
-
62
-
63
-
64
-
65
-
66
-
67
-
68
-
69
-
70
-
71
-
72
-
73
-
74
-
75
-
76
-
77
-
78
-
79
-
80
-
81
-
82
-
83
-
84
-
85
-
86
-
87
-
88
-
89
-
90
-
91
-
92
-
93
-
94
-
95
-
96
-
97
-
98
-
99
-
100
-
101
-
102
-
103
-
104
-
105
-
106
-
107
-
108
 |
 |
