Toshiba PA3454U-1DV2 User Guide - Page 30
Video, When WinDVD Creator Platinum is used, Click the Set button in the Virtual Memory Window.
 |
UPC - 032017331921
View all Toshiba PA3454U-1DV2 manuals
Add to My Manuals
Save this manual to your list of manuals |
Page 30 highlights
30 Using the External DVD SuperMulti Drive Video As for Inter Video WinDVD Creator Platinum. Only the model that can be written in to DVD is attached. When WinDVD Creator Platinum is used: You can record video back to your digital camcorder via i.LINK (IEEE1394) using WinDVD Creator Platinum. However, there is a case where its playback sound is choppy. 1 Click start and select the Control Panel. 2 Click the Performance and Maintenance icon in the Control Panel. 3 Click the System icon in the Performance and Maintenance window. 4 Click the Advanced tab in the System Properties window. 5 Click the Settings icon in the "Performance" section. 6 Click the Advanced tad in the Performance Options window. 7 Click the Change icon in the "virtual memory" section. 8 Select the custom size button in the Virtual Memory window. 9 Specify much higher values for "Initial size" and "Maximum size." 10 Click the Set button in the Virtual Memory Window. 11 Click the OK button in the Virtual Memory window.
-
 1
1 -
2
-
3
-
4
-
5
-
6
-
7
-
8
-
9
-
10
-
11
-
12
-
13
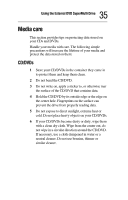
-
14
-
15
-
16
-
17
-
18
-
19
-
20
-
21
-
22
-
23
-
24
-
 25
25 -
 26
26 -
 27
27 -
 28
28 -
 29
29 -
 30
30 -
 31
31 -
 32
32 -
 33
33 -
 34
34 -
 35
35 -
36
-
37
-
38
-
39
-
40
-
41
-
42
-
43
-
44
-
45
-
46
-
47
-
48
-
49
-
50
-
51
-
52
-
53
-
54
-
55
-
56
-
57
-
58
-
59
-
60
-
61
-
62
-
63
-
64
-
65
 |
 |