Toshiba TLP710 Owners Manual
Toshiba TLP710 - TLP 710 UXGA LCD Projector Manual
 |
UPC - 022265950128
View all Toshiba TLP710 manuals
Add to My Manuals
Save this manual to your list of manuals |
Toshiba TLP710 manual content summary:
- Toshiba TLP710 | Owners Manual - Page 1
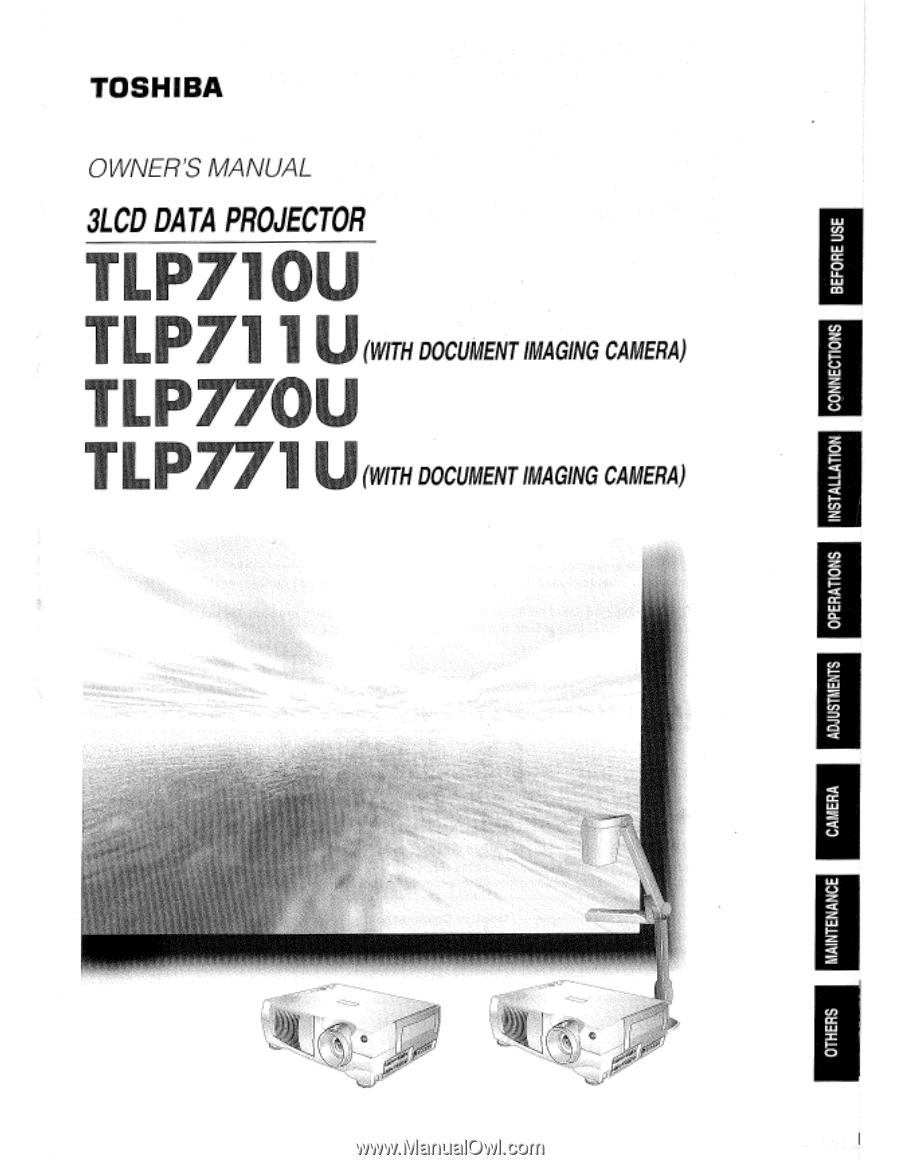
INSTALLATION CONNECTIONS TOSHIBA OWNER'S MANUAL 3LCD DATA PROJECTOR Ti.P710U w CC 0 w ILP711U(WITH DOCUMENT IMAGING CAMERA) P prim • .P77 (WITH DOCUMENT IMAGING CAMERA) 0CO .0( CwC CL 0 LLI CI CI 4:C Q CC LLI MAINTENANCE U) Cr LLI - Toshiba TLP710 | Owners Manual - Page 2
operating and maintenance (servicing) instructions in the literature accompanying in accordance with the instruction manual, may cause harmful expressly approved by Toshiba, or parties authorized by Toshiba, could void ever have to ship your LCD projector. For maximum protection, repack the set - Toshiba TLP710 | Owners Manual - Page 3
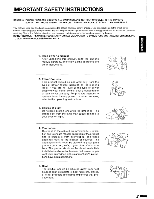
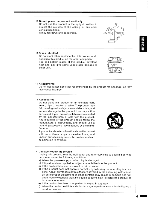
EXPOSED TO DANGEROUS VOLTAGE. REFER SERVICING TO QUALIFIED SERVICE PERSONNEL ONLY. cw n UJ CC 0 IJ- CO 1. Read owner's manual After unpacking this product, read the owner's manual carefully, and follow all the operating and other instructions. ' I - 1, ' c 2. Power Sources This product should - Toshiba TLP710 | Owners Manual - Page 4
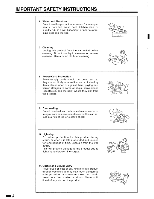
IMPORTANT SAFETY INSTRUCTIONS 6. Water and Moisture Do not use this product near water - for example, near a bath tub, wash bowl, kitchen sink, or laundry tub; in a wet basement; - Toshiba TLP710 | Owners Manual - Page 5
. Any mounting of the product should follow the manufacturer's instructions, and should use a mounting accessory recommended by the manufacturer ,,„ 16. Damage Requiring Service Unplug this product from the wall outlet and refer servicing to qualified service personnel under the following conditions - Toshiba TLP710 | Owners Manual - Page 6
made by users.) 19. Safety Check Upon completion of any service or repairs to this product, ask the service technician to perform safety checks to determine that the product is not carry by the camera arm. Do not carry the projector by the camera arm. Doing so can result in damage or injury. PP. \ C - Toshiba TLP710 | Owners Manual - Page 7
other injuries. 24. Do not leave documents in the bottom of the projector. Documents can block the air intake holes, making the inside of the projector heat up and causing ((/ breakdowns. \,N, 25. Do not move the projector while the arm is still erect. Always store the arm back in position - Toshiba TLP710 | Owners Manual - Page 8
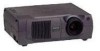
high precision. Also compatible with Hi-vision signal and SXGA, UXGA signal can also be displayed in a compressed format. Compact, light-weight main unit ) This projector is light-weight and compact so it is easy to carry around and set up. Large-screen display of up to about 300 inches ) Can - Toshiba TLP710 | Owners Manual - Page 9
SAFETY INSTRUCTIONS Macintosh Computer Connecting Video Equipment Output Terminals PROJECTOR PLACEMENT Front Projecting Placement 1 w GO TROUBLE INDICATIONS 35 AIR FILTER, LENS, AND MAIN UNIT CLEANING 36 LAMP REPLACEMENT 37 FLUORESCENT LIGHT REPLACEMENT 38 OTHERS BEFORE CALLING SERVICE - Toshiba TLP710 | Owners Manual - Page 10
BEFORE USE PART NAMES AND FUNCTIONS For detail, use the page inside the Body and control panel Control panel ON/STANDBY MENU SELECT EXIT ENTER VOLUME/ADJUST INPUT ON LAMP TEMP 0 0 0 Lens cap Speaker Exhaust holes Foot adjuster (L) release lever [To\ Foot adjuster (L/R) 17-6\ Projection - Toshiba TLP710 | Owners Manual - Page 11
AUDIO (ill)) VIDEO/Y VIDEO 2 IN (i) 0 CR/P0 =CR/PR 0 AUDIO CONTROL (RS-232C) connector 14\ I43\ To connect a computer to control the projector. RGB2 IN connector 13 To connect a computer, etc. AUDIO OUT jack /4\ To connect audio equipment. VIDEO2 IN jacks P\ (Video input/Color differ- ence - Toshiba TLP710 | Owners Manual - Page 12
USE PART NAMES AND FUNCTIONS (CONTINUED) This instruction uses remote control. For details, see the page : 645nm MAX OUTPUT : 1mW CLASS IILASER PRODUCT COMPLIES WITH DHHS 21 CFR SUBCHAPTER J TOSHIBA AMERICA CONSUMER PRODUCTS, INC. 82 TOTOWA RD., WAYNE, NJ 07470, U.S.A. RAYONNEMENT LASER NE - Toshiba TLP710 | Owners Manual - Page 13
remote control operation. Open the cover. Install the batteries. Remote Control Operation LLI Ca Instruction to use the remote control. LU 0 ULLI CCI Face the infrared sensor and press , turn the remote control sensor face to the projector unit again and retry the remote control operation. 12 - Toshiba TLP710 | Owners Manual - Page 14
be connected to a computer that does not have an analog RGB output terminal. For details, refer to the computer manual. • You may not be able to connect some computers to the projector. For details, consult the dealer. • If NTSC/PAUSECAM signals are input to the RGB1 INPUT connector or RGB2 INPUT - Toshiba TLP710 | Owners Manual - Page 15
before connecting the cables. c--i • I40:21 1e1, , I AUDIO 4I0:1110/i OW ing n~ozRI Al1D, O F:::: ' O O O Vo . o. o. O 1 You can connect a computer to control the projector. (For detail, FN. E IN\) ti You can connect an extra monitor to view the picture. To AUDIO OUT O3.5mm STEREO mini - Toshiba TLP710 | Owners Manual - Page 16
possible picture. Screen Top view 9 li Screen Side view 9 O Point the lens straight at the center of the screen as above. Place the projector horizontally so that the projecting light hits the screen squarely. Adjust the distance between the lens and the screen. The projection size depends - Toshiba TLP710 | Owners Manual - Page 17
to standby mode. A Take off the lens cover. How to use the foot adjusters The tilt of the projector can be adjusted using the foot adjusters. 1 Lift the front of the projector until a tilt angle desired is obtained and pull up the foot adjuster release lever. Foot adjuster will stretch. Release - Toshiba TLP710 | Owners Manual - Page 18
On (Green) (Green) Turn on the connected equipment and put it in playback mode. Turn on the computer or video tape player connected with the projector and put it in playback mode. RGB1 (Using the remote control) Press the DIRECT INPUT (H8e-2-j button (RGB1, RGB2, VIDE01 • VIDEO1, VIDEO2, CAM - Toshiba TLP710 | Owners Manual - Page 19
automatically turn on when the signal is sent again. The power can be turned on if the ON/STANDBY button is pressed. • When operating the projector " " can be displayed on the screen. This means that the operation can not be completed. • Before unplugging the power cord, make sure that the fans - Toshiba TLP710 | Owners Manual - Page 20
OPERATIONS RESIZE FUNCTION RESIZE Through Size You may change the size of the picture. Changing the Picture Size Pictures are projected at the maximal projection size regardless of the signal types. Optionally you can change the picture size to through size or enlarge it. tA RESIZE V Press - Toshiba TLP710 | Owners Manual - Page 21
RESIZE (El E A,y,EXIT/ 4, ENTER/O. RESET • When the picture size is smaller than the projection area, the picture can be moved inch by inch in up, down, left, right direction by pressing the A, V, EXIT/I, ENTER/0' buttons. Example OQ Normal E) U) 17> 0 o•o• a CC w } Projection area a - Toshiba TLP710 | Owners Manual - Page 22
Current input source Signal system of the input source Signal system of the input source automatically detected by the projector. (Mode determination[\). Syncronizing polarity of input signal. P = Positive N = Negative < STATUS > -INPUT : RGB1 SIGNAL : XGA60Hz SCREEN : XGA60 SYNCHV : IN / N This - Toshiba TLP710 | Owners Manual - Page 23
supplied) Pr To right-click Press the mouse button (right). The pointer right-clicks. • To operate the projector and the computer by the remote control, place the infrared remote sensor unit close to the projector. • If the mouse used is PS/2 type, connect a PS/2 cable, or if the mouse is a serial - Toshiba TLP710 | Owners Manual - Page 24
(HUE) ..F- IANQA IT A,'V,EXIT/4, ENTER/* (3:EUTSC-DI I CtSPARIOD. CiALIAND VOLUME/ ADJUST(+,-) You can select the display language. This owner's manual explains using an instance where English is selected. Selecting the Display Language Display the image as explained in "PICTURE PROJECTION" 17 - Toshiba TLP710 | Owners Manual - Page 25
ADJUSTMENTS PICTURE DETAIL ADJUSTMENTS Contrast Bright Color Tint NS., harp Adjustment items Contrast Brightness Color Tint Sharpness,' Explains how to adjust the projected picture quality. Adjusting the Picture Details • Display the image as explained in "PICTURE PROJECTION" 17 • Select the - Toshiba TLP710 | Owners Manual - Page 26
ADJUSTMENTS G, B LEVEL ADJUSTMENTS ( -Level G-Level 3-Level Adjustment items Red level Green level Blue level MENU A ,V (7; ENTER/IIP. O MENU VOLUME! 'O . O' ADJUST(+,-) aGD Adjusting R, G, B Level • Display the image as explained in "PICTURE PROJECTION". F-N • Select the input source - Toshiba TLP710 | Owners Manual - Page 27
model. In this case, turn off the computer display, or make the necessary picture adjustments on the projector. For details on controlling the computer display, etc. refer to the computer's manual and description on the software for the computer used. • When adjusting V-pos. and H-pos. values, the - Toshiba TLP710 | Owners Manual - Page 28
designed ceiling fixture "TLPTK5" (for high ceiling) or "TLPTK6" (for low ceiling).) For more details, refer to the instruction manual attached to the ceiling fixture. • If you use the projector mounted on the ceiling, ask the dealer to clean the filter and replace the lamp, etc. for your own safety - Toshiba TLP710 | Owners Manual - Page 29
ADJUSTMENTS SETTING OSD (ON SCREEN C)-- MENU DISPLAY) MUTE FUNCTION With indication Without indication 0 A ,11 ,EXIT/ , ENTER/I* VOLUME/ ADJUST(+,-) MENU You can keep the on-screen displays (OSD) off even while switching the input sources (RGB1, RGB2, Video1, Video2) or losing then (-,\ri - Toshiba TLP710 | Owners Manual - Page 30
ADJUSTMENTS SAVING THEADJUSTMENTS MENU You can save the adjusting values. Saving the Adjustments Display the image as explained in "PICTURE PROJECTION" . MENU Press MENU. The menu is displayed. It automatically disappears after about 30 seconds if no button is pressed. Video2 Panel Mode - Toshiba TLP710 | Owners Manual - Page 31
camera, be careful to not pinch your hand or fingers into the arm. • Do not look into the projection lens while operating the projector. On the document imaging camera model, you can project pictures using the document imaging camera. The document imaging camera can directly project any materials - Toshiba TLP710 | Owners Manual - Page 32
CAMERA PROJECTINGIMAGES WITHTHEDOCUMENTIMAGING CAMERA (CONTINUED) Projecting Images with the Document Imaging Camera • Adjust the focus between the projector and screen by turning the focus ring as needed. • Adjusting the focus is easier if done while pressing the MENU button and displaying the - Toshiba TLP710 | Owners Manual - Page 33
camera head unit (®). le • When projecting a transparent draft such as an 0HP film or small size data such as a name card, etc., use the projector with the accessory Pad placed. • When a glossy draft such as a photograph is placed, the projected document may become difficult to see due to a light - Toshiba TLP710 | Owners Manual - Page 34
CAMERA PROJECTINGIMAGESWITHTHEDOCUMENT IMAGINGCAMERA(CONTINUED) WHITEBALANCELOCK indicator 7 10 WHITE 7 8 9 BALANCE 8, 9 Projecting Images with the Document Imaging Camera (Continued) CAMERA Select "Camera" by pressing CAMERA. CAMERA You can switch to camera input by pressing the CAMERA - Toshiba TLP710 | Owners Manual - Page 35
ADJUST(+,) MENU Explains how to adjust the exposure. Adjusting the Exposure The exposure is automatically adjusted, and the fine adjustment can be made manually. If the projected document is dark, adjust the iris to "+". If the projected document is too bright, adjust the iris to "-". MENU Press - Toshiba TLP710 | Owners Manual - Page 36
MAINTENANCE TROUBLE INDICATIONS If there is some problem inside the projector, the indicators light up or flash. Troubleshooting ON uNAP TRAP 0 00 I I I Indicators Indicators ON LAMP off Lit (Red) Lit (Red) Lit (Red) Lit (Red) - TEMP Symptom and cause Solutions - The power does - Toshiba TLP710 | Owners Manual - Page 37
MAIN UNIT CLEANING Give a frequent clean especially to the air filter. (The cleaning period is once per about 50 hours). ( CAUTION If you use the projector mounted on the ceiling, ask the dealer to carry out the maintenance such as cleaning. Cleaning the Air Filter The filter under the air filter - Toshiba TLP710 | Owners Manual - Page 38
or replacement of the lamp. • When replacing, always use lamp "TLPL3" (for TLP710U, TLP711U) or "TLPL7" (for TLP770U, TLP771U) (sold separately). For detail, refer to the lamp instruction. • If you have been using the projector, the lamp will be very hot, and may cause burn injuries. Wait for the - Toshiba TLP710 | Owners Manual - Page 39
is worn out. Replace it. Replacing the Fluorescent Light CAUTION If you have been using the projector, the fluorescent light will be very hot, and may cause burn injuries. Wait for the fluorescent the light is on for a few minutes, this is not a problem.) • Use FLEW for the fluorescent light. 38 - Toshiba TLP710 | Owners Manual - Page 40
following points before asking for support service. Symptoms and Solutions Refer also to "TROUBLE INDICATIONS" 35 Symptom Cause ambient temperature of the Lower the ambient temperature of the projection - using the projector. projection room is too high. room, and turn the power on. No - Toshiba TLP710 | Owners Manual - Page 41
The remote control is not facing the Face the remote control transmitter 12 not work. remote sensor. toward the remote sensor on the projector. The remote control is too far. Operate within about 5 meters. 12 There is an obstruction between the Remove the obstacle. - remote control and - Toshiba TLP710 | Owners Manual - Page 42
is carried out correctly, a normal display may be not obtained depending on the signal frequency. • SXGA, UXGA signals can be projected since the projector has simplified compatibility with them. (However, letters and lines can be inequal or a part can be missing. Some signals may not be projected - Toshiba TLP710 | Owners Manual - Page 43
RGB Signal Defaults The following signals are factory set as defaults in each mode. However, some computers may have different timings than those in the chart. Make the necessary adjustments if the picture has flickers or is blurred. Timing Chart Video Video Timing (Horizontal) A B C Video - Toshiba TLP710 | Owners Manual - Page 44
OTHERS ADJUSTMENTS WITH RS-232C Controlling Via the RS-232C Terminal Conditioning of the Projection Unit can also be done by a computer via the RS-232C, as well as by the remote control. 5 O O O O O 6 9 D-SUB 9 pin (Main Unit) Interface Format Pin No. 1 2 3 4 5 6 7 8 9 Signal N.0 TXD RXD DSR GND - Toshiba TLP710 | Owners Manual - Page 45
(2) COMMON ADJUSTMENT Command Original meaning of command ALF Adj-LeFt DSV DataSaVe Meaning Adjusts value down. Save adjusts value. (3) VIDEO1 ADJUSTMENT Command Original meaning of command VCN Video-CoNtrast VCL Video-CoLor VSH Video-SHarp Meaning Adjusts contrast balance. Adjusts - Toshiba TLP710 | Owners Manual - Page 46
(W/H/D) (Including the projecting sections) Temperature: 0°C to 35°C Humidity: 30% to 70% RH TLP710U, TLP711U: UHP lamp 120W TLP770U, TLP771U: UHP lamp 150W 1.5W (monaural) RGB signal (D-sub Lens] Lens Focusing Zooming Zooming lens F=2.0 - 2.5 f=50 - 70mm Manual operation Manual operation 45 - Toshiba TLP710 | Owners Manual - Page 47
Camera] Lens F=1.8 - 2.3, f=5.8 - 23.2mm Filming area Max 390 (mm) horizontal, 300 (mm) vertical (WIDE) Zoom Motor-driven (Manual) Focus Motor-driven (Manual) Iris Auto/Level adjustment allowed Image element 1/3 inch CCD Total picture elements 810,000 Resolution Horizontal 1024 - Toshiba TLP710 | Owners Manual - Page 48
Projector Toshiba or use in violation of instructions furnished by us; or to after investigation that the claimed problem was not covered with service To obtain warranty servicing, you should: 1. Read the owners manual thoroughly before operating. 2. Please contact your dealer for an immediate service
-
 1
1 -
 2
2 -
 3
3 -
 4
4 -
 5
5 -
 6
6 -
 7
7 -
8
-
9
-
10
-
11
-
12
-
13
-
14
-
15
-
16
-
17
-
18
-
19
-
20
-
21
-
22
-
23
-
24
-
25
-
26
-
27
-
28
-
29
-
30
-
31
-
32
-
33
-
34
-
35
-
36
-
37
-
38
-
39
-
40
-
41
-
42
-
43
-
44
-
45
-
46
-
47
-
48
 |
 |
TOSHIBA
OWNER'S
MANUAL
3LCD
DATA
PROJECTOR
Ti.P710U
ILP711U
(WITH
DOCUMENT
IMAGING
CAMERA)
P
prim
•
.P77
(WITH
DOCUMENT
IMAGING
CAMERA)
w
CC
0
w
CONNECTIONS
INSTALLATION
CO
0
.0(
CC
w
CL
0
LLI
CI
CI
4:C
Q
CC
LLI
MAINTENANCE
U)
Cr
LLI