ViewSonic PJD5351 PJD5152, PJD5352 User Guide (English) - Page 33
Using Screen Color, Fine-tuning the image quality in user modes, Setting the User 1/User 2 mode
 |
UPC - 766907341010
View all ViewSonic PJD5351 manuals
Add to My Manuals
Save this manual to your list of manuals |
Page 33 highlights
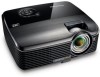
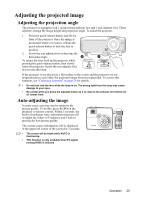
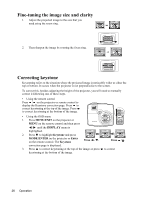
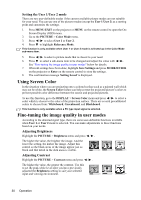
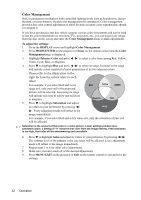
Setting the User 1/User 2 mode There are two user-definable modes if the current available picture modes are not suitable for your need. You can use one of the picture modes (except the User 1/User 2) as a starting point and customize the settings. 1. Press MENU/EXIT on the projector or MENU on the remote control to open the OnScreen Display (OSD) menu. 2. Go to the PICTURE > Color Mode menu. 3. Press / to select User 1 or User 2. 4. Press to highlight Reference Mode. This function is only available when User 1 or User 2 mode is selected up in the Color Mode sub-menu item. 5. Press / to select a picture mode that is closest to your need. 6. Press to select a sub-menu item to be changed and adjust the value with / . See "Fine-tuning the image quality in user modes" below for details. 7. When all settings have been done, highlight Save Settings and press MODE/ENTER on the projector or Enter on the remote control to store the settings. 8. The confirmation message 'Setting Saved' is displayed. Using Screen Color In the situation where you are projecting onto a colored surface such as a painted wall which may not be white, the Screen Color feature can help correct the projected picture's colors to prevent possible color difference between the source and projected pictures. To use this function, go to the DISPLAY > Screen Color menu and press / to select a color which is closest to the color of the projection surface. There are several precalibrated colors to choose from: Whiteboard, Greenboard, and Blackboard. This function is only available when a PC type input signal is selected. Fine-tuning the image quality in user modes According to the detected signal type, there are some user-definable functions available when User 1 or User 2 mode is selected. You can make adjustments to these functions based on your needs. Adjusting Brightness Highlight the PICTURE > Brightness menu and press / . The higher the value, the brighter the image. And the lower the setting, the darker the image. Adjust this control so the black areas of the image appear just as black and that detail in the dark areas is visible. +30 +50 +70 Adjusting Contrast Highlight the PICTURE > Contrast menu and press / . The higher the value, the greater the contrast. Use this to set the peak white level after you have previously adjusted the Brightness setting to suit your selected input and viewing environment. -30 0 +30 30 Operation
-
 1
1 -
2
-
3
-
4
-
5
-
6
-
7
-
8
-
9
-
10
-
11
-
12
-
13
-
14
-
15
-
16
-
17
-
18
-
19
-
20
-
21
-
22
-
23
-
24
-
25
-
26
-
27
-
 28
28 -
 29
29 -
 30
30 -
 31
31 -
 32
32 -
 33
33 -
 34
34 -
 35
35 -
 36
36 -
 37
37 -
 38
38 -
39
-
40
-
41
-
42
-
43
-
44
-
45
-
46
-
47
-
48
-
49
-
50
-
51
-
52
-
53
-
54
-
55
-
56
-
57
-
58
-
59
-
60
-
61
-
62
-
63
-
64
-
65
-
66
-
67
-
68
-
69
 |
 |