ViewSonic PJD7822HDL User Guide - Page 38
Adjusting Brilliant Color, Adjusting Sharpness
 |
View all ViewSonic PJD7822HDL manuals
Add to My Manuals
Save this manual to your list of manuals |
Page 38 highlights
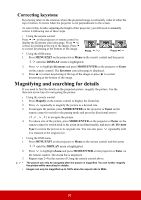
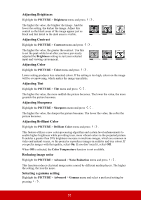
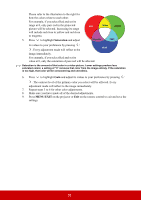
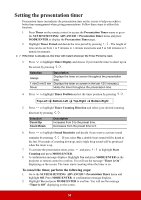
Adjusting Brightness Highlight the PICTURE > Brightness menu and press / . The higher the value, the brighter the image. And the lower the setting, the darker the image. Adjust this control so the black areas of the image appear just as black and that detail in the dark areas is visible. +30 +50 +70 Adjusting Contrast Highlight the PICTURE > Contrast menu and press / . The higher the value, the greater the contrast. Use this to set the peak white level after you have previously adjusted the Brightness setting to suit your selected input and viewing environment. -30 0 +30 Adjusting Color Highlight the PICTURE > Color menu and press / . Lower setting produces less saturated colors. If the setting is too high, colors on the image will be overpowering, which makes the image unrealistic. Adjusting Tint Highlight the PICTURE > Tint menu and press / . The higher the value, the more reddish the picture becomes. The lower the value, the more greenish the picture becomes. Adjusting Sharpness Highlight the PICTURE > Sharpness menu and press / . The higher the value, the sharper the picture becomes. The lower the value, the softer the picture becomes. Adjusting Brilliant Color Highlight the PICTURE > Brilliant Color menu and press / . This feature utilizes a new color-processing algorithm and system level enhancements to enable higher brightness while providing truer, more vibrant colors in the projected picture. It enables a greater than 50% brightness increase in mid-tone images, which are common in video and natural scenes, so the projector reproduces images in realistic and true colors. If you prefer images with that quality, select On. If you don't need it, select Off. When Off is selected, the Color Temperature function is not available. Reducing image noise Highlight the PICTURE > Advanced > Noise Reduction menu and press / . This function reduces electrical image noise caused by different media players. The higher the setting, the less the noise. Selecting a gamma setting Highlight the PICTURE > Advanced > Gamma menu and select a preferred setting by pressing / . 31
-
 1
1 -
2
-
3
-
4
-
5
-
6
-
7
-
8
-
9
-
10
-
11
-
12
-
13
-
14
-
15
-
16
-
17
-
18
-
19
-
20
-
21
-
22
-
23
-
24
-
25
-
26
-
27
-
28
-
29
-
30
-
31
-
32
-
 33
33 -
 34
34 -
 35
35 -
 36
36 -
 37
37 -
 38
38 -
 39
39 -
 40
40 -
 41
41 -
 42
42 -
 43
43 -
44
-
45
-
46
-
47
-
48
-
49
-
50
-
51
-
52
-
53
-
54
-
55
-
56
-
57
-
58
-
59
-
60
-
61
-
62
-
63
-
64
-
65
-
66
-
67
-
68
-
69
-
70
-
71
-
72
-
73
-
74
-
75
-
76
-
77
-
78
-
79
-
80
-
81
-
82
-
83
-
84
-
85
-
86
 |
 |
