ViewSonic VE170B User Manual - Page 9
Adjusting the Screen Image..continued
 |
View all ViewSonic VE170B manuals
Add to My Manuals
Save this manual to your list of manuals |
Page 9 highlights
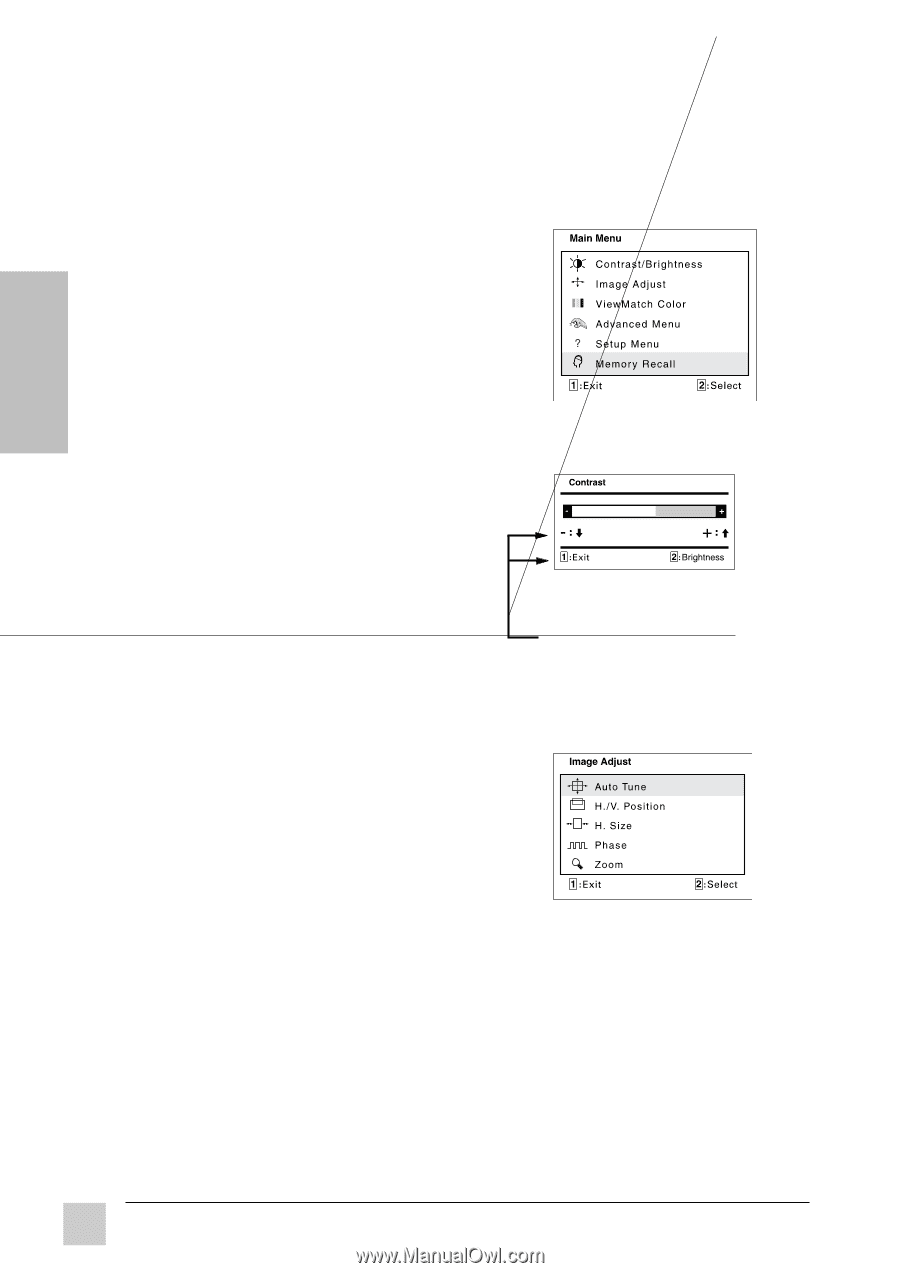
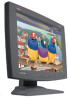
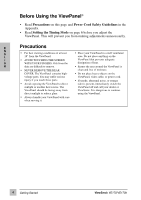
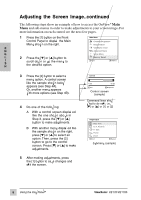
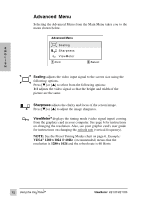
Adjusting the Screen Image..continued The following steps show an example of how to access the OnView® Main Menu and sub-menus in order to make adjustments to your screen image. For more information on each control see the next few pages. 1 P re s s th e [1 ] b u t to n o n th e Fro n t C o n rt o l P a n e l t o d is p l a y t h e M a i n M e n u s h o w n o n t h e ri g h t . E N G L 2 P r e s s t h e [ ▼] o r [▲] b u t t o n t o I S H s c r o ll d o w n o r u p t h e m e n u t o t h e d e sir e d o p it o n . 3 P r e s s th e [2 ] b u t to n to s ele c t a m e n u o p it o n . A c o n rt o l s c r e e n lik e t h e s a m p l e s h o w n b e l o w a p p e ars (s e e S te p 4 A ) . O r , a n o th er m e n u a p p e ars w i t h m o r e o p it o n s ( s e e S t e p 4 B ) . 4 D o o n e o f t h e f o ll o w i n g : A W i t h a c o n rt o l s c r e e n d is p l a y e d lik e t h e o n e s h o w n a b o v e i n S t e p 3 , p r e s s t h e [ ▼] o r [▲] b u t to n to m a k e a dju s t m e n ts . B W i t h a n o t h e r m e n u d is p l a y e d lik e t h e s a m p l e s h o w n o n t h e ri g h t , p r e s s [ ▼] o r [▲] t o s e l e c t a n o p it o n . T h e n , p r e s s t h e [ 2 ] b u t t o n t o g o t o t h e c o n rt o l s c r e e n . P r e s s [ ▼] o r [▲] t o m a k e a dju s t m e n ts . 5 A f t e r m a kin g a dju s t m e n ts , p r e s s th e [1 ] b u t to n to s a v e c h a n g e s a n d e xi t t h e s c r e e n . C o n rt o l s c r e e n (s a m ple ) C o m m a n d li n e s s h o w w h a t to d o n e x t :i.e . , [ ▼] o r [ ▲] o r [ 1 ] o r [ 2 ] S u b m e n u (s a m ple ) 8 U sin g t h e V ie w P a n el ® ViewSonic V E 1 7 0 / V E 1 7 0 b
-
 1
1 -
2
-
3
-
 4
4 -
 5
5 -
 6
6 -
 7
7 -
 8
8 -
 9
9 -
 10
10 -
 11
11 -
 12
12 -
 13
13 -
 14
14 -
15
-
16
-
17
-
18
-
19
-
20
-
21
-
22
 |
 |