Viking VBCV42381 Installation Instructions - Page 5
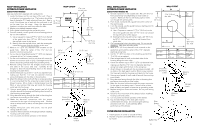
Installing Rough-in Plate And Connecting Duct -external Power, Installing The Ventilators
 |
View all Viking VBCV42381 manuals
Add to My Manuals
Save this manual to your list of manuals |
Page 5 highlights
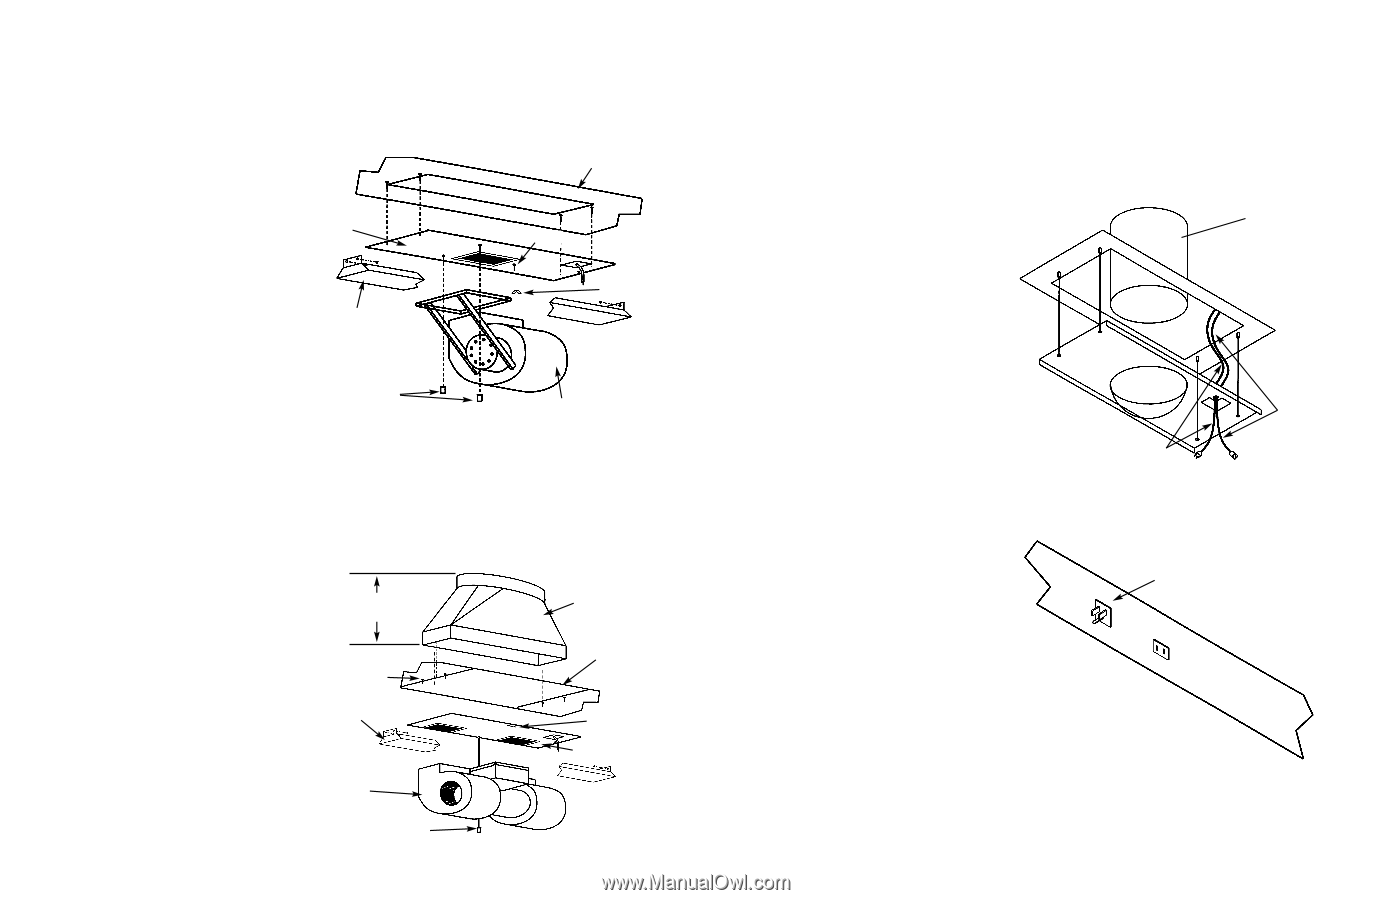
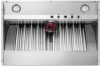
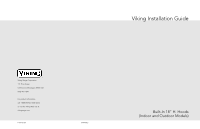
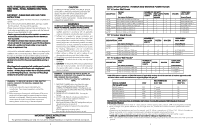
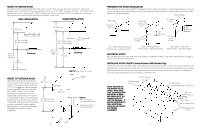
INSTALLING THE VENTILATORS VIV300 or VIV600 - Interior-Power Ventilator Kit (300 or 600 CFM) (also see instructions supplied with ventilator kit) 1. Make sure barrel nuts and wing nut are engaged halfway onto threaded stud. 2. Lift ventilator into canopy - may be easier to turn ventilator side ways to lift into canopy then rotate into mounting position. 3. Lift ventilator allowing barrel nuts to come through large end of keyhole opening. 4. Slide ventilator to the right, engaging barrel nuts Top of Hood into small end of keyhole openings and engaging studs with wing nut in slot on right side of ventilator. Make sure discharge openings match. 5. Tighten barrel nuts and wing nut. Rough-in Plate Studs 6. Plug the ventilator power cord into the receptacle located on the topside of the light panel. Wingnut *NOTE: Island Hoods Only - Upper filter support must be removed before blower can be installed. Upper Filter Support Island Hoods Only Barrel Nuts 600 CFM Blower VIV1200 - Interior-Power Ventilator Kit (1200 CFM) (also see instructions supplied with ventilator kit) 1. Make sure barrel nuts and wing nut are engaged halfway onto threaded stud. 2. Lift ventilator into canopy - may be easier to turn ventilator side ways to lift into canopy then rotate into mounting position. 3. Engage tab on ventilator with slot in rough-in plate AND engage slot in ventilator with barrel nut on threaded stud. 4. Push ventilator towards the back of hood to fully engage. 5. Use a long, flat-head screwdriver to tighten the barrel nut securely. 6. Plug the ventilator power cord into the receptacle 9" (22.9 cm) Transition located on the topside of the light panel. *NOTE: Island Hoods Only - Upper filter support must be removed before blower can be installed. Studs Top of Hood Upper Filter Support Island Hoods Only Slot Rough-in Plate 1200 CFM Blower Barrel Nut 8 INSTALLING ROUGH-IN PLATE AND CONNECTING DUCT -EXTERNAL POWER (Also see instructions supplied with ventilator kit) 1. Run 10" round steel ductwork, from exterior blower to the installationlocation. For best performance, use the straightest possible duct run and the fewest number of elbows. Tape all joints. 2. Run 120 VAC electrical power cable from service panel and from remote blower to installation location. 3. Remove wiring box cover. Remove knockouts from the wiring box. Feed 6" of power cable through the openings and attach cables to wiring box with appropriate connectors. 4. Wire black to black, white to white, and green or bare wire beneath green ground screw. Replace wiring box cover. 5. Attach rough-in plate to the studs at the inside top 10" (25.4 cm) Round Duct of hood with (4) #10-24 nuts provided. 6. Connect ductwork to rough-in plate and tape joint. 7. Plug the rough-in plate power cord into the receptacle located on the top side of the light panel. Receptacles are located behind and above control panel Wire from blower goes to two prong male plug Wire from breaker goes to three prong female plug. 3-prong power supply plug-in 2-prong blower plug-in 9
-
 1
1 -
 2
2 -
 3
3 -
 4
4 -
 5
5 -
 6
6 -
 7
7 -
 8
8 -
 9
9 -
 10
10 -
 11
11 -
12
 |
 |