Vizio M3D550SR M3D420SR User Manual - Page 21
Using the On-Screen Menu
 |
View all Vizio M3D550SR manuals
Add to My Manuals
Save this manual to your list of manuals |
Page 21 highlights
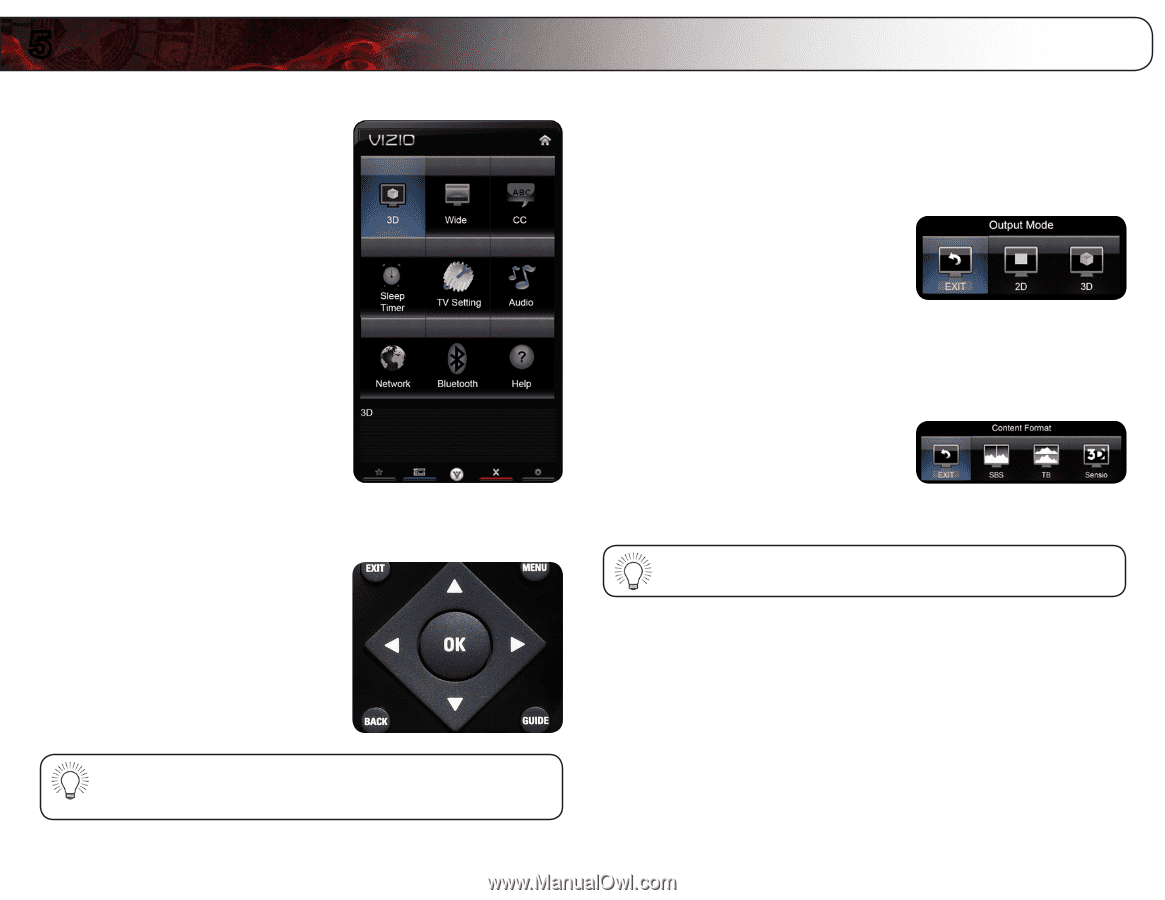
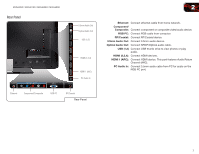
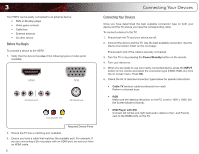
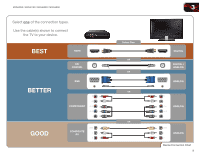
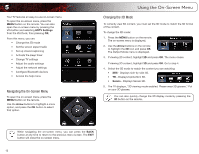
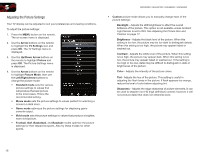
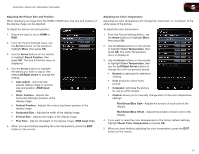
5 Your TV features an easy-to-use on-screen menu. To open the on-screen menu, press the MENU button on the remote. You can also open the on-screen menu by pressing the VIA button and selecting HDTV Settings from the VIA Dock, then pressing OK. From this menu, you can: • Change the 3D mode • Set the screen aspect radio • Set up closed captioning • Activate the sleep timer • Change TV settings • Adjust the audio settings • Adjust the network settings • Configure Bluetooth devices • Access the help menu Navigating the On-Screen Menu To open the on-screen menu, press the MENU button on the remote. Use the Arrow buttons to highlight a menu option, and press the OK button to select that option. Using the On-Screen Menu Changing the 3D Mode To correctly view 3D content, you must set the 3D mode to match the 3D format of the content. To change the 3D mode: 1. Press the MENU button on the remote. The on-screen menu is displayed. 2. Use the Arrow buttons on the remote to highlight the 3D icon and press OK. The Output Mode menu is displayed. 3. If viewing 2D content, highlight 2D and press OK. The menu closes. If viewing 3D content, highlight 3D and press OK. Go to step 4. 4. Select the 3D mode to match the content you are watching: • SBS - Displays side-by-side 3D. • TB - Displays top/bottom 3D. • Sensio - Displays Sensio 3D. 5. The TV displays, "3D viewing mode enabled. Please wear 3D glasses." Put on your 3D glasses. You can also quickly change the 3D display mode by pressing the 3D button on the remote. While navigating the on-screen menu, you can press the BACK button at any time to return to the previous menu screen. The EXIT button will close the on-screen menu. 12
-
 1
1 -
2
-
3
-
4
-
5
-
6
-
7
-
8
-
9
-
10
-
11
-
12
-
13
-
14
-
15
-
 16
16 -
 17
17 -
 18
18 -
 19
19 -
 20
20 -
 21
21 -
 22
22 -
 23
23 -
 24
24 -
 25
25 -
 26
26 -
27
-
28
-
29
-
30
-
31
-
32
-
33
-
34
-
35
-
36
-
37
-
38
-
39
-
40
-
41
-
42
-
43
-
44
-
45
-
46
-
47
-
48
-
49
-
50
-
51
-
52
-
53
-
54
-
55
-
56
-
57
-
58
-
59
-
60
-
61
-
62
-
63
-
64
 |
 |