Western Digital My Net N900 Central User Manual
Western Digital My Net N900 Central Manual
 |
View all Western Digital My Net N900 Central manuals
Add to My Manuals
Save this manual to your list of manuals |
Western Digital My Net N900 Central manual content summary:
- Western Digital My Net N900 Central | User Manual - Page 1
My Net™ N900 Central HD Dual-Band Storage Router User Manual - Western Digital My Net N900 Central | User Manual - Page 2
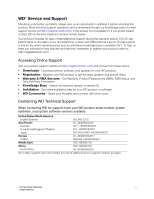
001/0033/0061 +80085584253 Europe 00 +80085584253 Finland 990/999 +80085584253 Middle East 0031.880062100 Africa 0031.880062100 South Africa 09 +80085584253 Go to http://support.wdc.com/contact for a list of additional phone support numbers by region. MY NET N900 CENTRAL ii USER MANUAL - Western Digital My Net N900 Central | User Manual - Page 3
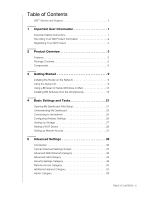
Table of Contents WD® Service and Support ii 1 Important User Information 1 Important Safety Instructions 1 Recording Your WD Product Information 2 Registering Your WD Product 2 2 Product Overview 3 Features 3 Package Contents 5 Components 6 3 Getting Started 9 Installing the Router on the - Western Digital My Net N900 Central | User Manual - Page 4
65 Updating the Router's Firmware 69 Restoring the Router to Factory Defaults 70 Rebooting the Router 70 Using the Router as an Access Point 71 Configuring UPnP 74 Enabling Port Forwarding 74 Accessing My Net View (Windows 76 7 Installing and Using WD Print Share 77 Installing WD Print Share - Western Digital My Net N900 Central | User Manual - Page 5
instructions for installation, use, and servicing. Read these instructions. Keep these instructions. Heed all warnings. Follow all instructions dropped. Carefully read and follow the Quick Install Guide and User Manual. Do not operate this device outside the temperature NET N900 CENTRAL USER MANUAL - Western Digital My Net N900 Central | User Manual - Page 6
product includes 30 days of free technical support during the applicable warranty period for your product. The 30-day period commences on the date of your first telephone contact with WD technical support. Register your WD product online at http://register.wdc.com. 2 MY NET N900 CENTRAL USER MANUAL - Western Digital My Net N900 Central | User Manual - Page 7
PRODUCT OVERVIEW 2 Product Overview Thank you for purchasing the My Net N900 Central. This user manual provides step-by-step instructions for installing and using your new router. For the latest WD product information and news, visit our website at www.wdc.com. This chapter contains the following - Western Digital My Net N900 Central | User Manual - Page 8
. For example, it notifies you of new firmware availability, shows network attached storage status, and opens the router's My Dashboard user interface. WD Print Share enables users to share a printer connected to the USB port on the My Net N900 Central router. 4 MY NET N900 CENTRAL USER MANUAL - Western Digital My Net N900 Central | User Manual - Page 9
Central Quick Install Guide AC power adapter Ethernet cable Setup CD Accessories For U.S. residents, visit www.shopwd.com to view additional accessories available for your My Net N900 Central router. For users outside the U.S., visit http://support.wdc.com. 5 MY NET N900 CENTRAL USER MANUAL - Western Digital My Net N900 Central | User Manual - Page 10
Front Panel Removing Installing Removing Power LED Internet LED Internal Storage Wi-Fi Protected Setup (WPS) button Wireless LED Wi-Fi Protected Setup LED 6 MY NET N900 CENTRAL USER MANUAL - Western Digital My Net N900 Central | User Manual - Page 11
OVERVIEW Front LED Indicators LED Description Power Steady when the router is powered on and operational; flashes slowly during firmware upgrades and system self-tests. Wireless Lit when wireless to the modem. Blinks to indicate network activity on that port. 7 MY NET N900 CENTRAL USER MANUAL - Western Digital My Net N900 Central | User Manual - Page 12
PRODUCT OVERVIEW Bottom (not shown) Component Reset button Description To reset your My Net N900 Central router to factory defaults, press and hold the Reset button until the power LED begins blinking (about 10 seconds). 1 8 MY NET N900 CENTRAL USER MANUAL - Western Digital My Net N900 Central | User Manual - Page 13
or Mac) Installing WD Software from the CD (Optional) Installing the Router on the Network Two methods install the My Net N900 Central router on your network: or > Computer and locate the My Net N900 Central router CD drive under Devices with Removable Storage. 9 MY NET N900 CENTRAL USER MANUAL - Western Digital My Net N900 Central | User Manual - Page 14
double-click EasySetup.exe to display the Choose your setup option screen. 5. Continue to "Setting up a New Router" below. Setting up a New Router 1. On the Choose your setup option screen, click Set up a new router. A screen showing a connected router appears: 10 MY NET N900 CENTRAL USER MANUAL - Western Digital My Net N900 Central | User Manual - Page 15
you want and enter the required information. The default connection type is PPPoE. Click Next. Note: See "Advanced WAN (Internet) Category" on page 38 for more information about connection types. To proceed without setting up your Internet connection, click Skip. 11 MY NET N900 CENTRAL USER MANUAL - Western Digital My Net N900 Central | User Manual - Page 16
: For more information on these processes, see "Updating the Router's Firmware" on page 69 and "Installing WD Software from the CD (Optional)" on page 18. b. To use or configure the router without selecting the other options, clear the check boxes and click Next. 12 MY NET N900 CENTRAL USER MANUAL - Western Digital My Net N900 Central | User Manual - Page 17
the Router Physically While the installation wizards for the router lead you through the steps for physically connecting the router, this section is for users who want more specific information and for those who simply want to connect the router and start using it. 13 MY NET N900 CENTRAL USER MANUAL - Western Digital My Net N900 Central | User Manual - Page 18
computer's Wi-Fi is turned on. 2. From the list of wireless networks on the computer's or device's screen, select the WesternDigital network and connect. By default there is no password. Continue to "Configuring a New Router" on page 15. 14 MY NET N900 CENTRAL USER MANUAL - Western Digital My Net N900 Central | User Manual - Page 19
), or http://192.168.1.1. The Welcome screen displays: 3. Click Continue to display the first Connect to Internet screen. 4. Make sure that your router is connected properly and click Confirm. 5. If both connections are confirmed, click Next. Continue to step 7. 15 MY NET N900 CENTRAL USER MANUAL - Western Digital My Net N900 Central | User Manual - Page 20
: To configure your router, continue with "Basic Settings and Tasks" on page 21. 7. When the Set up Wireless screen displays, you can change the Network Name and Password for more protection. (See "Configuring Wireless Settings" on page 26 for more information.) 16 MY NET N900 CENTRAL USER MANUAL - Western Digital My Net N900 Central | User Manual - Page 21
will have to connect your computer or wireless device to the new network. 9. Click OK. The My Dashboard home screen displays. Note: To configure your router, continue with "Basic Settings and Tasks" on page 21. 17 MY NET N900 CENTRAL USER MANUAL - Western Digital My Net N900 Central | User Manual - Page 22
Finish. For information about... WD Quick View WD Print Share My Net View WD SmartWare See... "Using WD Quick View (Windows or Mac)" on page 65 "Installing and Using WD Print Share" on page 77 "Accessing My Net View (Windows)" on page 76 WD SmartWare online Help 18 MY NET N900 CENTRAL USER MANUAL - Western Digital My Net N900 Central | User Manual - Page 23
Net™ Setup (Mac) Use My Net Setup on the Setup CD to install WD Print Share and WD Quick View on a Mac computer. 1. Insert the Setup CD into the CD drive of your Mac computer to display the Welcome to the My Net and select the applications you want to install. 19 MY NET N900 CENTRAL USER MANUAL - Western Digital My Net N900 Central | User Manual - Page 24
a standard installation of WD Quick View and WD Print Share, click Install. Note: For information about WD Quick View, see "Using WD Quick View (Windows or Mac)" on page 65. For information about WD Print Share, see "Installing and Using WD Print Share" on page 77. 20 MY NET N900 CENTRAL USER MANUAL - Western Digital My Net N900 Central | User Manual - Page 25
://wdrouter or http://192.168.1.1 in the address field of your browser. The Welcome screen displays: 2. Enter the router's username (default value is admin) and password (default value is lowercase password) and click Submit. The My Dashboard home screen displays: 21 MY NET N900 CENTRAL USER MANUAL - Western Digital My Net N900 Central | User Manual - Page 26
Add a Wi-Fi Device Follow the wizard guiding you through setting up internal storage or a storage device connected to the router's USB port. "Setting Up Storage" to display recent alerts about new firmware and network issues and shortcuts to important settings. 22 MY NET N900 CENTRAL USER MANUAL - Western Digital My Net N900 Central | User Manual - Page 27
Connected Guest Network Name Guest Password Network Name (5 GHz) Password Attached Storage Internal Hard Drive MY NET N900 CENTRAL USER MANUAL Description Unique identifier of the 2.4 GHz network. Password for accessing the 2.4 GHz network. Name assigned to the router. Router is Connected to or - Western Digital My Net N900 Central | User Manual - Page 28
by restricting dangerous or undesirable web access. Disabled by default. See "Setting Up Parental Controls" on page 59. troubleshoot your Internet connection: 1. Click the Connect to Internet icon to display a diagram showing you how to connect the router cables. 24 MY NET N900 CENTRAL USER MANUAL - Western Digital My Net N900 Central | User Manual - Page 29
the status of the connections: from the computer to the router and from the router to the Internet: 3. If a connection succeeds, a connection you want to make and enter the required information.The default connection type is PPPoE. Click Next. To proceed without setting NET N900 CENTRAL USER MANUAL - Western Digital My Net N900 Central | User Manual - Page 30
Wireless Settings Once you configure wireless settings on the router, you can easily connect wireless devices such as notebooks Network Name Password Description Name given to the wireless network. Password for accessing the wireless network. 3. Click Save. 26 MY NET N900 CENTRAL USER MANUAL - Western Digital My Net N900 Central | User Manual - Page 31
up a USB storage device, make sure it is properly connected to the router's USB port. 1. Click the Set Up Storage icon to display the first screen of the storage wizard. 2. Click Next to display a list of connected storage devices and the internal hard drive. 27 MY NET N900 CENTRAL USER MANUAL - Western Digital My Net N900 Central | User Manual - Page 32
default value is Public Share. 8. Click Next to save your settings. 9. On the Step 4 screen, do one of the following: Click Back to select another storage device from the list. Repeat steps 3-8 for each device. Click Finish. The My Dashboard home screen appears. 28 MY NET N900 CENTRAL USER MANUAL - Western Digital My Net N900 Central | User Manual - Page 33
device is not capable of WPS, you can still connect to the router using a network name and password. 1. Click the Add a Wi-Fi Device icon. 2. Select 3: Router PIN: If prompted by your wireless device, enter the WPS PIN shown on the screen into your wireless device. 29 MY NET N900 CENTRAL USER MANUAL - Western Digital My Net N900 Central | User Manual - Page 34
the default value is invalid unless you reset the router to default values. password for the wireless network you selected Note: By default there is no password. If a password was configured during setup, that password displays in the Password field. 3. Click Close. 30 MY NET N900 CENTRAL USER MANUAL - Western Digital My Net N900 Central | User Manual - Page 35
the router's internal hard drive using the WD Photos and WD 2go WD 2go Remote Access screen displays: Adding Mobile Access 1. Click Add Mobile Access to display the Step 1: Download App screen. 2. Download the WD Photos and/or WD 2go apps from your app store. 31 MY NET N900 CENTRAL USER MANUAL - Western Digital My Net N900 Central | User Manual - Page 36
and display the activation code for your device: 4. Open the WD app on your mobile device:, 5. Select your router, and enter the activation code as prompted. Click Activate. 6. On the router My Dashboard screen that displays the activation code, click Finish. 32 MY NET N900 CENTRAL USER MANUAL - Western Digital My Net N900 Central | User Manual - Page 37
Enter the email address and full name of the user for whom you are setting up an account and click Next. 3. When the screen indicates that the email has been sent, click Finish. 4. Check your email for further instructions on accessing your stored files and data. 33 MY NET N900 CENTRAL USER MANUAL - Western Digital My Net N900 Central | User Manual - Page 38
BASIC SETTINGS AND TASKS 5. In a browser, sign in to https://www.wd2go.com/ using the associated email address and password (see page 31). 6. Click Submit to display the My WD Devices screen. 7. Click View Shares to display the router's share(s). 34 MY NET N900 CENTRAL USER MANUAL - Western Digital My Net N900 Central | User Manual - Page 39
8. Click + Open in Explorer to view the content of the share Note: Mac users follow a similar procedure in Finder. BASIC SETTINGS AND TASKS For further information, please see the online FAQs. 35 MY NET N900 CENTRAL USER MANUAL - Western Digital My Net N900 Central | User Manual - Page 40
Settings icon to its upper left, you are configuring that function's advanced settings. For example, the icon for Internet Settings looks like this: 36 MY NET N900 CENTRAL USER MANUAL - Western Digital My Net N900 Central | User Manual - Page 41
Typical Advanced Settings Screen Advanced Settings Categories Close button ADVANCED SETTINGS Tabs Note: To close an Advanced Settings screen, click the Close button at the top of the screen. The My Dashboard home screen displays. 37 MY NET N900 CENTRAL USER MANUAL - Western Digital My Net N900 Central | User Manual - Page 42
Link to WAN Indicates whether the router has established a physical link to the modem. Primary DNS Server/Secondary DNS Server The primary and secondary DNS Server addresses are configured and maintained by your ISP. Contact your ISP for this information. 38 MY NET N900 CENTRAL USER MANUAL - Western Digital My Net N900 Central | User Manual - Page 43
PPPoE, PPTP, or L2TP (Username/Password): MAC Address Identification number assigned to the router by the manufacturer. Note: With some that can be transmitted over the network. The default value is 1500. Password for accessing the ISP. Primary/Secondary DNS Server NET N900 CENTRAL USER MANUAL - Western Digital My Net N900 Central | User Manual - Page 44
Default Gateway The IPv6 address of the gateway device to which your router is connected. LAN IPv6 Link-Local Address The LAN link-local IPv6 address of your router that is assigned automatically. Name (if any) Name of the computer associated with the IPv6 address. 40 MY NET N900 CENTRAL USER - Western Digital My Net N900 Central | User Manual - Page 45
, even if your ISP changes your router's WAN IP address. DNS (Domain Name service provider. Password (Key)/Verify Password (Key) Password required for accessing your DDNS account. For DynDNS.org, this is your account password. For TZO, this is your account key. 41 MY NET N900 CENTRAL USER MANUAL - Western Digital My Net N900 Central | User Manual - Page 46
of whether your router can successfully connect to and update your IP address on the DDNS service. Username (email) Password for accessing the wireless network. For some Enterprise modes, additional fields display: • Radius Server IP Address • Port • Shared Secret 42 MY NET N900 CENTRAL USER MANUAL - Western Digital My Net N900 Central | User Manual - Page 47
recommended. Your wireless clients identify and connect to your router using the network name or SSID (Service Set Identifier). The SSID broadcast is On by default. For additional security, you can turn SSID broadcast to you have the option of turning WMM QoS Off. 43 MY NET N900 CENTRAL USER MANUAL - Western Digital My Net N900 Central | User Manual - Page 48
button to generate a new PIN or reset it to the default value. Guest Access Screen Purpose: Allow visitors access to the 2.4 GHz and 5 GHz wireless bands. For information on setting up guest access, see "Enabling Guest Access" on page 58. Advanced LAN Category 44 MY NET N900 CENTRAL USER MANUAL - Western Digital My Net N900 Central | User Manual - Page 49
network. Subnet Mask The subnet mask controls which subnet the computers connected to the router belong to. In most cases, the default value of 255.255.255.0 is sufficient as it allows up to 255 unique the complete address of commonly used Internet domains. 45 MY NET N900 CENTRAL USER MANUAL - Western Digital My Net N900 Central | User Manual - Page 50
devices that are connected to the router. You can manually add a device to the table . DLNA (Digital Living Network Alliance) Makes stored digital media contents Password Enter the password of the person being granted access to the private share and FTP service. 46 MY NET N900 CENTRAL USER MANUAL - Western Digital My Net N900 Central | User Manual - Page 51
User Account Username Workgroup Select to enable public access (no authentication) to the shares/services. Selected by default. Files sharing service among local network client devices using the Samba protocol. USB port on the router Apple Time Machine support. 47 MY NET N900 CENTRAL USER MANUAL - Western Digital My Net N900 Central | User Manual - Page 52
Settings Category ADVANCED SETTINGS Firewall Screen Purpose: Set up a firewall for this router to block specific incoming or outgoing traffic by IP address and/or ports. or Internet (WAN). Source IP Range Range of IP addresses where the traffic initiates. 48 MY NET N900 CENTRAL USER MANUAL - Western Digital My Net N900 Central | User Manual - Page 53
it were connected outside of the router. If you are aware of the specific TCP and UDP ports that a service is using, we recommend using network device being filtered. MAC Filtering drop-down list The default setting is Turn MAC Filtering OFF. Other options are: Turn MY NET N900 CENTRAL USER MANUAL - Western Digital My Net N900 Central | User Manual - Page 54
and WD 2go Service. Enable Remote Access Toggle to On to enable remote access. Note: It may take a few minutes for the service to Router could not establish a remote access connection with the mobile device or web access account. Check your Internet connection. 50 MY NET N900 CENTRAL USER MANUAL - Western Digital My Net N900 Central | User Manual - Page 55
router's IP address unreachable for a direct connection. In this situation, consult your ISP for alternatives to enable portforwarded connections. Unknown - Problem on the router's internal hard drive. A wizard guides you through downloading the WD2go or WD Photos app NET N900 CENTRAL USER MANUAL - Western Digital My Net N900 Central | User Manual - Page 56
through the WD 2go web site. URL for web access Click the https://www.wd2go.com link to display the WD 2go router and redirect data. Applies only to traffic coming from the Internet. For information on port forwarding, see "Enabling Port Forwarding" on page 74. 52 MY NET N900 CENTRAL USER MANUAL - Western Digital My Net N900 Central | User Manual - Page 57
data over the network compared to other applications or devices. The default value is 1-Highest. Protocol Internet protocol for transferring data. Select TCP or UDP. Remote IP Range Remote IP address range of the service on the Internet the rule applies to. 53 MY NET N900 CENTRAL USER MANUAL - Western Digital My Net N900 Central | User Manual - Page 58
for network devices. Enable/Disable UPnP IGD Toggle to enable or disable Universal Plug and Play functionality (Internet Gateway Device) for network devices. 54 MY NET N900 CENTRAL USER MANUAL - Western Digital My Net N900 Central | User Manual - Page 59
of the router. Time Settings Screen Purpose: Configure, update, and maintain the correct time on the router manually or automatically by NTP (Network Time Protocol). Adding User Defined NTP Server Enter the name of NTP server of your choice and click Add. 55 MY NET N900 CENTRAL USER MANUAL - Western Digital My Net N900 Central | User Manual - Page 60
router and network/Internet hosts. Connection Check Result The result of whether your router can reach the specified host name or IP address. Host Name or IP Address Enter the host name or IP address of a computer you want to locate on the network. Click Ping. 56 MY NET N900 CENTRAL USER MANUAL - Western Digital My Net N900 Central | User Manual - Page 61
services, such as DHCP and routing, to turn the router into a Wi-Fi access point, allowing you to expand your existing wireless network without replacing your router. For information about changing to AP mode, see "Using the Router as an Access Point" on page 71. 57 MY NET N900 CENTRAL USER MANUAL - Western Digital My Net N900 Central | User Manual - Page 62
Net N900 Central router. It includes the following topics: Enabling Guest Access Setting Up Parental Controls Changing the Administrator Password Accessing Files on the Router or an Attached USB Drive Updating the Router's Firmware Restoring the Router to Factory Defaults NET N900 CENTRAL USER MANUAL - Western Digital My Net N900 Central | User Manual - Page 63
. You need to register the router to activate Parental Control service for your router. To set up parental controls: 1. On the Advanced Settings screen, click the Security icon to display the Security/Parental Controls screen. 2. Click the Parental Controls tab. 59 MY NET N900 CENTRAL USER MANUAL - Western Digital My Net N900 Central | User Manual - Page 64
address. Follow the instructions in the email to confirm your registration of Parental Controls. Parental Controls are activated about fifteen minutes after you confirm your registration. 7. On the Policy Management screen, enter your password and click Login. 60 MY NET N900 CENTRAL USER MANUAL - Western Digital My Net N900 Central | User Manual - Page 65
the WD Internet Parental Controls Policy Management link in the middle of the page to launch the Device List View screen. Managing Parental Controls The Device List View screen enables you to manage parental controls on a master, device, and time range level. 61 MY NET N900 CENTRAL USER MANUAL - Western Digital My Net N900 Central | User Manual - Page 66
Device List View screen, click UserInfo to display the User Information Setting screen. 1. (Optional) Update the User name, Password and Password reset information. 2. Click Confirm to return to the Master Setting, click Safe/Block. The Safe/Block List displays. 62 MY NET N900 CENTRAL USER MANUAL - Western Digital My Net N900 Central | User Manual - Page 67
screen. 2. Select the Time Range and the Filtering Level it should apply to. By default, the screen shows a 24-hour range (12 A.M. - 12 A.M.); you can adjust the range to your preferences. For example, you may want to block all web access from (8 A.M.- 5 P.M.). 63 MY NET N900 CENTRAL USER MANUAL - Western Digital My Net N900 Central | User Manual - Page 68
the WD password. Changing the Administrator Password It is a good practice to change the administrator password for accessing and managing the router. 1. On the Advanced Settings screen, click the Administrator icon to display the Admin/Administrator screen. 64 MY NET N900 CENTRAL USER MANUAL - Western Digital My Net N900 Central | User Manual - Page 69
device. Windows 1. Right-or left-click the WD Quick View icon in the system tray to display a menu. 2. Move the pointer over or click to select your My Net N900 Central router and display a submenu. The internal storage and USB shares display in Windows Explorer: 65 MY NET N900 CENTRAL USER MANUAL - Western Digital My Net N900 Central | User Manual - Page 70
Select Open. 3. If you are prompted for a username and password, enter the username and password that you created when you set up external storage. If a password was not created, select or enter guest. Click Connect. 4. Select the volume(s) to mount and click OK. 66 MY NET N900 CENTRAL USER MANUAL - Western Digital My Net N900 Central | User Manual - Page 71
the Search programs and files box, type \\mynetn900c. If the router's default host name was changed during setup, substitute the new name. The password was set on the router during storage setup, at the prompts, enter the username and the password that you created. 67 MY NET N900 CENTRAL USER MANUAL - Western Digital My Net N900 Central | User Manual - Page 72
Server. 2. Type smb://mynetn900c. If the router's default host name was changed during setup, substitute password, enter the username and password that you created when you set up external storage. If a password was not created, select or enter guest. Click Connect. 68 MY NET N900 CENTRAL USER MANUAL - Western Digital My Net N900 Central | User Manual - Page 73
. 2. On the router screen, browse to the firmware file you saved and click Open. The file name displays in the browser field on the router screen. 3. Click Upload. A message says how long the upload will take. Please wait while the firmware update is taking place. 69 MY NET N900 CENTRAL USER MANUAL - Western Digital My Net N900 Central | User Manual - Page 74
/write activities. You can reboot the router two ways. If you are physically close to it, just press the On/Off button on the router. If you cannot easily press the button: 1. On the Advanced Settings screen, click the Administrator icon. 2. Click the System tab. 70 MY NET N900 CENTRAL USER MANUAL - Western Digital My Net N900 Central | User Manual - Page 75
. Note: To use the router in extender mode, the router must be connected by wire to your computer. To convert the router to extender mode: 1. On the Advanced Settings screen, click the Admin icon. 2. Click the Device Mode tab. The LAN Connection Type displays. 71 MY NET N900 CENTRAL USER MANUAL - Western Digital My Net N900 Central | User Manual - Page 76
My Net N900 Central Router: 1. On the Advanced Settings screen, click the LAN icon. 2. Click the DHCP Server Settings tab. 3. Enable DHCP server (On by default) and click Save. 4. Configure DHCP IP Address Range. By default IP address and MAC address of each device 72 MY NET N900 CENTRAL USER MANUAL - Western Digital My Net N900 Central | User Manual - Page 77
assign a device a DHCP IP address: 1. In the Manual Added Device section of the screen, enter the device's IP address, MAC address, and device name. 2. Click Add/ a device, select it in the table and click the Edit icon. Edit the information and click Add/Update. 73 MY NET N900 CENTRAL USER MANUAL - Western Digital My Net N900 Central | User Manual - Page 78
blocked because of the router's network address translation (NAT), port forwarding allows their information to come through. To create port forwarding rules: 1. On the Advanced Settings screen, click the Additional Settings icon. 2. Click the Port Forwarding tab. 74 MY NET N900 CENTRAL USER MANUAL - Western Digital My Net N900 Central | User Manual - Page 79
protocol will be automatically be selected if you pick an application from the drop-down list. Can be manually entered or populated by your selection from the Computer Name drop-down list. Device on your local network Click Save at the top or bottom of the page. 75 MY NET N900 CENTRAL USER MANUAL - Western Digital My Net N900 Central | User Manual - Page 80
computer, you can use it to diagnose network problems. To access My Net View: 1. Double-click the My Net View icon on your Desktop. The My Net View Welcome page displays. 2. Click Diagnose, and use the online Help (?) to guide you through the diagnostic procedures. 76 MY NET N900 CENTRAL USER MANUAL - Western Digital My Net N900 Central | User Manual - Page 81
have already set up your router, click Skip and go to software installation. 4. Select WD Print Share and click Install to start installation. 5. When the installation is done, click the WD Print Share icon on the desktop to display the Print Share Control Center. 77 MY NET N900 CENTRAL USER MANUAL - Western Digital My Net N900 Central | User Manual - Page 82
(Mac)" on page 19). 2. In Finder, double-click WD Print Share under Devices: 3. Follow the installation wizard to install WD Print Share. 4. When the installation is done, click the WD Print Share icon on the desktop to display the WD Print Share Control Center. 78 MY NET N900 CENTRAL USER MANUAL - Western Digital My Net N900 Central | User Manual - Page 83
. Selecting the printer or scanner and clicking Connect manually connects the device to your computer for the timeout duration set in Tool > Set Timeout in the menu. Note: Only the connected computer will be able to print until the computer releases the connection. 79 MY NET N900 CENTRAL USER MANUAL - Western Digital My Net N900 Central | User Manual - Page 84
the list on the WD Print Share Control Center. 2. Click Scan. You are prompted to select a scanner interface. A scanner user interface appears on the screen. 3. Choose options and click Scan to scan your picture or document. 4. After scanning is done, click Close. 80 MY NET N900 CENTRAL USER MANUAL - Western Digital My Net N900 Central | User Manual - Page 85
Relocate your router to a place that has good ventilation. Turn off your router, and set it aside for 15 to 20 minutes until it cools down. Turn your router back on to resume operation. If the problem persists, contact Technical Support at http://support.wdc.com. 81 MY NET N900 CENTRAL USER MANUAL - Western Digital My Net N900 Central | User Manual - Page 86
tested and found to comply with the limits for a Class B digital device, pursuant to Part 15 of the FCC Rules. These limits and, if not installed and used in accordance with the instructions, may cause harmful interference to radio communications. However, there . 82 MY NET N900 CENTRAL USER MANUAL - Western Digital My Net N900 Central | User Manual - Page 87
device is only for use with the compatible UL Listed AC adapter. Cet appareil n'est destiné qu'a` des adaptateur compatibles marqués "UL Listed". 83 MY NET N900 CENTRAL USER MANUAL - Western Digital My Net N900 Central | User Manual - Page 88
applicables a été effectuée et est consultable chez Western Digital Europe. Il marchio CE indica la conformità del sistema alle direttive applicabili del Consiglio dell'Unione europea, tra cui le Direttive EMC (2004/108/CE), (1999/5/CE), la Direttiva Bassa 84 MY NET N900 CENTRAL USER MANUAL - Western Digital My Net N900 Central | User Manual - Page 89
of Conformity" (overensstemmelsesattestering) i henhold til gældende direktiver er afgivet og opbevares hos Western Digital Europe CE 2004/108/EC, 1999/5/EC 2006/95/EC 2005/32/EC Western Digital CE 2004/108/ΕΚ), (1999/5 2006/95 2005/32 Western Digital 85 MY NET N900 CENTRAL USER MANUAL - Western Digital My Net N900 Central | User Manual - Page 90
establish the period of warranty, check the warranty expiration (serial number required) via http://support.wdc.com. WD shall have no liability for lost data regardless of the cause, recovery of lost data, or data contained in any Product placed in its possession. 86 MY NET N900 CENTRAL USER MANUAL - Western Digital My Net N900 Central | User Manual - Page 91
Service WD values your business and always attempts to provide you the very best of service. Should you encounter any problem, please give us an opportunity to address it before returning this Product. Most technical support to you under this warranty are in 87 MY NET N900 CENTRAL USER MANUAL - Western Digital My Net N900 Central | User Manual - Page 92
to any Open Source Software, is solely at your own risk. Western Digital is not responsible for any such modification or tampering. Western Digital will not support any product in which you have or have attempted to modify the Software supplied by Western Digital. 88 MY NET N900 CENTRAL USER MANUAL - Western Digital My Net N900 Central | User Manual - Page 93
storage 2.5" HDD with SATA interface (1TB or 2TB) Supported operating Windows XP with Service Pack 3 systems Windows Vista with Service Pack 2 Windows 7 with Service Pack 1 Mac OS X Leopard Mac OS X Snow -operating temperature: -20 to 65 oC (-4 to 149 oF) 89 MY NET N900 CENTRAL USER MANUAL - Western Digital My Net N900 Central | User Manual - Page 94
network problems (Windows) 76 MY NET N900 CENTRAL USER MANUAL DLNA 4, 28, 46 dual band speed 3 dynamic DNS 41 E Easy Setup installation software 3 using 9 environmental compliance (China) 86 Ethernet ports 3 external USB storage 27, 46 F factory defaults, restoring 70 FasTrack Plus 3 firmware - Western Digital My Net N900 Central | User Manual - Page 95
settings screens 48 service, all but Australia/New Zealand 86 service, Australia/New Zealand 87 settings advanced 36 basic 21 current 21 storage 27 setup CD 9 options 10 Windows Vista/Win7 9 Windows XP 9 wireless 14 software on the setup CD 18 software, GPL 88 MY NET N900 CENTRAL 91 USER MANUAL - Western Digital My Net N900 Central | User Manual - Page 96
a Mac computer 78 installing on a Windows computer 77 using 79 WD Quick View accessing stored files 65 description 4 WD SmartWare 5 Wi-Fi Protected Security (WPS) 4 wireless adding devices 29 settings 26 setup 14 WPS LED 7 WPS-enabled device, connecting 29 MY NET N900 CENTRAL USER MANUAL INDEX 92 - Western Digital My Net N900 Central | User Manual - Page 97
reserves the right to change specifications at any time without notice. Western Digital, WD and the WD logo are registered trademarks in the U.S. and other countries; My Net is a registered trademark of Western Digital Technologies, Inc. Adobe and Adobe Reader and the included Adobe Reader logo are
-
 1
1 -
 2
2 -
 3
3 -
 4
4 -
 5
5 -
 6
6 -
 7
7 -
8
-
9
-
10
-
11
-
12
-
13
-
14
-
15
-
16
-
17
-
18
-
19
-
20
-
21
-
22
-
23
-
24
-
25
-
26
-
27
-
28
-
29
-
30
-
31
-
32
-
33
-
34
-
35
-
36
-
37
-
38
-
39
-
40
-
41
-
42
-
43
-
44
-
45
-
46
-
47
-
48
-
49
-
50
-
51
-
52
-
53
-
54
-
55
-
56
-
57
-
58
-
59
-
60
-
61
-
62
-
63
-
64
-
65
-
66
-
67
-
68
-
69
-
70
-
71
-
72
-
73
-
74
-
75
-
76
-
77
-
78
-
79
-
80
-
81
-
82
-
83
-
84
-
85
-
86
-
87
-
88
-
89
-
90
-
91
-
92
-
93
-
94
-
95
-
96
-
97
 |
 |

My Net
™
N900 Central
HD Dual-Band Storage Router
User Manual