Western Digital WDBABT0010HBK User Manual - Page 11
Connecting the Drive and Getting Started, Connecting the Drive
 |
UPC - 718037762906
View all Western Digital WDBABT0010HBK manuals
Add to My Manuals
Save this manual to your list of manuals |
Page 11 highlights
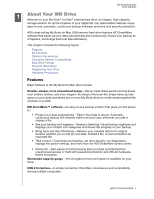
MY BOOK FOR MAC USER MANUAL 12 Connecting the Drive and Getting Started This chapter provides step-by-step instructions for connecting and installing the drive on your computer. It includes the following topics: Connecting the Drive Enhancing Performance with WD +TURBO Installing the WD SmartWare Software WD SmartWare Software Overview WD SmartWare Home Screen Viewing the Info/Online Help Topics Hiding the WD SmartWare Virtual CD Showing the WD SmartWare Virtual CD Connecting the Drive To connect the My Book drive to your Mac OS X Tiger/Leopard/Snow Leopard computer: 1. Depending on your region, if required, change the power adapter as follows: US/JA/TW EU/KO US/JA/TW EU/KO Installing Removing Installing Removing 2. Turn on your computer. 3. Connect the My Book drive as shown in Figure 4 on page 7. 4. If you have reformatted the drive for use on a Windows computer, skip the rest of this procedure and see "Installing the Drive on Windows Computers" on page 50 instead. 5. After you physicallyconnect the drive, the WD SmartWare virtual CD: • Icon displays on the desktop: • Is listed under Devices in Finder: CONNECTING THE DRIVE AND GETTING STARTED - 6
-
 1
1 -
2
-
3
-
4
-
5
-
 6
6 -
 7
7 -
 8
8 -
 9
9 -
 10
10 -
 11
11 -
 12
12 -
 13
13 -
 14
14 -
 15
15 -
 16
16 -
17
-
18
-
19
-
20
-
21
-
22
-
23
-
24
-
25
-
26
-
27
-
28
-
29
-
30
-
31
-
32
-
33
-
34
-
35
-
36
-
37
-
38
-
39
-
40
-
41
-
42
-
43
-
44
-
45
-
46
-
47
-
48
-
49
-
50
-
51
-
52
-
53
-
54
-
55
-
56
-
57
-
58
-
59
-
60
-
61
-
62
-
63
-
64
-
65
-
66
-
67
-
68
-
69
-
70
-
71
-
72
-
73
-
74
-
75
-
76
-
77
-
78
-
79
-
80
-
81
-
82
-
83
-
84
-
85
 |
 |
