Whirlpool CEM2750KQ Installation Instructions
Whirlpool CEM2750KQ Manual
 |
View all Whirlpool CEM2750KQ manuals
Add to My Manuals
Save this manual to your list of manuals |
Whirlpool CEM2750KQ manual content summary:
- Whirlpool CEM2750KQ | Installation Instructions - Page 1
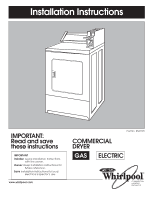
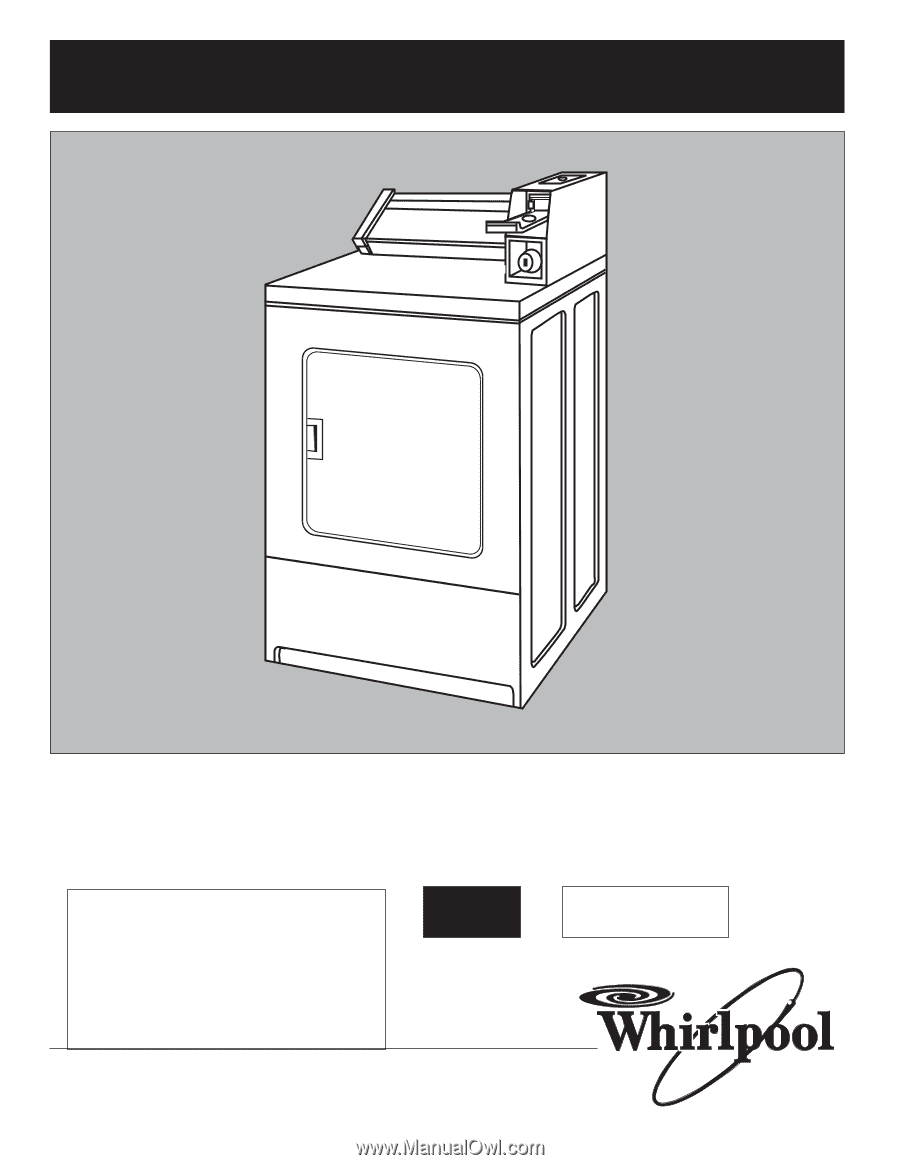
Read and save these instructions IMPORTANT Installer: Leave Installation Instructions with the owner. Owner: Keep Installation Instructions for future reference. Save Installation Instructions for local electrical inspector's use. www.whirlpool.com Part No. 8527795 COMMERCIAL DRYER GAS ELECTRIC 120 - Whirlpool CEM2750KQ | Installation Instructions - Page 2
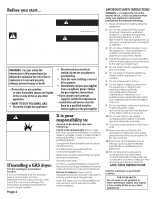
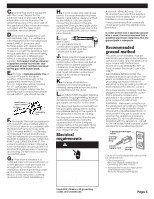
the weather. 7. Do not tamper with controls. 8. Do not repair or replace any part of the appliance or attempt any servicing unless specifically recommended in the usermaintenance instructions or in published user-repair instructions that you understand and have the skills to carry out. 9. Do not use - Whirlpool CEM2750KQ | Installation Instructions - Page 3
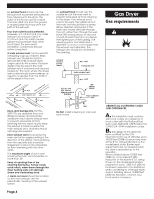
exhaust airflow Metal flexible vent must be fully extended and supported when the dryer is in its final position. DO NOT KINK OR CRUSH length chart, see Whirlpool Service Manual, "Exhausting Whirlpool Dryers," Part No. 603197, available from your Whirlpool parts distributor. If dryer is installed in - Whirlpool CEM2750KQ | Installation Instructions - Page 4
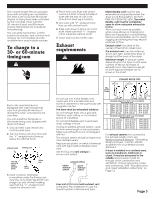
than the CFM of all the dryers in the room. dryer exhaust vent 30° max. dryer exhaust vent air flow main collector vent 30° max. dryer exhaust vent dryer exhaust vent 30° max. Back-draft Damper Kits, Part No. 3391910, are available from your Whirlpool dealer and should be installed in - Whirlpool CEM2750KQ | Installation Instructions - Page 5
No attempt shall be made to convert the appliance from the gas specified on the serial/rating plate for use with a different gas without consulting the serving gas supplier. Conversion must be done by a qualified service technician. Gas conversion kit part numbers are listed on the gas valve burner - Whirlpool CEM2750KQ | Installation Instructions - Page 6
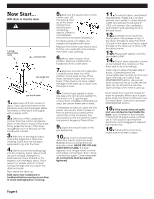
valve 1. Take tape off front corners of dryer. Open dryer and remove the literature and parts packages. Wipe the interior of the drum thoroughly manufaturer's instructions for proper installation.) For dryers using coin slides, use adapter kit supplied with dryer. Replace the meter case service door - Whirlpool CEM2750KQ | Installation Instructions - Page 7
door up at the back and remove. Install moneyaccepting device. (Refer to manufaturer's instructions for proper installation.) For dryers using coin slides, use adapter kit supplied with dryer. Replace the meter case service door. Put the coin vault with lock and key the meter case opening. 6. Move - Whirlpool CEM2750KQ | Installation Instructions - Page 8
This dryer is manufactured with the cabinet-ground conductor connected to the NEUTRAL (center) of the wiring harness at the terminal block. If local codes do NOT permit this type of connection, use "Fourwire connection" instructions. For a grounded, cord-connected appliance - GROUNDING INSTRUCTIONS - Whirlpool CEM2750KQ | Installation Instructions - Page 9
a white cover. 4. Remove center terminal block screw. 5. Remove appliance ground wire (green with yellow stripes) from external ground connector screw relief screws. 10. Insert tab of terminal block cover into slot of the dryer rear panel. Secure cover with hold-down screw. DIRECT WIRE 4. Remove - Whirlpool CEM2750KQ | Installation Instructions - Page 10
Type 10-30R. 8. Insert tab of terminal block cover into slot of dryer rear panel. Secure cover with hold-down screw. DIRECT WIRE Preparing the wire -wire with ground wire: Bare wire cut short. Wire is not used. Dryer is grounded through direct wire cable. 3/4" (1.9 cm) U.L.-listed strain relief - Whirlpool CEM2750KQ | Installation Instructions - Page 11
Remove the appliance harness ground wire (green with yellow stripes) from the external ground connector screw. Connect appliance harness ground connect direct wire to power supply. Turn power supply on. 11. Check dryer operation (some accumulated time may be on the timer due to factory testing). - Whirlpool CEM2750KQ | Installation Instructions - Page 12
valves are set in open position. If you need assistance... The Whirlpool Consumer Interaction Center will answer any questions about operating or maintaining your dryer not covered in the Installation Instructions. The Whirlpool Consumer Interaction Center is open 24 hours a day, 7 days a week. Just - Whirlpool CEM2750KQ | Installation Instructions - Page 13
coin-operated models: 7-7/8" (20 cm) SIDE VIEW 27" (68.6 cm) 27" (68.6 cm) dryer 29-1/4" (74.3 cm) 26-1/2" (64.8 cm) 6-3/4" (15.2 cm) ELECTRIC 14" (35.6 cm (35.9 cm) BOTTOM EXHAUST Part No. 8527795 © 2001 Whirlpool Corporation Prepared by Whirlpool Corporation, Benton Harbor, Michigan 49022 - Whirlpool CEM2750KQ | Installation Instructions - Page 14
d'installation au propriétaire. Propriétaire : Conserver les instructions d'installation pour consultation ultérieure. Conserver les instructions d'installation pour consultation par l'inspecteur local des installations électriques. www.whirlpool.com Pièce n° 8527795 SÉCHEUSE COMMERCIALE GAZ - Whirlpool CEM2750KQ | Installation Instructions - Page 15
sécheuse est utilisée près d'eux. 4. Avant d'enlever la sécheuse du service ou la jeter, enlever la porte du compartiment de séchage. 5. Ne pas mettre d'une recommandation spécifique dans le guide d'utilisation et d'entretien, ou publiée dans les instructions de réparation par l'utilisateur que vous - Whirlpool CEM2750KQ | Installation Instructions - Page 16
. Ne pas utiliser un conduit d'évacuation en plastique. Ne pas utiliser un conduit d'évacuation en feuille métallique mince. Le non-respect de ces instructions peut provoquer un décès ou un incendie. Ne pas utiliser un conduit flexible nonmétallique, un conduit métallique de diamètre inférieur à 10 - Whirlpool CEM2750KQ | Installation Instructions - Page 17
service Whirlpool, «Exhausting Whirlpool Dryers», pièce n° 603197, qu'on peut obtenir auprès du distributeur de pièces Whirlpool et règlements en vigueur.) Voir «Instructions d'installation dans un encastrement ou dans conduits raccordés au conduit principal de part et d'autre devraient être disposés - Whirlpool CEM2750KQ | Installation Instructions - Page 18
la broche de liaison à la terre. Ne pas utiliser un adaptateur. Ne pas utiliser un câble de rallonge. Le non-respect de ces instructions peut causer un décès, un incendie ou un choc électrique. Important : Respecter les prescriptions de tous les codes et règlements en vigueur. L'appareil doit - Whirlpool CEM2750KQ | Installation Instructions - Page 19
pour déplacer et installer la sécheuse. Le non-respect de cette instruction peut causer une blessure au dos ou d'autre blessure. prise de ôler le bon fonctionnement de la sécheuse (la minuterie peut indiquer un temps de service cumulatif du fait de tests effectués à l'usine). Insérer les pièces dans - Whirlpool CEM2750KQ | Installation Instructions - Page 20
AVERTISSEMENT Risque du poids excessif Utiliser deux ou plus de personnes pour déplacer et installer la sécheuse. Le non-respect de cette instruction peut causer une blessure au dos ou d'autre blessure. Avec la sécheuse dans la buanderie... conduit d'évacuation coupe-circuit avec fusible prise - Whirlpool CEM2750KQ | Installation Instructions - Page 21
courant convenable par un électricien qualifié. Pour un appareil à câblage permanent - INSTRUCTIONS DE LIAISON À LA TERRE Cet appareil doit être relié à un circuit de seulement Utiliser un cordon d'alimentation neuf (agrément UL) pour service 240 volts min., 30 A, identifié pour utilisation avec une - Whirlpool CEM2750KQ | Installation Instructions - Page 22
Circuit à quatre conducteurs... Prise de courant à quatre conducteurs (nécessaire pour maison mobile) CORDON D'ALIMENTATION cosse à fourche - extrémités relevées BROCHE NEUTRE serre-câble de CONDUCTEUR 3/4 po NEUTRE (blanc) (agrément UL) broche de liaison à la terre conducteur de liaison - Whirlpool CEM2750KQ | Installation Instructions - Page 23
Circuit à trois conducteurs... Prise de courant à trois conducteurs CORDON D'ALIMENTATION cosse à fourche - extrémités relevées cosses annulaires Cette broche est reliée à ce conducteur Lorsque le code local permet le raccordement entre conducteur neutre et conducteur de liaison à la terre de la - Whirlpool CEM2750KQ | Installation Instructions - Page 24
avec la vis de retenue. 8. Consulter les pages 3-4 pour les instructions concernant le circuit d'évacuation de la sécheuse. Connecter le conduit d'évacuation fonctionnement de la sécheuse (la minuterie peut indiquer un temps de service cumulatif du fait de tests effectués à l'usine). Tirer le bouton - Whirlpool CEM2750KQ | Installation Instructions - Page 25
sur l'extrémité de la canalisation de gaz. Avant de retirer l'appareil du service ou de le mettre au rebut, démonter la porte de la sécheuse. Si qui n'est pas traitée dans les instructions d'installation. Le Centre d'interaction avec la clientèle Whirlpool est accessible 24 heures par jour, 7 - Whirlpool CEM2750KQ | Installation Instructions - Page 26
èces : 20 cm (7 7/8 po) 18,4 cm (7 1/4 po) 10,8 cm (4 1/4 po) 35,9 cm (14 1/8 po) VUE LATÉRALE ÉVACUATION PAR LE BAS Pièce n° 8527795 © 2001 Whirlpool Corporation Préparé par Whirlpool Corporation, Benton Harbor, Michigan 49022 Imprimé aux É.-U.
-
 1
1 -
 2
2 -
 3
3 -
 4
4 -
 5
5 -
 6
6 -
 7
7 -
8
-
9
-
10
-
11
-
12
-
13
-
14
-
15
-
16
-
17
-
18
-
19
-
20
-
21
-
22
-
23
-
24
-
25
-
26
 |
 |
Installation Instructions
IMPORTANT:
Read and save
these instructions
IMPORTANT
Installer:
Leave Installation Instructions
with the owner.
Owner:
Keep Installation Instructions for
future reference.
Save
Installation Instructions for local
electrical inspector’s use.
COMMERCIAL
DRYER
GAS
Part No. 8527795
COMMERCIAL
LAUNDRY
PRODUCTS
®
www.whirlpool.com
120-volt, 60 Hz
ELECTRIC
120/240-volt, 60 Hz