Whirlpool RF3010XEW Use and Care Guide
Whirlpool RF3010XEW Manual
 |
View all Whirlpool RF3010XEW manuals
Add to My Manuals
Save this manual to your list of manuals |
Whirlpool RF3010XEW manual content summary:
- Whirlpool RF3010XEW | Use and Care Guide - Page 1
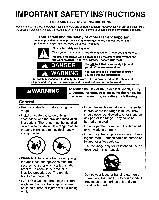
Service If You Need Assistance Warranty 1-3 4 5-6 7-11 11 12 13-16 17 17 18 18 18 19 20 21-23 24 25 27 4 A WARNING * ALL RANGES CAN TIP * INJURY TO PERSONS COULD RESULT * INSTALL ANTI-TIP is DEVICE PACKED WITH RANGE * SEE INSTALLATION INSTRUCTIONS Note to Consumer: Please save this manual - Whirlpool RF3010XEW | Use and Care Guide - Page 2
the room. Persons could be burned or injured, or a fire could start. • Use the range only for its intended use as described in this manual. • WARNING: To reduce the risk of tipping the appliance, the appliance must be secured by a properly installed anti-tip bracket. To check if the bracket is - Whirlpool RF3010XEW | Use and Care Guide - Page 3
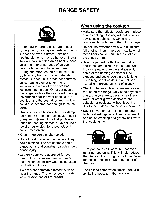
could cause injury. • Use only cookware approved for oven use. Follow cookware manufacturer's instructions, especially when using glass or plastic cookware. • Do not store flammable materials on or near the range. The fumes could create an explosion and/or fire hazard. • Turn pan handles inward - Whirlpool RF3010XEW | Use and Care Guide - Page 4
be damaged and shock or fire could result. • Clean only parts recommended in this Use and Care Guide. • Do not repair or replace any part of the range unless specifically recommended in this manual. All other servicing should be referred to a qualified technician. • Disconnect the electrical supply - Whirlpool RF3010XEW | Use and Care Guide - Page 5
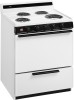
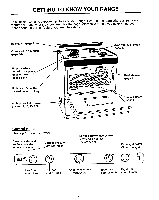
of your range. Use them to learn where all parts and features are and what they look like. Use the page references to help you quickly find out more about the part or feature ) 82 Left front Left rear control knob control knob Oven temperature control dial Right rear Right front control - Whirlpool RF3010XEW | Use and Care Guide - Page 6
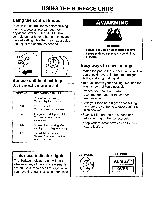
USING THE SURFACE UNITS Using the control knobs Push in the control knobs before turning them to a setting. You can set them anywhere between HI and OFF. The controls do not have to be set exactly on a marked setting. Use the marks as a guide and adjust the control as needed. OF 0 Ito Surface unit - Whirlpool RF3010XEW | Use and Care Guide - Page 7
metal or glass) affects how quickly and evenly the pan heats. Home canning information To protect your range: • Use flat-bottomed canners/pans for best results. • Use the largest surface unit for best your elements for canning all day. • Refer to your canner manual for specific instructions. - 6 - - Whirlpool RF3010XEW | Use and Care Guide - Page 8
USING YOUR OVEN Oven control Your oven temperature is controlled very accurately using an electric oven control system. We recommend that you operate the oven for a number of weeks to become familiar with your new oven's performance. To use your oven, turn the oven control dial clockwise to the - Whirlpool RF3010XEW | Use and Care Guide - Page 9
pans The racks are designed with stop locks. When placed correctly on the rack supports, they will stop before coming completely out of the oven and will not tilt , meats Cookies, biscuits, muffins, cakes, nonfrozen pies 1st or 2nd rack guide from bottom 2nd rack guide from bottom 2nd or 3rd rack - Whirlpool RF3010XEW | Use and Care Guide - Page 10
oven for even heat to reach all parts of the oven. This results in better er(fr 7- Use the following as a guide to determine where to place the pans: One 1. Always follow the package instructions or a reliable recipe. Use oven to heat improperly. 4. For 30" ranges, when two cakes or pies are baked - Whirlpool RF3010XEW | Use and Care Guide - Page 11
USING YOUR OVEN Using aluminum foil for baking Use aluminum foil to catch spillovers from pies and casseroles: Models with two oven racks: Place the foil on the oven rack below the rack with the food. Turn up foil edges and make sure foil is about 1 inch (3 cm.) larger all around than the dish - Whirlpool RF3010XEW | Use and Care Guide - Page 12
on the roasting chart in your favorite cookbook. These times are only a guide as meat cuts will differ. A meat thermometer is the only accurate test for method for cooking tender cuts of meats, poultry, ham and fish. Your range is equipped with a variable broil feature which allows you to broil at - Whirlpool RF3010XEW | Use and Care Guide - Page 13
the light bulb. 4. Unscrew the light bulb counterclockwise. 5. Replace the bulb with a 40-watt appliance bulb. 6. Reconnect the power to the range. The anti-tip bracket The range will not tip during normal use. However, the range can tip if you apply too much force or weight to the open door - Whirlpool RF3010XEW | Use and Care Guide - Page 14
result in sparking or fire. Do not let commercial oven cleaners contact the heat seals or exterior surfaces of the range. This will cause damage. Follow instructions carefully. After using cleaners, thoroughly rinse the oven with a solution of one tablespoon vinegar to one cup water. Oven cleaners - Whirlpool RF3010XEW | Use and Care Guide - Page 15
reflector pan out. Control knobs and dials Clean up any spills or splatters on the knobs and dial with a damp cloth. Remove heavier soil with soapy water. The control knobs and dial may be removed a soap filled abrasive pad or commercial oven cleaner, following the manufacturer's instructions. -14- - Whirlpool RF3010XEW | Use and Care Guide - Page 16
COOKTOP: To make cleaning easier, the entire cooktop may be lifted up and supported in the up position. To avoid the possibility of a burn or electrical area beneath the cooktop. TO REMOVE OVEN DOOR: The 20" range door can not be removed. The 30" range has a lift-off door. To remove lift-off door: - Whirlpool RF3010XEW | Use and Care Guide - Page 17
position. 2. Push up under the center of the drawer while pulling the drawer out to allow the drawer stop to clear the range front frame. 3. Drawer will slide free of range. Push up under center and roll out To replace drawer: 1. Slide drawer back in on tracks until the drawer stop hits - Whirlpool RF3010XEW | Use and Care Guide - Page 18
the normal safe operation of a listed appliance. Damage, such as discoloration or delamination may occur. Mobile home installation The installation of this range must conform with the Manufactured Home Construction and Safety Standard, Title 24 CFR, Part 3280 (formerly the Federal Standard for - Whirlpool RF3010XEW | Use and Care Guide - Page 19
MODEL 30" ELECTRIC 20" ELECTRIC OVERALL HEIGHT COOKTOP HEIGHT DIM. "A" DIM. "B" 40" 36" 40" 36 1/4" WIDTH DIM. "C" 30" 20 3/16" Parts supplied: Tools needed: DEPTH WITHOUT HANDLE DIM. "D" 26" 24 1/2" DEPTH WITH HANDLE DIM. "E" 27 1/8" 25 1/2" level 2 screws #10 x 1" O Phillips - Whirlpool RF3010XEW | Use and Care Guide - Page 20
of cooktop, see Note.*** if 4 Of Do Not pinch the power supply cord between the range and the wall. Do Not seal the range to the side cabinets. Oven side panels must extend beyond cabinet fronts by 1/4" where 0" ( supplied, see Page 23 and the anti-tip bracket template/instruction sheet. -19- - Whirlpool RF3010XEW | Use and Care Guide - Page 21
cord enters the appliance. If connecting to a four wire system: This range is manufactured with the ground connected to the cabinet. This ground must be revised so the green grounding wire of the four-wire power supply cord is connected to the cabinet. See "Special grounding instructions for 4-wire - Whirlpool RF3010XEW | Use and Care Guide - Page 22
prevent damage to floor coverings. Porcelain backguard installation 1. Move range cooktop forward about two inches and position backguard over the backguard support. 2. Attach backguard to backguard support with (4) (A) wing nuts. A '410 3. On the front of the backguard, two nuts are provided - Whirlpool RF3010XEW | Use and Care Guide - Page 23
, cord or cable, center the conduit bracket below the terminal block. Secure with (3) metal screws to range rear wall. Special grounding instructions for 4-wire systems WARNING: Frame grounded to neutral of appliance through a link. If used in a MOBILE HOME or if LOCAL CODES do not permit grounding - Whirlpool RF3010XEW | Use and Care Guide - Page 24
instructions can result in death or serious burns to children and adults. Making sure the anti-tip bracket is installed: • Slide range forward. • Look for the anti-tip bracket securely attached to floor. • Slide range back so rear range foot is under anti-tip bracket. Range Foot NOTICE: Parts - Whirlpool RF3010XEW | Use and Care Guide - Page 25
BEFORE YOU CALL FOR SERVICE Before you call for service, review this list. It may save you time and expense. This list includes common occurrences that are not the result of defective workmanship or materials in the appliance. Find your problem here OVEN AND SURFACE UNITS WILL NOT WORK AT ALL. OVEN - Whirlpool RF3010XEW | Use and Care Guide - Page 26
save you the cost of a service call. If you still need help, follow the instructions below. If you need Assistance or Service Call the Consumer Assistance Center the dealer, authorized servicer, and we have failed to resolve your problem, you can contact the Major Appliance Consumer Action Program - Whirlpool RF3010XEW | Use and Care Guide - Page 27
or use of products not mentioned in this manual. D. Repairs to parts or systems caused by unauthorized modifications made to the appliance. E. Repairs when your range is used in other than normal, single-family household use. WHIRLPOOL CORPORATION SHALL NOT BE LIABLE FOR INCIDENTAL OR CONSEQUENTIAL
-
 1
1 -
 2
2 -
 3
3 -
 4
4 -
 5
5 -
 6
6 -
 7
7 -
8
-
9
-
10
-
11
-
12
-
13
-
14
-
15
-
16
-
17
-
18
-
19
-
20
-
21
-
22
-
23
-
24
-
25
-
26
-
27
 |
 |
Use
and
Care
Manual
and
Installation
Instructions
Electric
Range
Important
Safety
Instructions
1-3
Use
and
Care
Getting
to
Know
your
Range
4
Surface
Cooking
5-6
Using
your
Oven
7-11
Using
your
Broiler
11
Changing
the
Oven
Light
Bulb
(Some
Models)
12
Care
and
Cleaning
13-16
Installation
Instructions
Proper
Installation
17
Mobile
Home
Installation
17
Product
Dimensions
18
Parts
Supplied
18
Tools
Needed
18
Cabinet
Dimensions/Requirements
19
Electrical
Requirements
20
Installation
Steps
21-23
Before
You
Call
for
Service
24
If
You
Need
Assistance
25
Warranty
27
4
is
A
WARNING
*
ALL
RANGES
CAN
TIP
*
INJURY
TO
PERSONS
COULD
RESULT
*
INSTALL
ANTI
-TIP
DEVICE
PACKED
WITH
RANGE
*
SEE
INSTALLATION
INSTRUCTIONS
Note
to
Consumer:
Please
save
this
manual
for
future
reference.
Note
to
Installer:
IMPORTANT:
Please
leave
this
manual
and
other
literature
with
the
consumer
for
future
use.
IMPORTANT:
Please
be
sure
to
leave
these
instructions
for
the
local
electrical
inspector's
use.
PART
NO
4364040-799