Whirlpool RF3010XEW Use and Care Guide - Page 20
Whirlpool RF3010XEW Manual
 |
View all Whirlpool RF3010XEW manuals
Add to My Manuals
Save this manual to your list of manuals |
Page 20 highlights
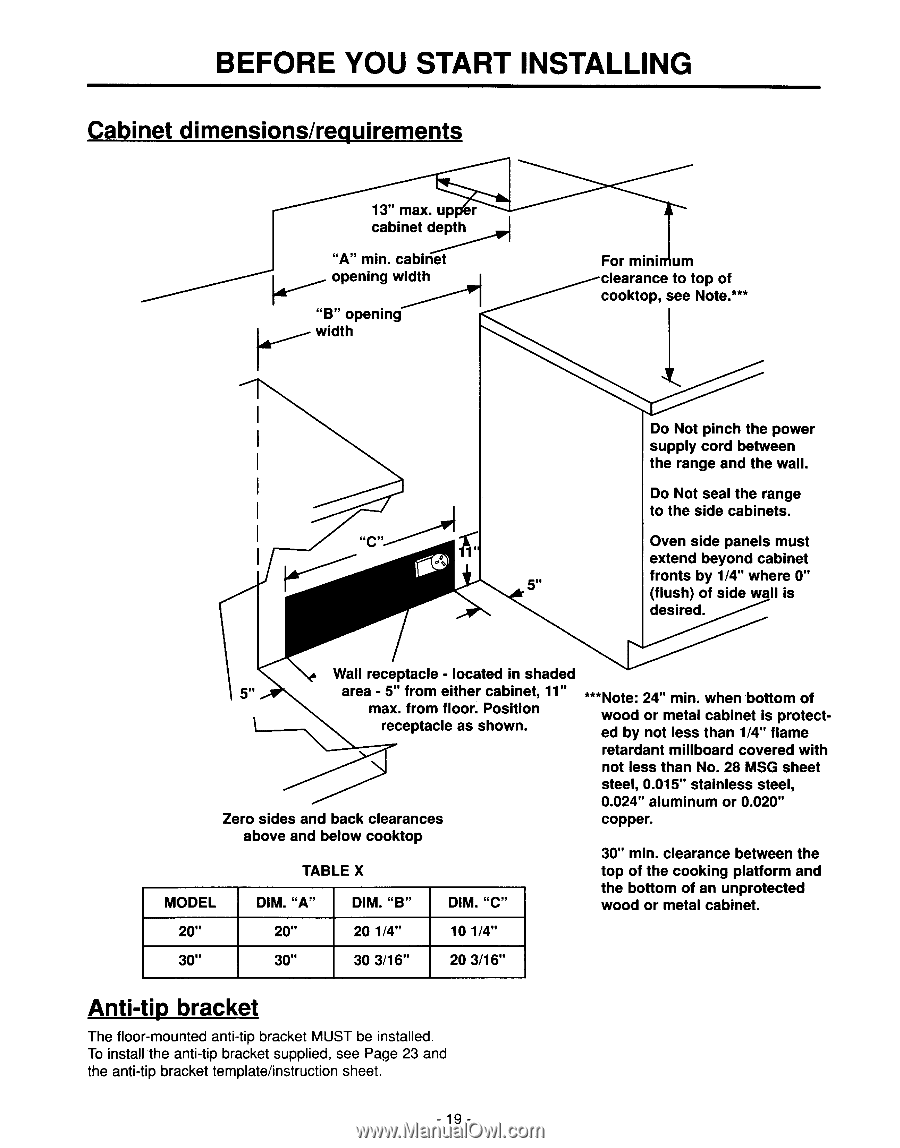
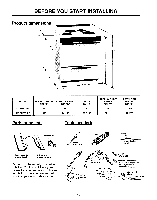
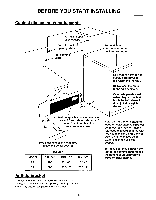
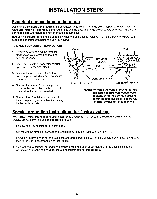
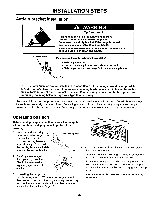
BEFORE YOU START INSTALLING Cabinet dimensions/requirements 13" max. up • er cabinet depth "A" min. cabinet opening width "B" opening width For minimum clearance to top of cooktop, see Note.*** if 4 Of Do Not pinch the power supply cord between the range and the wall. Do Not seal the range to the side cabinets. Oven side panels must extend beyond cabinet fronts by 1/4" where 0" (flush) of side wall is desired. Wall receptacle - located in shaded area - 5" from either cabinet, 11" max. from floor. Position ***Note: 24" min. when bottom of wood or metal cabinet is protect- receptacle as shown. ed by not less than 1/4" flame retardant millboard covered with not less than No. 28 MSG sheet steel, 0.015" stainless steel, 0.024" aluminum or 0.020" Zero sides and back clearances copper. above and below cooktop 30" min. clearance between the TABLE X top of the cooking platform and MODEL DIM. "A" DIM. "B" DIM. "C" the bottom of an unprotected wood or metal cabinet. 20" 20" 20 1/4" 10 1/4" 30" 30" 30 3/16" 20 3/16" Anti-tip bracket The floor-mounted anti-tip bracket MUST be installed. To install the anti-tip bracket supplied, see Page 23 and the anti-tip bracket template/instruction sheet. -19-
-
 1
1 -
2
-
3
-
4
-
5
-
6
-
7
-
8
-
9
-
10
-
11
-
12
-
13
-
14
-
 15
15 -
 16
16 -
 17
17 -
 18
18 -
 19
19 -
 20
20 -
 21
21 -
 22
22 -
 23
23 -
 24
24 -
 25
25 -
26
-
27
 |
 |