Whirlpool RF3010XEW Use and Care Guide - Page 24
Whirlpool RF3010XEW Manual
 |
View all Whirlpool RF3010XEW manuals
Add to My Manuals
Save this manual to your list of manuals |
Page 24 highlights
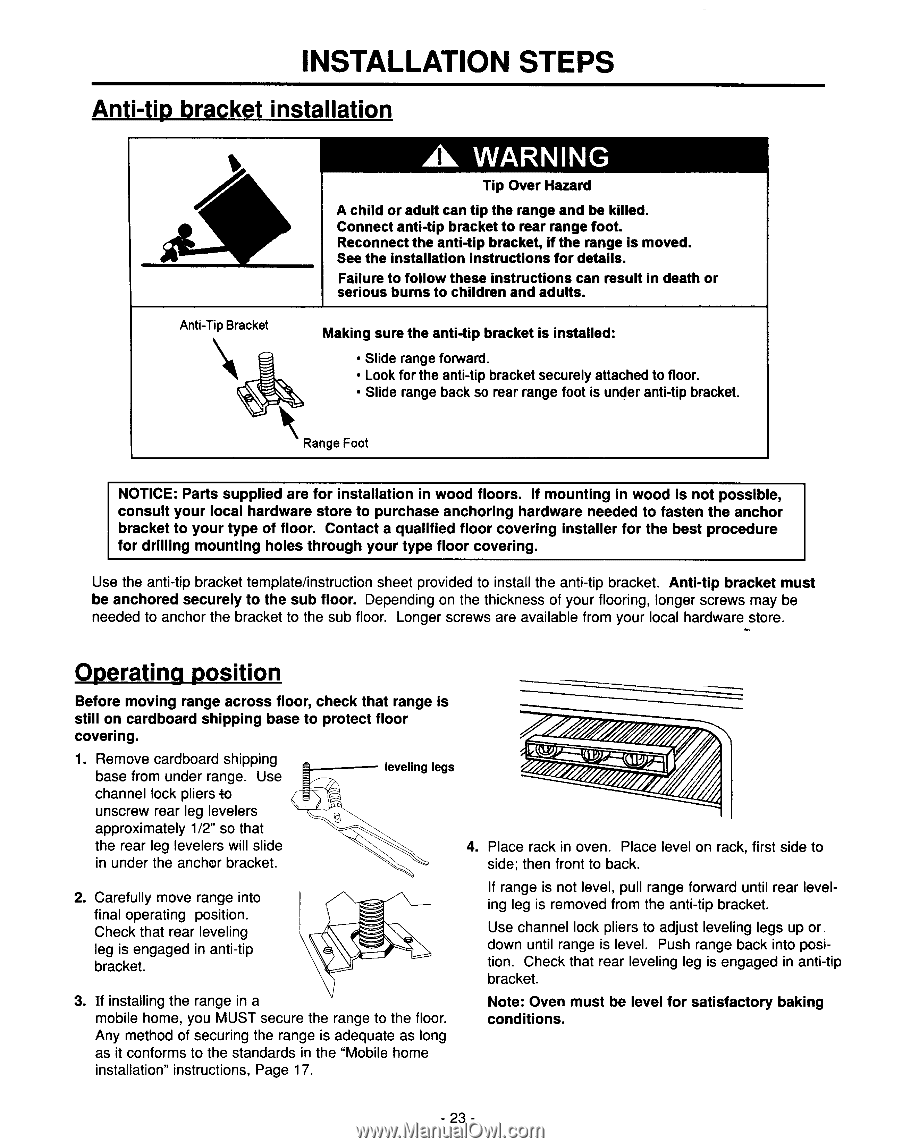
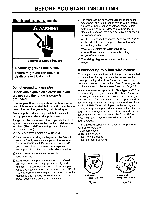
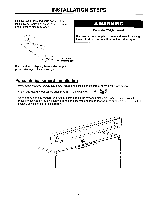
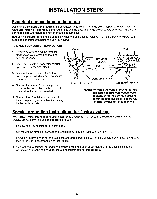
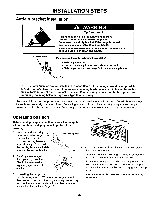
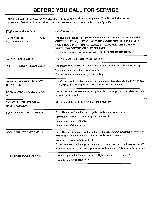
INSTALLATION STEPS Anti-tip bracket installation Anti-Tip Bracket Aa WARNING Tip Over Hazard A child or adult can tip the range and be killed. Connect anti-tip bracket to rear range foot. Reconnect the anti-tip bracket, if the range is moved. See the installation instructions for details. Failure to follow these instructions can result in death or serious burns to children and adults. Making sure the anti-tip bracket is installed: • Slide range forward. • Look for the anti-tip bracket securely attached to floor. • Slide range back so rear range foot is under anti-tip bracket. Range Foot NOTICE: Parts supplied are for installation in wood floors. If mounting in wood is not possible, consult your local hardware store to purchase anchoring hardware needed to fasten the anchor bracket to your type of floor. Contact a qualified floor covering installer for the best procedure for drilling mounting holes through your type floor covering. Use the anti-tip bracket template/instruction sheet provided to install the anti-tip bracket. Anti-tip bracket must be anchored securely to the sub floor. Depending on the thickness of your flooring, longer screws may be needed to anchor the bracket to the sub floor. Longer screws are available from your local hardware store. Operating position Before moving range across floor, check that range is still on cardboard shipping base to protect floor covering. 1. Remove cardboard shipping base from under range. Use channel lock pliers to unscrew rear leg levelers approximately 1/2" so that the rear leg levelers will slide in under the anchor bracket. leveling legs 4. Place rack in oven. Place level on rack, first side to side; then front to back. 2. Carefully move range into final operating position. Check that rear leveling leg is engaged in anti-tip bracket. If range is not level, pull range forward until rear leveling leg is removed from the anti-tip bracket. Use channel lock pliers to adjust leveling legs up or down until range is level. Push range back into position. Check that rear leveling leg is engaged in anti-tip bracket. 3. If installing the range in a mobile home, you MUST secure the range to the floor. Any method of securing the range is adequate as long as it conforms to the standards in the "Mobile home installation" instructions, Page 17. Note: Oven must be level for satisfactory baking conditions. - 23 -
-
 1
1 -
2
-
3
-
4
-
5
-
6
-
7
-
8
-
9
-
10
-
11
-
12
-
13
-
14
-
15
-
16
-
17
-
18
-
 19
19 -
 20
20 -
 21
21 -
 22
22 -
 23
23 -
 24
24 -
 25
25 -
 26
26 -
 27
27
 |
 |