Xerox 3250D User Guide - Page 81
Using the MFP Configurator, Printers Configuration
 |
UPC - 095205740929
View all Xerox 3250D manuals
Add to My Manuals
Save this manual to your list of manuals |
Page 81 highlights
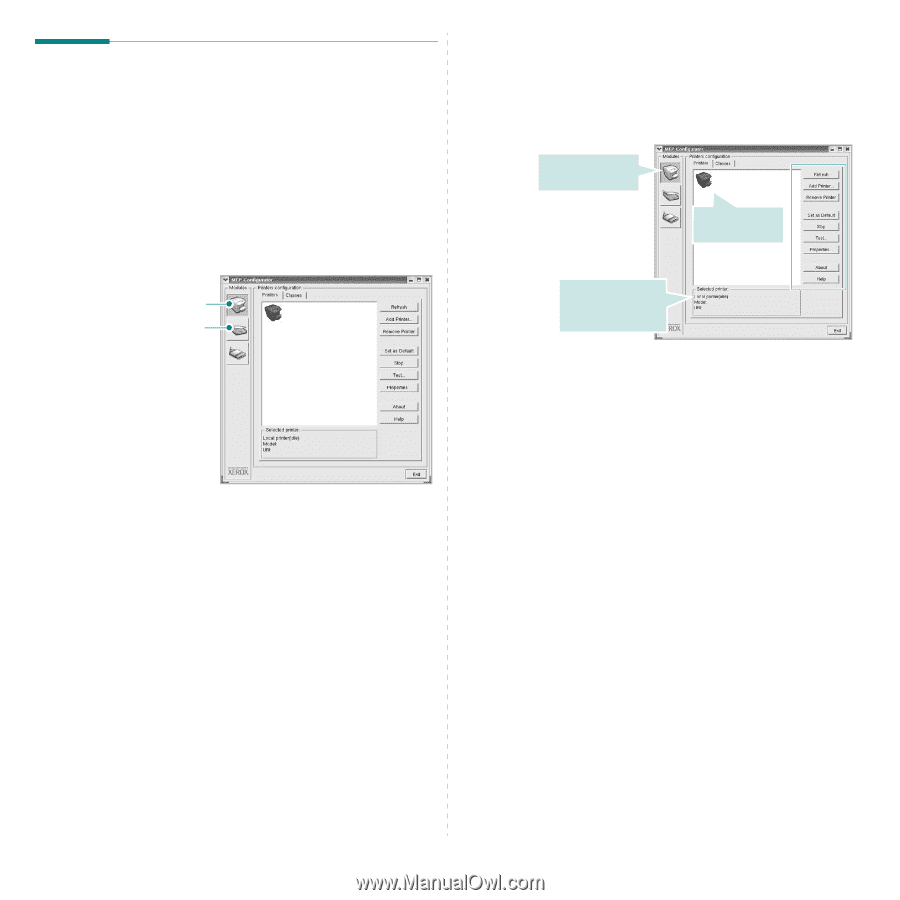
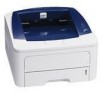
Using the MFP Configurator MFP Configurator is a tool primarily intended for configuring Printer. After installing the MFP Driver, the MFP Configurator icon will automatically be created on your desktop. Opening the MFP Configurator 1 Double-click MFP Configurator on the desktop. You can also click the Startup Menu icon and select Xerox MFP and then MFP Configurator. 2 Press each button on the Modules pane to switch to the corresponding configuration window. Printers Configuration button Ports Configuration button You can use the onscreen help by clicking Help. 3 After changing the configurations, click Exit to close the MFP Configurator. Printers Configuration Printers configuration has the two tabs: Printers and Classes. Printers Tab You can see the current system's printer configuration by clicking on the printer icon button on the left side of the MFP Configurator window. Switches to Printer configuration. Shows all of the installed printer. Shows the status, model name and URI of your printer. You can use the following printer control buttons: • Refresh: renews the available printers list. • Add Printer: allows you to add a new printer. • Remove Printer: removes the selected printer. • Set as Default: sets the current printer as a default printer. • Stop/Start: stops/starts the printer. • Test: allows you to print a test page to check if the machine is working properly. • Properties: allows you to view and change the printer properties. For details, see page 30. 29 Using Your Printer in Linux
-
 1
1 -
2
-
3
-
4
-
5
-
6
-
7
-
8
-
9
-
10
-
11
-
12
-
13
-
14
-
15
-
16
-
17
-
18
-
19
-
20
-
21
-
22
-
23
-
24
-
25
-
26
-
27
-
28
-
29
-
30
-
31
-
32
-
33
-
34
-
35
-
36
-
37
-
38
-
39
-
40
-
41
-
42
-
43
-
44
-
45
-
46
-
47
-
48
-
49
-
50
-
51
-
52
-
53
-
54
-
55
-
56
-
57
-
58
-
59
-
60
-
61
-
62
-
63
-
64
-
65
-
66
-
67
-
68
-
69
-
70
-
71
-
72
-
73
-
74
-
75
-
 76
76 -
 77
77 -
 78
78 -
 79
79 -
 80
80 -
 81
81 -
 82
82 -
 83
83 -
 84
84 -
 85
85 -
 86
86 -
87
-
88
-
89
-
90
 |
 |