Xerox 7500/DN Phaser 7500 User Guide - Page 51
Address Precedence, Setting the IPv6 Address Using CentreWare IS, Using CentreWare IS
 |
UPC - 095205705935
View all Xerox 7500/DN manuals
Add to My Manuals
Save this manual to your list of manuals |
Page 51 highlights
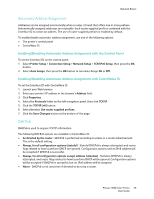
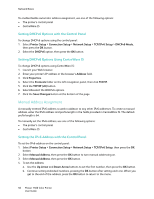
Network Basics Setting the IPv6 Address Using CentreWare IS To manually set the IPv6 address using CentreWare IS: 1. Launch your Web browser. 2. Enter your printer's IP address in the browser's Address field. 3. Click Properties. 4. Select the Protocols folder on the left navigation panel, then click TCP/IP. 5. Click the TCP/IP (v6) button. 6. In the Manual Address Assignment field, select Use this address, and then type the address. 7. Click the Save Changes button at the bottom of the page. Address Precedence Address precedence can be set to prefer IPv6 or IPv4 addresses when both types are available. The default setting is to prefer IPv6 addresses. Address Precedence can only be set in CentreWare IS. Using CentreWare IS To set address precedence using CentreWare IS: 1. Launch your Web browser. 2. Enter your printer's IP address in the browser's Address field. 3. Click Properties. 4. Select the Protocols folder on the left navigation panel, then click TCP/IP. 5. Click the TCP/IP (v6) button. 6. In the Address Precedence field, select the desired option. 7. Click the Save Changes button at the bottom of the page. Phaser 7500 Color Printer 51 User Guide
-
 1
1 -
2
-
3
-
4
-
5
-
6
-
7
-
8
-
9
-
10
-
11
-
12
-
13
-
14
-
15
-
16
-
17
-
18
-
19
-
20
-
21
-
22
-
23
-
24
-
25
-
26
-
27
-
28
-
29
-
30
-
31
-
32
-
33
-
34
-
35
-
36
-
37
-
38
-
39
-
40
-
41
-
42
-
43
-
44
-
45
-
 46
46 -
 47
47 -
 48
48 -
 49
49 -
 50
50 -
 51
51 -
 52
52 -
 53
53 -
 54
54 -
 55
55 -
 56
56 -
57
-
58
-
59
-
60
-
61
-
62
-
63
-
64
-
65
-
66
-
67
-
68
-
69
-
70
-
71
-
72
-
73
-
74
-
75
-
76
-
77
-
78
-
79
-
80
-
81
-
82
-
83
-
84
-
85
-
86
-
87
-
88
-
89
-
90
-
91
-
92
-
93
-
94
-
95
-
96
-
97
-
98
-
99
-
100
-
101
-
102
-
103
-
104
-
105
-
106
-
107
-
108
-
109
-
110
-
111
-
112
-
113
-
114
-
115
-
116
-
117
-
118
-
119
-
120
-
121
-
122
-
123
-
124
-
125
-
126
-
127
-
128
-
129
-
130
-
131
-
132
-
133
-
134
-
135
-
136
-
137
-
138
-
139
-
140
-
141
-
142
-
143
-
144
-
145
-
146
-
147
-
148
-
149
-
150
-
151
-
152
-
153
-
154
-
155
-
156
-
157
-
158
-
159
-
160
-
161
-
162
-
163
-
164
 |
 |
