Yamaha EZ150 Owner's Manual - Page 47
Change chords using the auto accompaniment feature., Starting with a A or B
 |
UPC - 086792278339
View all Yamaha EZ150 manuals
Add to My Manuals
Save this manual to your list of manuals |
Page 47 highlights
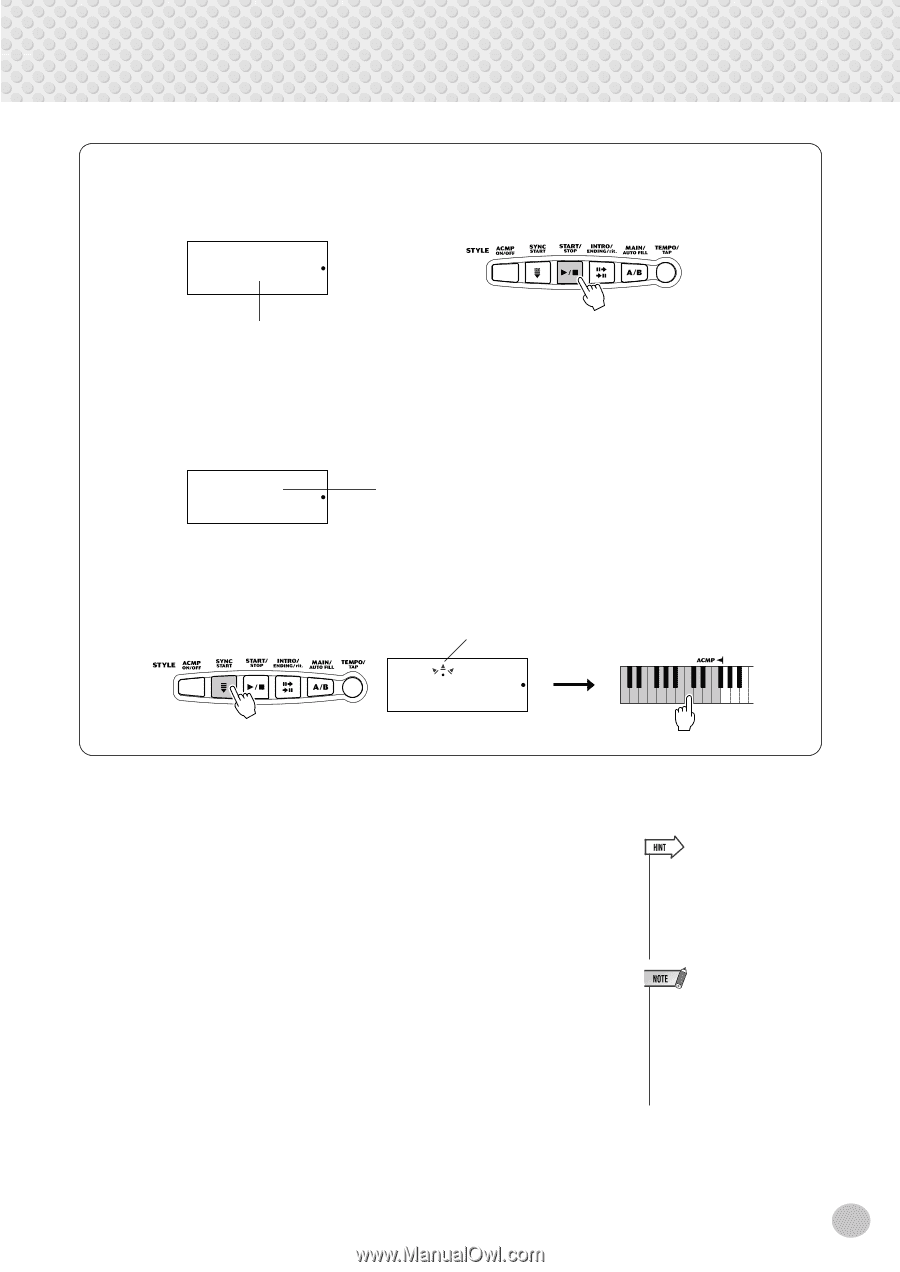
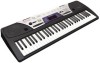
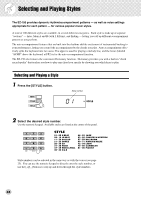
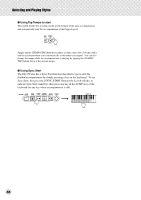
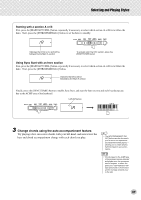
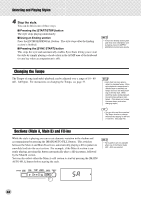
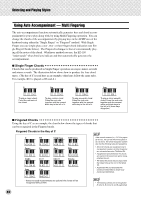
Selecting and Playing Styles Starting with a section A or B First, press the [MAIN/AUTO FILL] button, repeatedly if necessary, to select which section (A or B) is to follow the Intro. Next, press the [INTRO/ENDING/rit.] button to set the Intro to standby. 1A Indicates that Intro is on, and will be followed by the Main A section. To actually start the Intro section, press the [START/STOP] button. Using Sync Start with an Intro section First, press the [MAIN/AUTO FILL] button, repeatedly if necessary, to select which section (A or B) is to follow the Intro. Next, press the [INTRO/ENDING/rit.] button. 1A Indicates that Intro will be followed by the Main A section. Finally, press the [SYNC START] button to enable Sync Start, and start the Intro section and style by playing any key in the ACMP area of the keyboard. Left dot flashes 1A 3 Change chords using the auto accompaniment feature. Try playing a few successive chords with your left hand, and notice how the bass and chord accompaniment change with each chord you play. • The [ACCOMPANIMENT ON/ OFF] button can also be used to turn off and on the bass/chord accompaniment while playing - allowing you to create dynamic rhythmic breaks in your performance. • Chords played in the ACMP area of the keyboard are also detected and played when the accompaniment is stopped. In effect, this gives you a "split keyboard," with bass and chords in the left hand and the normally selected voice in the right. 47
-
 1
1 -
2
-
3
-
4
-
5
-
6
-
7
-
8
-
9
-
10
-
11
-
12
-
13
-
14
-
15
-
16
-
17
-
18
-
19
-
20
-
21
-
22
-
23
-
24
-
25
-
26
-
27
-
28
-
29
-
30
-
31
-
32
-
33
-
34
-
35
-
36
-
37
-
38
-
39
-
40
-
41
-
 42
42 -
 43
43 -
 44
44 -
 45
45 -
 46
46 -
 47
47 -
 48
48 -
 49
49 -
 50
50 -
 51
51 -
 52
52 -
53
-
54
-
55
-
56
-
57
-
58
-
59
-
60
-
61
-
62
-
63
-
64
-
65
-
66
-
67
-
68
 |
 |