Yamaha EZ150 Owner's Manual - Page 9
Rear Panel, MULTI PAD/DJ GAME] buttons
 |
UPC - 086792278339
View all Yamaha EZ150 manuals
Add to My Manuals
Save this manual to your list of manuals |
Page 9 highlights
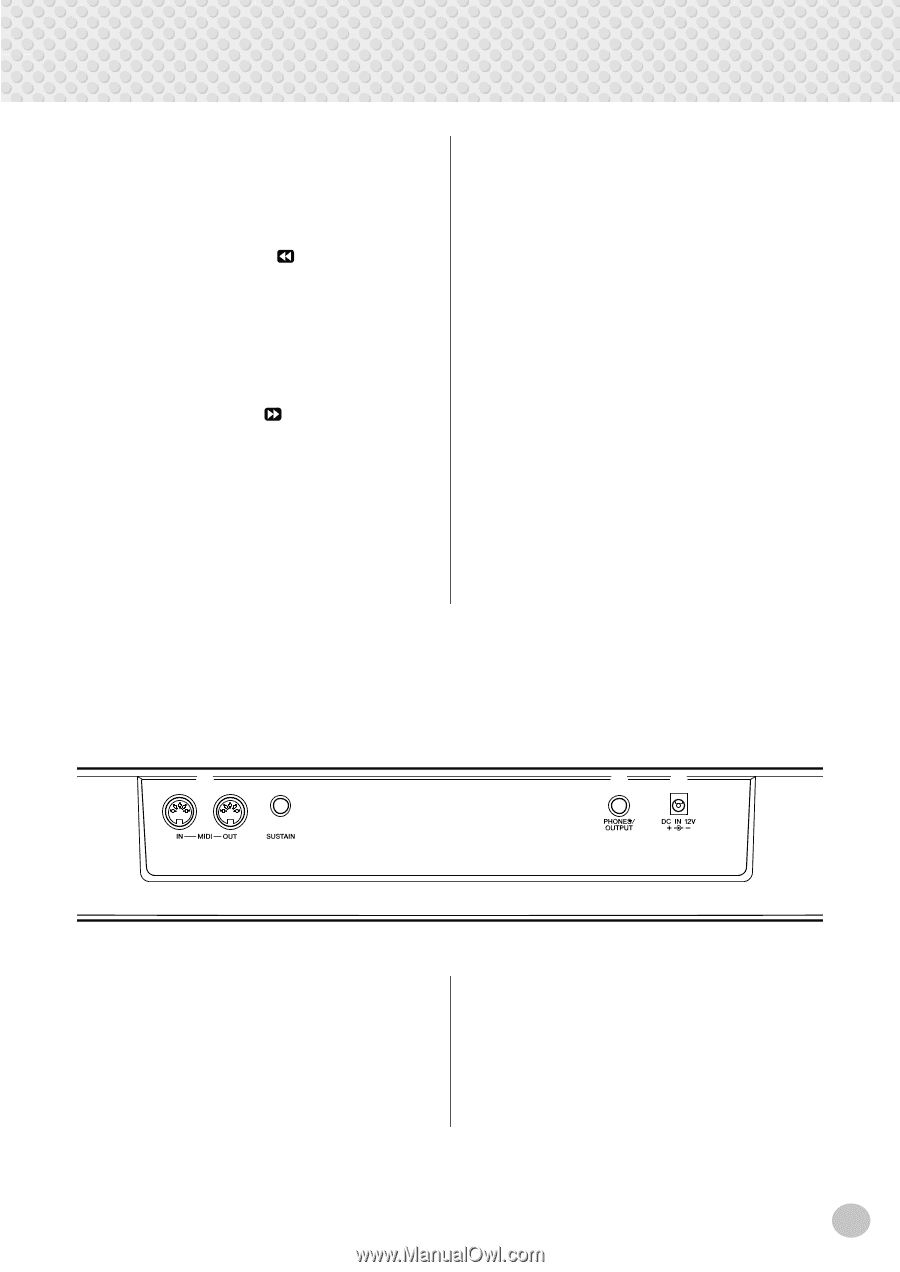
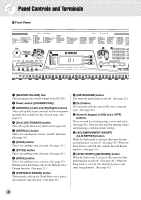
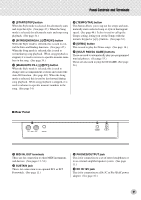
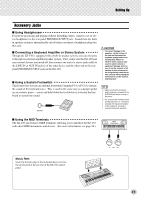
Panel Controls and Terminals !5 [START/STOP] button When the Style mode is selected, this alternately starts and stops the style. (See page 45.) When the Song mode is selected, this alternately starts and stops song playback. (See page 34.) !6 [INTRO/ENDING/rit.] ([ REW]) button When the Style mode is selected, this is used to control the Intro and Ending functions. (See page 47.) When the Song mode is selected, this is used to rewind during song playback. When song playback is stopped, it is used to reverse to specific measure numbers in the song. (See page 34.) !7 [MAIN/AUTO FILL] ([ FF]) button When the Style mode is selected, this is used to change auto accompaniment sections and control the Auto Fill function. (See page 48.) When the Song mode is selected, this is used to fast forward during song playback. When song playback is stopped, it is used to advance to specific measure numbers in the song. (See page 34.) !8 [TEMPO/TAP] button This button allows you to tap out the tempo and automatically start a selected song or style at that tapped speed. (See page 46.) It also is used to call up the Tempo setting, letting you set the Tempo with the numeric keypad or [+]/[-] buttons. (See page 33.) !9 [DEMO] button This is used to play the Demo songs. (See page 14.) @0 [MULTI PAD/DJ GAME] buttons These are used to automatically play pre-programmed musical phrases. (See page 53.) These are also used to play the DJ GAME. (See page 24.) I Rear Panel @1 @3 @4 @1 MIDI IN, OUT terminals These are for connection to other MIDI instruments and devices. (See pages 11, 54.) @2 SUSTAIN jack This is for connection to an optional FC4 or FC5 Footswitch. (See page 11.) @3 PHONES/OUTPUT jack This is for connection to a set of stereo headphones or to an external amplifier/speaker system. (See page 11.) @4 DC IN 12V jack This is for connection to a PA-3C or PA-3B AC power adaptor. (See page 10.) 9
-
 1
1 -
2
-
3
-
 4
4 -
 5
5 -
 6
6 -
 7
7 -
 8
8 -
 9
9 -
 10
10 -
 11
11 -
 12
12 -
 13
13 -
 14
14 -
15
-
16
-
17
-
18
-
19
-
20
-
21
-
22
-
23
-
24
-
25
-
26
-
27
-
28
-
29
-
30
-
31
-
32
-
33
-
34
-
35
-
36
-
37
-
38
-
39
-
40
-
41
-
42
-
43
-
44
-
45
-
46
-
47
-
48
-
49
-
50
-
51
-
52
-
53
-
54
-
55
-
56
-
57
-
58
-
59
-
60
-
61
-
62
-
63
-
64
-
65
-
66
-
67
-
68
 |
 |