Yamaha IIs Owner's Manual
Yamaha IIs Manual
 |
UPC - 086792645445
View all Yamaha IIs manuals
Add to My Manuals
Save this manual to your list of manuals |
Yamaha IIs manual content summary:
- Yamaha IIs | Owner's Manual - Page 1
OWNER'S MANUAL - Yamaha IIs | Owner's Manual - Page 2
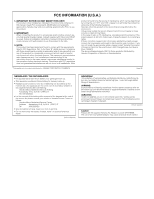
SPECIAL MESSAGE SECTION This product utilizes batteries or an external power supply (adapter). DO NOT connect this product to any power supply or adapter other than one described in the manual, on the name plate, or specifically recommended by Yamaha a qualified service representative to perform the - Yamaha IIs | Owner's Manual - Page 3
electronic devices. This equipment generates/uses radio frequencies and, if not installed and used according to the instructions found in the users manual of de volgende Yamaha Service Afdeiing: Yamaha Music Nederland Service Afdeiing Kanaalweg 18-G, supplied Yamaha AC Adaptor to power DTXTREME - Yamaha IIs | Owner's Manual - Page 4
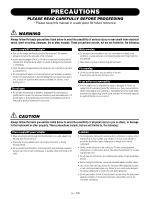
not limited to, the following: Power supply/AC power adaptor • Only use the voltage specified as correct for the instrument. The required voltage is printed on the name plate of the instrument. • Use the specified adaptor (PA-5C or PA-5D or an equivalent recommended by Yamaha) only. Using the wrong - Yamaha IIs | Owner's Manual - Page 5
instrument to other electronic components, turn off the power for all components. Before turning the power on or off for all components, set all volume levels to minimum. Also, be sure to set media such as the Yamaha MDF3 MIDI data filer, then have qualified Yamaha service personnel replace the backup - Yamaha IIs | Owner's Manual - Page 6
detailed information on a topic. Indicates special cautions and Information to avoid loss of data, damage to the instrument, etc. Contents of the Package ❏ DTXTREME IIs ❏ AC power adapter (PA-5C or PA-5D) ❏ Owner's Manual ❏ Data List ❏ DTXTREME IIs Installation Guide ❏ USB-MIDI driver (CD-ROM) 6 - Yamaha IIs | Owner's Manual - Page 7
the internal tone generator. A set of trigger-to-voice configurations can be stored as a drum kit. DTXTREME IIs stores up to 40 drum kits internally and up to 99 externally on convenient memory cards. Also, DTXTREME IIs comes with 90 preset drum kits. • Each trigger input can be set to play several - Yamaha IIs | Owner's Manual - Page 8
or an external sequencer. The sequencer also offers step recording so that you can manually create or edit a song step-by-step, using the DTXTREME IIs LCD display. • Selective playback feature. Since you can simply mute the drum or any other part in a song while controlling the volume of each part - Yamaha IIs | Owner's Manual - Page 9
30 Playing a Chain 32 Setup Edit Section 33 DTXTREME IIs as Drum System 33 From Trigger Input to Sound Output . . . 33 Memory, Buffer, and Store Operation . 35 Trigger Settings 36 Edit Pages and Basic Operations . . . . . 36 Voice Settings 48 Edit Pages and Basic Operations . . . . . 48 - Yamaha IIs | Owner's Manual - Page 10
Page buttons (▲/▼) While editing each function, use these DTXTREME IIs operations, and the LED display indicates the current drum kit STANDBY ON L MONO R 1 OUTPUT DIGITAL OUT USB FOOT SW 2 3 4 5 INDIVIDUAL OUTPUT 3 2 from the MAIN OUT slider setting. & CLICK slider Adjusts the - Yamaha IIs | Owner's Manual - Page 11
button for system settings, sampling feature, and memory card functions. • SONG JOB button Press this button to edit a User song. ª TRIGGER button Press this button to edit trigger parameters for a drum kit. , VOICE button Press this button to edit voice parameters for a drum kit. ⁄ EFFECT button - Yamaha IIs | Owner's Manual - Page 12
DTXTREME IIs and an external device such as sequencer or tone generator, for an extended MIDI system (page 18). USB port By simply connecting the DTXTREME IIs to a computer with a single USB pads and trigger sensors with a lower trigger signal. Set the DIP switch to the H position to boost ( - Yamaha IIs | Owner's Manual - Page 13
switch Turns the DTXTREME IIs on or off. Cable hook Fix the DC power cord of the supplied AC power adapter here to ensure the plug will not come loose. DC IN jack Connect the supplied AC power adapter (PA-5C or PA-5D) here. HI-HAT CONTROL jack Connect a foot controller for hi-hats (Yamaha HH series - Yamaha IIs | Owner's Manual - Page 14
and designed especially for use with Yamaha System Drums. Drum Trigger (DT series) These trigger pickups are designed for attaching to acoustic drums, making them ideal for expanding the capabilities of your acoustic drum kit with the DTXTREME IIs electronic sounds. Each pickup can produce a single - Yamaha IIs | Owner's Manual - Page 15
drum kit (snare drum, other toms, percussion instruments, etc.). Detaching a Drum Trigger You'll need to detach the trigger when replacing the drum remnants may cause problems regarding trigger sensitivity (poor or no triggering, double triggering, etc.). Attaching to a Snare Drum Attach the sensor - Yamaha IIs | Owner's Manual - Page 16
each pad to the appropriate trigger input jack on the DTXTREME IIs rear panel. Appropriate names are printed beside each jack, Drum Trigger ▲ ▲ ▲ ▲ ▲ ▲ DT20 Drum Trigger ▲ ▲ ▲ ▲ ▲ ▲ DT30 Drum Trigger ▲ ▲ ▲ ▲ ▲ ▲ HH80A Hi-hat Controller HH60 Hi-hat Controller HH65 Hi-hat - Yamaha IIs | Owner's Manual - Page 17
since the instrument supports various types of connections. Here we'll show you some typical audio and MIDI connections so that you can learn how to fit the DTXTREME IIs system into your own working environment. Audio Connections When recording your performance on a DTXTREME IIs drum kit or sending - Yamaha IIs | Owner's Manual - Page 18
the DTXTREME IIs and a personal computer with a single USB cable. With a USB connection, you can record your performance on the drum kit - and even the song playback of the Instrument - with MIDI sequencer software on your computer. You can also play the internal tone generator of the DTXTREME IIs - Yamaha IIs | Owner's Manual - Page 19
STANDBY position. Plug the supplied AC power adapter to the DC IN jack on the DTXTREME IIs rear panel. Fix the power cord to the cable hook fier or powered speakers). DRUM TRIGGER MODULE MIDI master devices DTXTREME IIs Audio equipment (first mixer, then amplifier) The DTXTREME IIs displays a - Yamaha IIs | Owner's Manual - Page 20
we'll explain how to use these controls. 2 DRUM TRIGGER MODULE 3 1 4 1 The DTXTREME IIs has seven function modes. You can select each mode by SHIFT button and turn the appropriate knob. When you are editing a drum kit and want to set the same parameters for different targets (trigger inputs 1 to - Yamaha IIs | Owner's Manual - Page 21
PCY any PCY any PCY any PCY HI-HAT 8 RHH 130 RHH 130 RHH 130 any DTXTREME IIs drum kit. Go to the Play Section to learn some of the performance functions of the DTXTREME IIs. n Preset trigger sets (type1 to type6) are used for the Preset kits (P1 to P90). When you play one of the User kits - Yamaha IIs | Owner's Manual - Page 22
conveniently always enters the Play mode when it is turned on. The Play mode is where you can start working and playing with the DTXTREME IIs - simply select a drum kit and song to play (or edit in other modes). Other features related to performance are also accessible in Play mode. You can play any - Yamaha IIs | Owner's Manual - Page 23
n TEMPO is not adjustable when " =ext" is displayed, or in other words, when DTXTREME IIs is synchronized to an external clock (page 82). n Since every song contains information about the playback tempo, your tempo setting might be overwritten when you start or select a song or reset the playback - Yamaha IIs | Owner's Manual - Page 24
Song Playback In addition to the basic start/stop control of the song, the DTXTREME IIs lets control how the song is played, which part is played, and so repeats song playback from beginning to end until you stop it manually. ❏ Settings: (normal playback), (repeated playback) 2 TRACK 1 & TRACK - Yamaha IIs | Owner's Manual - Page 25
that is set specifically for that control. Each drum kit can contain pad songs as part of the sound program (page 40), and some Preset kits are provided with pad songs. Since the DTXTREME IIs can play (including data from MIDI IN or USB port) will not be sent to the built-in tone generator. 25 - Yamaha IIs | Owner's Manual - Page 26
DTXTREME IIs incorporates a simple but powerful mixer. There are ten sliders on the top panel for adjusting the volume balance, reverb effect, and the levels of the Individual Outputs. Adjusting the Volume Balance The following sliders let you control the volume balance between rhythm instruments - Yamaha IIs | Owner's Manual - Page 27
instrument can be freely assigned to any output (page 75), you can adjust the master output level for multiple instruments with a single slider. For example, the CYMBAL slider can become the master fader for all cymbals including hi-hats or only for the snare drum, depending on their output settings - Yamaha IIs | Owner's Manual - Page 28
stop blinking and remain lit. 5. Repeat steps 2 to 4 if you want to restart tempo detection. 6. Press the EXIT/NO button to finish the tempo setting and return to the Play mode display. n The Tap Tempo feature cannot be used during recording or in recording standby. [TAP TEMPO] TEMPO =115 BEAT - Yamaha IIs | Owner's Manual - Page 29
to measure the timing tightness of a specific instrument such as the snare or bass drum. Average: The difference in timing accuracy is setting a different note length from the CLICK beat. 3. If necessary, set the TEMPO, BEAT and CLICK values as in the default display (page 23). 4. Play the drum kit - Yamaha IIs | Owner's Manual - Page 30
drum kits to be selected in a specific order - for example, to match that of a set list in a live performance, or to use with a series of practice songs arranged in order of difficulty. The DTXTREME IIs beforehand (page 32). Chain Edit Screen Here you can arrange drum kits or songs one by one to - Yamaha IIs | Owner's Manual - Page 31
3 is set to jump: 1~32 (chain) n If you select a drum kit or a song on the memory card (C1-C99 for each), you'll need the appropriate memory card containing the relevant drum kit or song data for correct playback of the chain. Otherwise, "No Card" is shown in the display. Procedure Create or edit - Yamaha IIs | Owner's Manual - Page 32
: 1~32 2 Step= Select a step number for the current chain 1, which calls up the drum kit or song assigned to that step (the name and number appears at the right). Kit=xxx xxx, Song=xxx xxx. ❏ Settings: 1~32 (depending on each chain) Procedure In addition to the panel knob, you can assign increment - Yamaha IIs | Owner's Manual - Page 33
Edit Section Edit Section DTXTREME IIs as Drum System Because of their quick decay and non-pitched nature, drum and percussion instruments are ideal for electronic music. Rhythm machines and samplers make it easy to use actual instrument sounds and assemble the rhythms in authentic, dynamic ways. - Yamaha IIs | Owner's Manual - Page 34
Edit Section 1 Send trigger signals to the DTXTREME IIs by hitting drum pads (or drums attached with a trigger pickup) connected to the trigger input jacks 1 to 16 and the HI-HAT CONTROL and FOOT SW jacks. 2 Set each trigger input properly so that DTXTREME IIs can receive the trigger signals, and - Yamaha IIs | Owner's Manual - Page 35
kit or a User kit from the DTXTREME IIs internal memory or an external memory card, the drum kit data is copied to the working buffer. Internal memory Preset kit (ROM) External memory card 2. Copy to buffer User kit (RAM) Working buffer 1. Select a kit 3. Editing/Playing DRUM TRIGGER MODULE - Yamaha IIs | Owner's Manual - Page 36
editing trigger settings for the drum kit you are working with. n Trigger settings are the most important part for your drum kit to sound various voices properly. If necessary, first copy existing trigger settings (page 44) from a Preset kit can set up each trigger input on the DTXTREME IIs rear - Yamaha IIs | Owner's Manual - Page 37
pad types that can be set for the connected pads or trigger pickups. ❏ Settings: Refer to the following table. DTXTREME IIs Pad Types KP KP65/ pad rim is hit. *3 "RHH" also supports the TP65S pad. Rim 2 TP120SD/ TP100 TP65S Rim 1 Rim 1 Rim 2 3 Gain Set the input gain for the pad type 2. The - Yamaha IIs | Owner's Manual - Page 38
Edit Section 6 Level Set the Settings: Minimum level: 0~99, Maximum level: 1~100 7 Velocity Set the range of velocity values that corresponds to the Level range 6, as minimum and maximum values. The drum the trigger level generated by holding the rim will be converted to a velocity value of zero. 38 - Yamaha IIs | Owner's Manual - Page 39
Edit Section [TrgSens3] Rejection This page contains three different settings to prevent "false hits" - drum kit. If a trigger signal is generated at the target input 1 and its level is lower than specified here, that trigger signal is detected as crosstalk. ❏ Settings: 0 (no rejection) ~9 4 Spec - Yamaha IIs | Owner's Manual - Page 40
Edit Section Setting a Pad Song You can play up to four pad songs from one drum kit. If you have already specified four pad songs for other trigger inputs, the following parameters 3~5 cannot be set and "---" is shown in the display. 3 Song Select a song for the pad song. You cannot choose a song - Yamaha IIs | Owner's Manual - Page 41
Edit the internal tone generator and is used to mute a drum voice assigned to that MIDI note number. If this voice is set to receive the Note hi- hat pedal is released. • opRim2: For a rim2 sound by hitting the pad while the hi- hat pedal is released. n The mute note setting is a powerful performance - Yamaha IIs | Owner's Manual - Page 42
you that the same drum voice would be triggered from multiple pads. For your information, copying trigger settings from a Preset kit (page 44) tone generator from an external MIDI controller, as well as sending the Note On event to an external sound module by hitting the pad. ❏ Settings: 1~16 - Yamaha IIs | Owner's Manual - Page 43
play more softly, and 2nd note will sound louder when you play harder. Volume 1st 2nd 0 ❏ Settings: 1~10 1 Volume Velocity 2 Volume 0 3 Volume Velocity 0 4 Volume Velocity Edit Section [TrgMIDI3] Velocity Crossfade We've seen earlier how to convert the trigger signal into a specific velocity - Yamaha IIs | Owner's Manual - Page 44
Input Select the destination trigger input of the drum kit 2. ❏ Settings: 1~16 Copying from the Current Drum Kit [TrgCopy2]Copy Current Trigger to Kit U1 1 1 (to) Kit Select the destination drum kit. ❏ Settings: U1~U40 [MIDIEG] MIDI Envelope Generator In this page, you can create a MIDI-controlled - Yamaha IIs | Owner's Manual - Page 45
channel to output MIDI data 5 from the hi-hat controller. The default is channel 10 for the drum kit. ❏ Settings: 1ch~16ch (default: 10ch) 5 Type Set the type of MIDI data output from the hi-hat controller. ❏ Settings: • Ctl0~Ctl119: Controller number (default: 4) • A/T: Aftertouch • P/B up: Pitch - Yamaha IIs | Owner's Manual - Page 46
the foot switch function. ❏ Settings: • HiHat: Acts as a hi-hat controller (switching between open and closed sounds). Make sure to set an appropriate velocity value 2 when selecting this. • click: Enables or disables the click. • inc: Increment - selects the next drum kit in the Play mode display - Yamaha IIs | Owner's Manual - Page 47
the overall volume of the rhythm part including the drum kit (MIDI channel 10). ❏ Settings: 0~127 n This is the same as the volume setting for MIDI channel 10 (page 54). 5 9to10 If you set this parameter to on, trigger signals generated at trigger input 9 (KICK) will be shared with trigger - Yamaha IIs | Owner's Manual - Page 48
and make setups for other MIDI parts for playing together with a drum kit. Settings changes [Voice1] Type Voice 2* Volume Tuning 49C#2 XtrSnr rim 127 + 0.00 Edit Pages and Basic Operations Voice settings are available in the following ten pages, categorized by purpose and function. [Voice1 - Yamaha IIs | Owner's Manual - Page 49
voice, you can balance the various instruments in the drum kit. ❏ Settings: 0~127 5 Tuning Adjusts the pitch DTXTREME IIs itself, and explanations of how to use System Exclusive here are outside the scope of this manual generator (page 80), which saves you the trouble of re-assigning NoAssign every time - Yamaha IIs | Owner's Manual - Page 50
Edit Section Setting an Extra Snare Drum Extra Snare is a special snare drum voice that you can select when you specify XtrSnr for the voice category. Moreover, you can customize the snare drum using the following parameters. (These cannot be set with other voices, and "----" is shown in the - Yamaha IIs | Owner's Manual - Page 51
: -64~+63 (slower to faster) 2 KeyMode Determines how the same voice is played in response to multiple notes. ❏ Settings: • poly: No limitation until the DTXTREME IIs tone generator reaches maximum polyphony. • semi8: Up to eight polyphonic notes - every initial note will be muted to play the 9th - Yamaha IIs | Owner's Manual - Page 52
Determines whether the built-in tone generator receives Note Off events for the note number 1. Set this to off if you want to ensure that a cymbal voice or a one-shot wave sample plays to its full duration. ❏ Settings: off, on Using Note Off with Looped Voices Most drum voices are one-shot samples - Yamaha IIs | Owner's Manual - Page 53
10) to the drum kit you are editing, letting you set up an editing template for creating drum kits with similar settings. [VoiceCopy] Note Kit Note from 49C#2 to current 49C#2 1 2 3 1 (from) Note Determines the source note name (of the current drum kit). ❏ Settings: 13C#-1~94A#5 2 (to - Yamaha IIs | Owner's Manual - Page 54
for a MIDI ensemble using the built-in tone generator or external sound modules. The setting data will be sent to MIDI parts internally or externally (via MIDI OUT or USB) when you recall and play the drum kit you are currently editing. [MIDI1] Transmit PC# Ch=10 on 001 1 2 3 BankMSB - Yamaha IIs | Owner's Manual - Page 55
on the top panel let you easily mix the instrument sounds of the DTXTREME IIs. However, you can also create more complex and more flexible mixing schemes in conjunction with the output routing for each drum voice (page 53) and effect settings explained here. First, take a look at the following - Yamaha IIs | Owner's Manual - Page 56
Edit Section (Continued from previous page) 4 Completely Separate Effects If you specifically set the output of each drum voice, system effects and two insertion effects can be used as four completely separate effects. Here is a example of applying four different effects to four separate drum voices - Yamaha IIs | Owner's Manual - Page 57
] System Reverb Effect Configure the system reverb effect. This setting data will be sent to the built-in tone generator when you recall and play the drum kit you are currently editing. This setting data is shared not only with each drum voice (MIDI channel 10), but also with all other parts from - Yamaha IIs | Owner's Manual - Page 58
setting data will be sent to the built-in tone generator when you recall and play the drum kit you are currently editing. This setting data is shared not only with each drum effects to drum voices, or to make an advanced internal mix by DTXTREME IIs itself. through speakers, instruments to which the - Yamaha IIs | Owner's Manual - Page 59
effect (sound modulation) to another. This parameter can compensate for such personal differences in perception. ❏ Settings: 0~20 2m instruments, including the drum kit. ❏ Settings: 0.3~10.0 (meter) 7 Angle Determines the amount of stereo width (left to right) of the sounds of the DTXTREME IIs - Yamaha IIs | Owner's Manual - Page 60
an external MIDI keyboard in OverDub mode. Preparation for Recording Before you start recording a song, set up the DTXTREME IIs as described below. n You can start recording a song even while editing a drum kit or using other function modes. When you finish or cancel recording, you can resume working - Yamaha IIs | Owner's Manual - Page 61
. You can extend the song length before recording (page 70) if necessary, which is also helpful for editing in Step mode. 4 Quantize Determines the shortest note length to be recorded. The off setting is only available for real-time recording. Refer to the column below for information on quantizing - Yamaha IIs | Owner's Manual - Page 62
recorded data after recording (page 67). You can conveniently use the Quantize setting in step recording. If you record (enter) an 8th-note phrase can edit the recorded data using the song job features (page 65) or switch to Step mode to manually correct or edit the data. n If you switch the power - Yamaha IIs | Owner's Manual - Page 63
, where entered data is represented by a dot. The displayed resolution will vary according to the specified Quantize setting. 3 Cursor You can enter a MIDI event at the cursor position. You can also edit or delete an existing event by moving the cursor to a dot position. 4 Empty This will be shown - Yamaha IIs | Owner's Manual - Page 64
Editing 72). Program number: Set the program number. ❏ Settings: 1~128 Control Change Control Change numbers are powerful tools that give you bank of an external tone generator. Pitch Bend Set this to control the pitch of a sound. This information is identical to that generated when you move the - Yamaha IIs | Owner's Manual - Page 65
Amount Polyphonic Key Pressure Note number: Set the note number that generates a Polyphonic Key Pressure event. ❏ Settings: 0~127 Amount: Set the amount of pressure generated by the specified note number. ❏ Settings: 0~127 n The built-in tone generator does not recognize or respond to Polyphonic - Yamaha IIs | Owner's Manual - Page 66
Song Recording and Editing [Song12] Ch Transmit Volume Pan VOICE 16 on 100 064 [ 1 1 Copy From Song Select the source song using the center knob (song name also appears). ❏ Settings: Preset or User song (songs cannot be copied from the memory card) Copy Operation After selecting the source - Yamaha IIs | Owner's Manual - Page 67
to be quantized. ❏ Settings: 1, 2 2 Value Determines the smallest note length (resolution) used for quantizing. ❏ Settings: Quarter note, quarter . ❏ Settings: 30~300 n Playback tempo can also be set for each drum kit (page 47), along with the song used with the kit. When you select a kit, the - Yamaha IIs | Owner's Manual - Page 68
Song Recording and Editing [Song5] Mix Track This lets you merge all data on both tracks in the current User song. [Song7] Clear TRACK Track 1 1 1 Track Select the track you want to clear. ❏ Settings: 1, 2 [Song6] Copy Track This lets you copy a track from a Preset or User song to the specified - Yamaha IIs | Owner's Manual - Page 69
Song Recording and Editing [Song8] Copy Measure This allows you to copy data from the the beginning of the measure specified here, and overwriting data in the current song (if any). ❏ Settings: 001~999 Copy Operation After selecting the source (song, track, and measure range) in the first display - Yamaha IIs | Owner's Manual - Page 70
Song Recording and Editing [Song9] Create Measure This allows you to insert an empty to be inserted. The specified number of empty measures will be inserted from this point onward. ❏ Settings: 001~999 Insert Operation After selecting the number of measures and time signature as well as first measure - Yamaha IIs | Owner's Manual - Page 71
, both on the DTXTREME IIs' built-in tone generator and the connected external sound modules - every time you select a User song or a User kit. Meanwhile, if you select a Preset kit or a User kit for which MIDI part settings are disabled, there is a chance that the recalled drum kit will not sound - Yamaha IIs | Owner's Manual - Page 72
number 5 parameter to select a specific sound program (voice). ❏ Settings: 000~127 (for both MSB and LSB) n The built-in tone generator has no sound banks. However, you can use the two bank select events to specify where your favorite drum kit is stored: Preset bank (MSB=125, LSB=0), User bank (MSB - Yamaha IIs | Owner's Manual - Page 73
Features Utility features include overall settings of the DTXTREME IIs system, waveform sampling using the kit "INITWAVE" Volume [UT 24] Delete FileName CARD all data "DTXSONG1" Volume [UT 25] Rename FromFile CARD all kit "INIT-SYS" Volume [UT 26] MoveWave FromFile CARD "VOLUME01 /NEW-FILE - Yamaha IIs | Owner's Manual - Page 74
to Basic Operations on page 20. [UT 1] & [UT 2] EQ The EQ pages let you set the master equalizers that will be applied to the entire stereo output from the built-in tone generator. These EQ settings offer a parametric equalizer for the midrange, and a pair of shelving equalizers for the low and - Yamaha IIs | Owner's Manual - Page 75
to the output routing of each drum voice (page 53). ❏ Settings: • manual: Normal output routings as specified for the drum voices. • auto: Drum voices routed to the stereo OUTPUT are grouped into snare drum, bass drum, toms, hi-hats, cymbals, and other instruments and respectively sent to INDIVIDUAL - Yamaha IIs | Owner's Manual - Page 76
settings for easily and efficiently using the DTXTREME IIs system at any time while editing trigger or voice settings. 4 JumpRecnt This function drum kit silent between sets in a performance, for example. Enabling this function (on) prevents pad hits from triggering/playing sounds and generating - Yamaha IIs | Owner's Manual - Page 77
settings for preset drum kits (page 21). Select one of the six different presets that is most suitable for your pad configuration. ❏ Settings: type1~type6 Trigger Set any PCY any PCY HI-HAT 8 RHH RHH RHH 130 actually execute the factory set operation. The DTXTREME IIs will automatically reboot and - Yamaha IIs | Owner's Manual - Page 78
contents of the DTXTREME IIs as bulk data (System Exclusive data). You can record that data to an external device such as Yamaha MDF3 MIDI Data Filer ❏ Settings: • all data: Includes all data in the settings below. • system: Includes all Utility and System settings. • cur DKIT: Current drum kit (in - Yamaha IIs | Owner's Manual - Page 79
Change data on MIDI channel 10. You'll also need to set the DTXTREME IIs to receive Program Change data on MIDI channel 10. ❏ Settings: • native: Selects regular drum kits. • GM: Selects drum kits that correspond to GM program list (cannot select all kits). Program number 1 2 9 17 25 26 33 41 49 - Yamaha IIs | Owner's Manual - Page 80
, on (default) n Continuous data from the hi-hat controller is always sent to the built-in tone generator, regardless of this setting. 4 SysEx Enable or disable reception of System Exclusive data. Set this to off if you do not want the DTXTREME IIs to receive bulk data or parameter change messages - Yamaha IIs | Owner's Manual - Page 81
, the click can be set to automatically start or stop in sync with song playback and recording. ❏ Settings: • manual: Manually start or stop using the 1 2 3 4 Each page offers the same parameters. Using any drum voice you like, you can set the accent beat sound (played on the first beat) in the - Yamaha IIs | Owner's Manual - Page 82
save it to the memory card after editing. Since the captured sample will be lost when you turn DTXTREME IIs off, make sure prepare a memory card before you start sampling. 3 UseTempo Enable or disable using the tempo information assigned to a song or drum kit. ❏ Settings: • song: Enables the tempo - Yamaha IIs | Owner's Manual - Page 83
kit is occupying memory space, you'll need to delete it beforehand (page 84). Recording a Sample Once you've set up the DTXTREME IIs input level of the audio source in either display. For manual recording, if necessary, you can adjust the level using edit the captured sample. Utility Features 83 - Yamaha IIs | Owner's Manual - Page 84
. For fine adjustment, use a small step value. ❏ Settings: x1, x10, x1k, x10k, x100k (k=1,000 bytes) [UT 21] Deleting a Sample You can use the third WAVE page ([UT 21]) to delete all waveform data and sample data currently residing in the DTXTREME IIs memory. This helps free up additional memory for - Yamaha IIs | Owner's Manual - Page 85
Memory Card Feature You can store up to 40 drum kits (U1 to U40), up to 32 songs (U1 to U32), and 32 chains in the DTXTREME IIs internal memory. Moreover, an external memory card (SmartMedia) allows for storing many more kits, songs, and chains - as many as you want. The memory card is also useful - Yamaha IIs | Owner's Manual - Page 86
YAMAHA DTXTREME SMF @ XXXX.MID ALLDATA 1 SYSTEM 2 ONEKIT 3 ALLKIT 4 ONECHAIN 5 ALLCHAIN 6 ONESONG 7 ALLSONG 8 ALLVOICE 9 AUTOLOAD ) VOLUME ! 1 The ALLDATA directory stores a file that contains all setting data for DTXTREME IIs drum kits, File Type 0) MIDI file on the DTXTREME IIs - Yamaha IIs | Owner's Manual - Page 87
. [UT 23] Saving a Data File You can save specific data in the DTXTREME IIs memory as a file on the memory card. [UT 23] Save FileName CARD all kit "INITWAVE" 1 2 Volume 3 1 Save Determines the data type to be saved. ❏ Settings: all data, system, one kit, all kit, oneChain, allChain, one song - Yamaha IIs | Owner's Manual - Page 88
" 1 2 1 Load Determines the data type to be loaded into the DTXTREME IIs memory. If you select one data, it will be loaded in the working buffer (page 35). If you select all data, it will be loaded in the user memory (for drum kits or songs). If you select VOLUME, all data files in - Yamaha IIs | Owner's Manual - Page 89
a Data File You can rename a specific data file on the memory card. This operation will use two displays, one for specifying the target file and the other for specifying a new file name. [UT 25] Rename FromFile CARD all kit "INIT-SYS" 1 2 Volume 3 1 Rename Determines the data type. ❏ Settings: all - Yamaha IIs | Owner's Manual - Page 90
instrument is turned on. Never attempt to remove the Memory Card or turn the power off during accessing. Doing so can damage the data on the instrument seal that is peeled off. ■ Data Backup For maximum data security Yamaha recommends that you keep two copies of important data on separate Memory - Yamaha IIs | Owner's Manual - Page 91
plugged the monaural phone plug when the power is still ON. This sets the rim switch ON on the DTXTREME IIs. Turn the power OFF and ON again. ● Make sure the output MIDI channel is set to Drum Voice (ch=10). ● Make sure the pad type is set correctly. If set incorrectly, the mute and egde functions - Yamaha IIs | Owner's Manual - Page 92
● If you are playing a rim shot, set the RIM Velocity parameter in Drum Kit Trigger Edit mode to a setting other than "mute hi" and "mute lo." ● Set the unnecessary 2nd notes on to "off " in Drum Kit Trigger Edit mode. ● Set the Key mode in Drum Kit Voice Edit mode to "semi2," "semi3," "semi4" and - Yamaha IIs | Owner's Manual - Page 93
error has occurred. Turn the power OFF and then ON while holding the Play and Trigger buttons and the DTXTREME IIs will reset to its initial settings. Beware that all the data will be lost. Frequent data backup storage to external MIDI devices such as the Yamaha MDF3 is recommended to prevent lost - Yamaha IIs | Owner's Manual - Page 94
and if the MIDI data is appropriate. WARNING: All data initialized push [ENTER] All setting data is initialized because the backup battery inside the DTXTREME IIs may be running short. Consult your nearest Yamaha dealer on replacing the battery. WARNING : Battery voltage is low push [ENTER] The - Yamaha IIs | Owner's Manual - Page 95
case, the data stored on the troubled card may be corrupted. ERROR : File is unknown format push [ENTER] The DTXTREME IIs cannot recognize the specified fi preset song is selected (in Drum Kit Play mode). First select a user song and then retry loading a song. ERROR : Can't edit card song push [ENTER] - Yamaha IIs | Owner's Manual - Page 96
2.2kg Included Accessories ❏ AC Power Adaptor (PA-5C or PA-5D) ❏ Ownwer's Manual ❏ Data List ❏ DTXTREME IIs Installation Guide ❏ Warranty card ❏ CD-ROM (USB-MIDI driver) Specifications and descriptions in this product brochure are for information purposes only. YAMAHA Corp. reserves the right to - Yamaha IIs | Owner's Manual - Page 97
to a Power Source 19 Control File 88 Deleting a Sample 84 Dev.No 79 DIGITAL OUTPUT jack 13 Directory Structure 86 Displays 10 Dist 59 DrSens 59 Drum Kit Name 47 Drum Kit, current Copying from 44 Drum System 33 Drum Trigger 14 Attaching 15 DumpIntrvl 79 E Editing a Sample 84 Editing - Yamaha IIs | Owner's Manual - Page 98
11, 26 KIT 23 Kit Common Settings 47 KitName 47 (to) Kit 44, 53 L Layer 50 LCDcont 76 Learn 76 LEDdisp 76 Level 38 Load 88 Load (data file 88 Load PlayCount 82 Polyphonic Key Pressure 65 Polyphony 51 Power Source Connecting to 19 Power-On Sequence 19 Program Change 64 Q Q - Yamaha IIs | Owner's Manual - Page 99
50 Tone Generator 75 ToVolume 89 Edit pages 36 Tuning 49, 81 Two-track Sequencer 2-Track Structure 60 Features 60 MIDI I/O to External Device 60 Three Recording Modes 60 Using Preset songs 60 Type ........31, 37, 44, 45, 46, 49, 57, 58, 59, 81 U USB Settings 48 Basic operations 48 Edit - Yamaha IIs | Owner's Manual - Page 100
Siemensstraße 22-34, 25462 Rellingen, Germany Tel: 04101-3030 OTHER COUNTRIES Yamaha Music Gulf FZE LB21-128 Jebel Ali Freezone P.O.Box 17328, Dubai, U.A.E. Tel: +971-4-881-5868 ASIA THE PEOPLE'S REPUBLIC OF CHINA Yamaha Music & Electronics (China) Co.,Ltd. 25/F., United Plaza, 1468 Nanjing Road - Yamaha IIs | Owner's Manual - Page 101
Strings, Guitar & Percussion Division, Yamaha Corporation © 2003 Yamaha Corporation V908960 Printed in Taiwan
-
 1
1 -
 2
2 -
 3
3 -
 4
4 -
 5
5 -
 6
6 -
 7
7 -
8
-
9
-
10
-
11
-
12
-
13
-
14
-
15
-
16
-
17
-
18
-
19
-
20
-
21
-
22
-
23
-
24
-
25
-
26
-
27
-
28
-
29
-
30
-
31
-
32
-
33
-
34
-
35
-
36
-
37
-
38
-
39
-
40
-
41
-
42
-
43
-
44
-
45
-
46
-
47
-
48
-
49
-
50
-
51
-
52
-
53
-
54
-
55
-
56
-
57
-
58
-
59
-
60
-
61
-
62
-
63
-
64
-
65
-
66
-
67
-
68
-
69
-
70
-
71
-
72
-
73
-
74
-
75
-
76
-
77
-
78
-
79
-
80
-
81
-
82
-
83
-
84
-
85
-
86
-
87
-
88
-
89
-
90
-
91
-
92
-
93
-
94
-
95
-
96
-
97
-
98
-
99
-
100
-
101
 |
 |

OWNER’S MANUAL