Yamaha TSS-10 Owner's Manual - Page 14
PLAYING A SOURCE, To adjust the subwoofer level, To adjust the volume balance
 |
View all Yamaha TSS-10 manuals
Add to My Manuals
Save this manual to your list of manuals |
Page 14 highlights
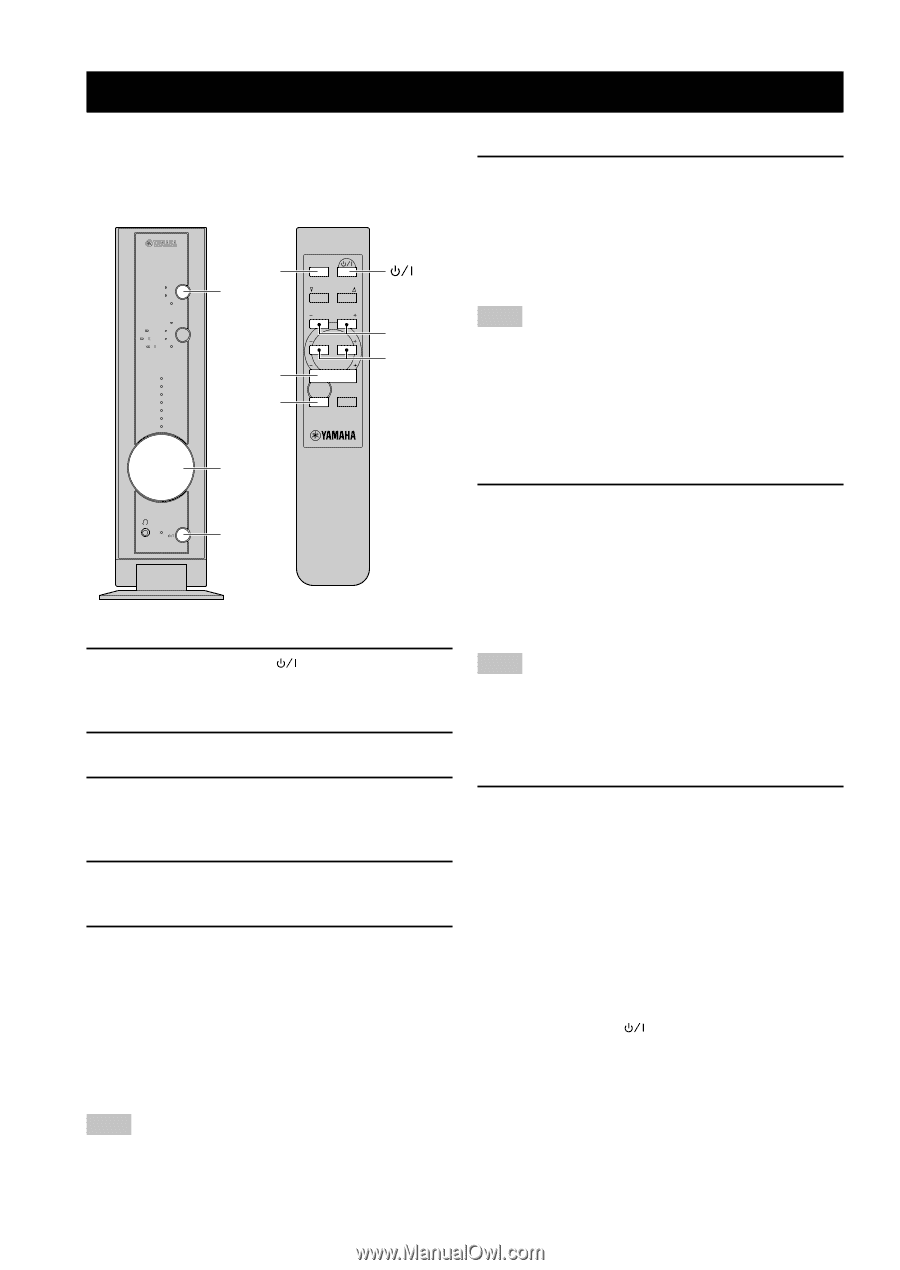
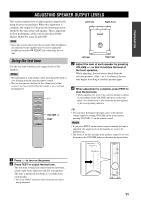
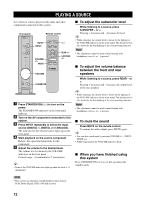
PLAYING A SOURCE Let's listen to sources played on the audio and video components connected to this system. Front panel Remote control INPUT DIGITAL 1 DIGITAL 2 ANALOG MODE DTS DIGITAL PL MOVIE PL MUSIC VOLUME TRIM 7 +6 6 +4 5 +2 4 0 3 -2 2 -4 1 -6 INPUT INPUT VOLUME +/- MUTE INPUT MODE REAR S.WOOFER VOLUME MUTE TEST REAR +/- S.WOOFER +/- VOLUME SILENT STANDBY/ON STANDBY/ON 1 Press STANDBY/ON ( ) to turn on the power. The STANDBY/ON indicator on the front panel lights up. 2 Turn on the AV component connected to this system. 3 Press INPUT repeatedly to select the input source (DIGITAL 1, DIGITAL 2 or ANALOG). The indicator for the selected source lights up on the front panel. 4 Start playback on the source component. Refer to the operation instructions for the component. 5 Adjust the volume to the desired level. The volume level is shown by the VOLUME indicators on the front panel. Control range: 0 (minimum) to 7 (maximum) y • None of the VOLUME indicators light up when the level is "0 (minimum)". I To adjust the subwoofer level While listening to a source, press S.WOOFER - or +. Pressing + increases and - decreases the level. y • While adjusting, the current level is shown by the lighting of the VOLUME indicators on the front panel. The default level is also shown by the dim lighting of the corresponding indicator. Note • The adjustment cannot be made when listening with headphones even if + or - is pressed. I To adjust the volume balance between the front and rear speakers While listening to a source, press REAR - or +. Pressing + increases and - decreases the output level of the rear speakers. y • While adjusting, the current level is shown by the lighting of the VOLUME indicators on the front panel. The default level is also shown by the dim lighting of the corresponding indicator. Note • The adjustment cannot be made when listening with headphones even if + or - is pressed. I To mute the sound Press MUTE on the remote control. To resume the audio output, press MUTE again. y • You can also cancel mute by pressing VOLUME +/-, INPUT, MODE, etc. • While being muted, the VOLUME indicators flash. I When you have finished using this system Press STANDBY/ON ( ) to set this system in the standby mode. Note • This system can reproduce sampled digital signals (Linear PCM, Dolby Digital, DTS) of 48 kHz or lower. 12
-
 1
1 -
2
-
3
-
4
-
5
-
6
-
7
-
8
-
 9
9 -
 10
10 -
 11
11 -
 12
12 -
 13
13 -
 14
14 -
 15
15 -
 16
16 -
 17
17 -
 18
18 -
 19
19 -
20
 |
 |