2010 Chevrolet Equinox Owner's Manual - Page 17
2010 Chevrolet Equinox Manual

Page 17 highlights
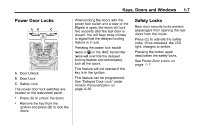
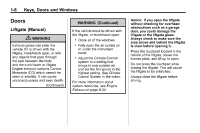
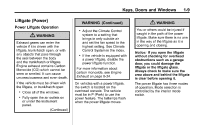
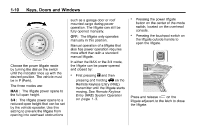
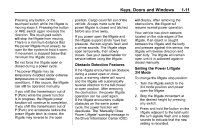
Keys, Doors and Windows Pressing any button, or the touchpad switch while the liftgate is moving stops it. Pressing the button or RKE switch again reverses the direction. The touch pad switch will stop the liftgate from moving. There is a minimum distance that the power liftgate must already be open for the system to hold it open. If movement is stopped below that minimum the liftgate closes. Do not force the liftgate open or closed during a power cycle. The power liftgate may be temporarily disabled under extreme temperatures or low battery conditions. If this occurs, the liftgate can still be operated manually. If you shift the transmission out of P (Park) while the power function is in progress, the liftgate power function will continue to completion. If you shift the transmission out of P (Park) and accelerate before the power liftgate latch is closed, the liftgate may reverse to the open position. Cargo could fall out of the vehicle. Always make sure the power liftgate is closed and latched before you drive away. If you power open the liftgate and the liftgate support struts have lost pressure, the turn signals flash and a chime sounds. The liftgate stays open temporarily, then slowly closes. See your dealer/retailer for service before using the liftgate. 1-11 will display. After removing the obstructions, the liftgate will resume normal power operation. Your vehicle has pinch sensors located on the side edges of the liftgate. If an object is caught between the liftgate and the body and presses against this sensor, the liftgate will reverse direction and open fully. The liftgate will remain open until it is activated again or closed manually. Obstacle Detection Features If the liftgate encounters an obstacle during a power open or close cycle, a warning chime will sound and the liftgate will automatically reverse direction to the full closed or open position. After removing the obstruction, the power liftgate operation can be used again. If the liftgate encounters multiple obstacles on the same power cycle, the power function will deactivate. The "Manually Close Power Liftgate" warning message in the Driver Information Center (DIC) Setting the Power Liftgate 3/4 Mode To change the liftgate stop position: 1. Turn the liftgate switch to the 3/4 mode position and power open the liftgate. 2. Stop the liftgate movement at the desired height by pressing any switch. 3. Press and hold the button on the liftgate adjacent to the latch until the turn signals flash and a beep sounds to indicate that the new setting is recorded.
-
 1
1 -
2
-
3
-
4
-
5
-
6
-
7
-
8
-
9
-
10
-
11
-
 12
12 -
 13
13 -
 14
14 -
 15
15 -
 16
16 -
 17
17 -
 18
18 -
 19
19 -
 20
20 -
 21
21 -
 22
22 -
23
-
24
-
25
-
26
-
27
-
28
-
29
-
30
-
31
-
32
-
33
-
34
-
35
-
36
-
37
-
38
-
39
-
40
-
41
-
42
-
43
-
44
-
45
-
46
-
47
-
48
-
49
-
50
-
51
-
52
-
53
-
54
-
55
-
56
-
57
-
58
-
59
-
60
-
61
-
62
-
63
-
64
-
65
-
66
-
67
-
68
-
69
-
70
-
71
-
72
-
73
-
74
-
75
-
76
-
77
-
78
-
79
-
80
-
81
-
82
-
83
-
84
-
85
-
86
-
87
-
88
-
89
-
90
-
91
-
92
-
93
-
94
-
95
-
96
-
97
-
98
-
99
-
100
-
101
-
102
-
103
-
104
-
105
-
106
-
107
-
108
-
109
-
110
-
111
-
112
-
113
-
114
-
115
-
116
-
117
-
118
-
119
-
120
-
121
-
122
-
123
-
124
-
125
-
126
-
127
-
128
-
129
-
130
-
131
-
132
-
133
-
134
-
135
-
136
-
137
-
138
-
139
-
140
-
141
-
142
-
143
-
144
-
145
-
146
-
147
-
148
-
149
-
150
-
151
-
152
-
153
-
154
-
155
-
156
-
157
-
158
-
159
-
160
-
161
-
162
-
163
-
164
-
165
-
166
-
167
-
168
-
169
-
170
-
171
-
172
-
173
-
174
-
175
-
176
-
177
-
178
-
179
-
180
-
181
-
182
-
183
-
184
-
185
-
186
-
187
-
188
-
189
-
190
-
191
-
192
-
193
-
194
-
195
-
196
-
197
-
198
-
199
-
200
-
201
-
202
-
203
-
204
-
205
-
206
-
207
-
208
-
209
-
210
-
211
-
212
-
213
-
214
-
215
-
216
-
217
-
218
-
219
-
220
-
221
-
222
-
223
-
224
-
225
-
226
-
227
-
228
-
229
-
230
-
231
-
232
-
233
-
234
-
235
-
236
-
237
-
238
-
239
-
240
-
241
-
242
-
243
-
244
-
245
-
246
-
247
-
248
-
249
-
250
-
251
-
252
-
253
-
254
-
255
-
256
-
257
-
258
-
259
-
260
-
261
-
262
-
263
-
264
-
265
-
266
-
267
-
268
-
269
-
270
-
271
-
272
-
273
-
274
-
275
-
276
-
277
-
278
-
279
-
280
-
281
-
282
-
283
-
284
-
285
-
286
-
287
-
288
-
289
-
290
-
291
-
292
-
293
-
294
-
295
-
296
-
297
-
298
-
299
-
300
-
301
-
302
-
303
-
304
-
305
-
306
-
307
-
308
-
309
-
310
-
311
-
312
-
313
-
314
-
315
-
316
-
317
-
318
-
319
-
320
-
321
-
322
-
323
-
324
-
325
-
326
-
327
-
328
-
329
-
330
-
331
-
332
-
333
-
334
-
335
-
336
-
337
-
338
-
339
-
340
-
341
-
342
-
343
-
344
-
345
-
346
-
347
-
348
-
349
-
350
-
351
-
352
-
353
-
354
-
355
-
356
-
357
-
358
-
359
-
360
-
361
-
362
-
363
-
364
-
365
-
366
-
367
-
368
-
369
-
370
-
371
-
372
-
373
-
374
-
375
-
376
-
377
-
378
-
379
-
380
-
381
-
382
-
383
-
384
-
385
-
386
-
387
-
388
-
389
-
390
-
391
-
392
-
393
-
394
-
395
-
396
-
397
-
398
-
399
-
400
-
401
-
402
-
403
-
404
-
405
-
406
-
407
-
408
-
409
-
410
 |
 |