2004 Honda S2000 Owner's Manual - Page 134
2004 Honda S2000 Manual
Page 134 highlights
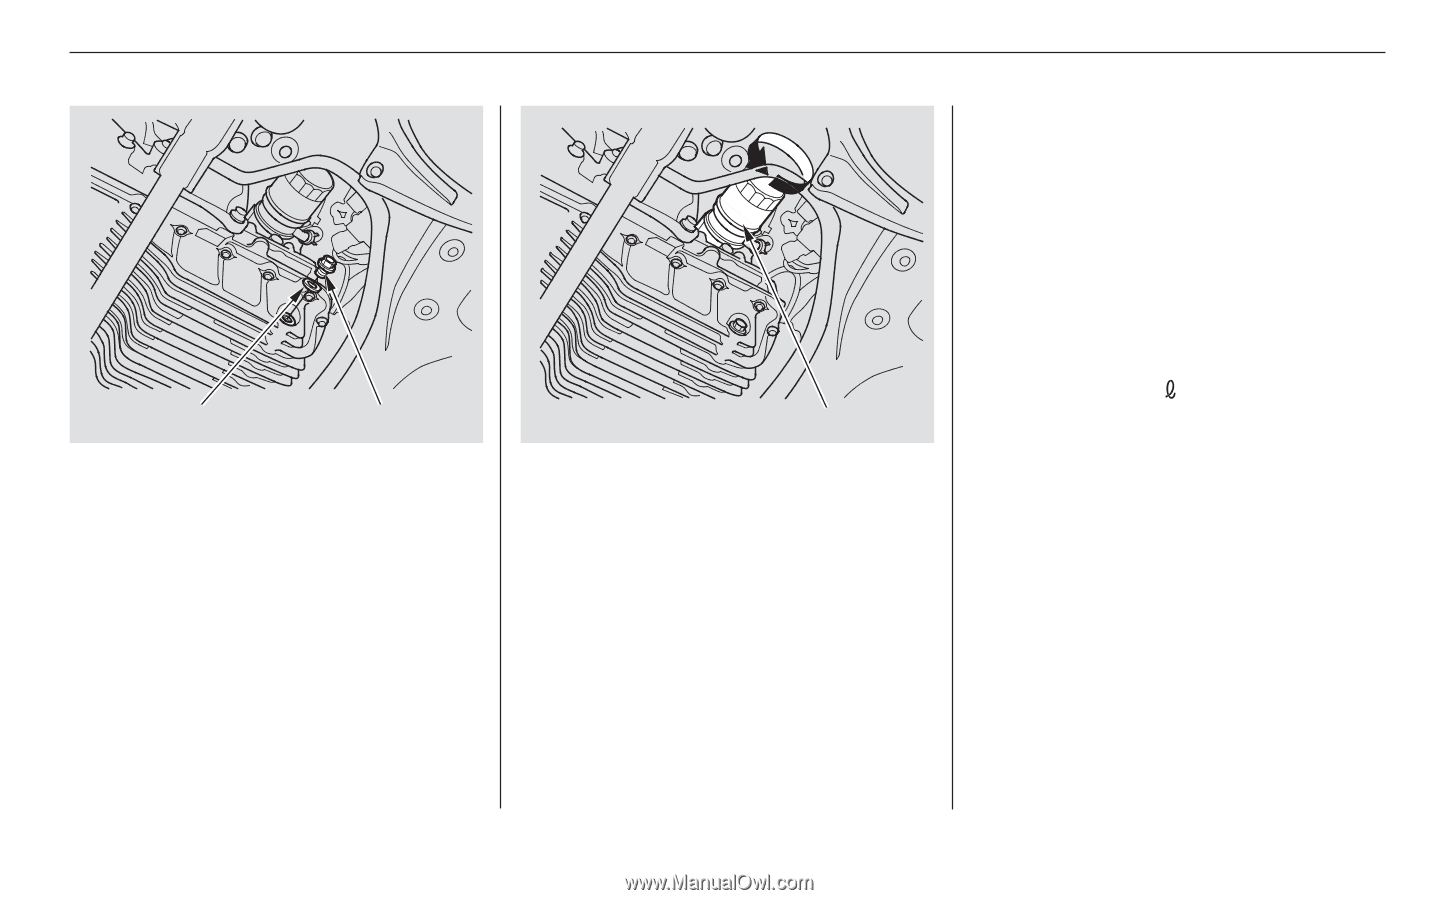
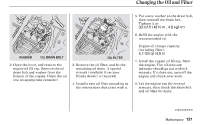
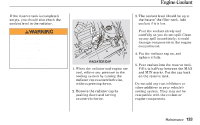
Changing the Oil and Filter 5. Put a new washer on the drain bolt, then reinstall the drain bolt. Tighten it to: 33 lbf·ft (45 N·m , 4.6 kgf·m) 6. Refill the engine with the recommended oil. Engine oil change capacity (including filter): 5.1 US qt (4.8 ) WASHER OIL DRAIN BOLT OIL FILTER 2. Open the hood, and remove the engine oil fill cap. Remove the oil drain bolt and washer from the bottom of the engine. Drain the oil into an appropriate container. 3. Remove the oil filter, and let the remaining oil drain. A special wrench (available from your Honda dealer) is required. 4. Install a new oil filter according to the instructions that come with it. 7. Install the engine oil fill cap. Start the engine. The oil pressure indicator should go out within 5 seconds. If it does not, turn off the engine and check your work. 8. Let the engine run for several minutes, then check the drain bolt and oil filter for leaks. CONTINUED Maintenance 131
-
 1
1 -
2
-
3
-
4
-
5
-
6
-
7
-
8
-
9
-
10
-
11
-
12
-
13
-
14
-
15
-
16
-
17
-
18
-
19
-
20
-
21
-
22
-
23
-
24
-
25
-
26
-
27
-
28
-
29
-
30
-
31
-
32
-
33
-
34
-
35
-
36
-
37
-
38
-
39
-
40
-
41
-
42
-
43
-
44
-
45
-
46
-
47
-
48
-
49
-
50
-
51
-
52
-
53
-
54
-
55
-
56
-
57
-
58
-
59
-
60
-
61
-
62
-
63
-
64
-
65
-
66
-
67
-
68
-
69
-
70
-
71
-
72
-
73
-
74
-
75
-
76
-
77
-
78
-
79
-
80
-
81
-
82
-
83
-
84
-
85
-
86
-
87
-
88
-
89
-
90
-
91
-
92
-
93
-
94
-
95
-
96
-
97
-
98
-
99
-
100
-
101
-
102
-
103
-
104
-
105
-
106
-
107
-
108
-
109
-
110
-
111
-
112
-
113
-
114
-
115
-
116
-
117
-
118
-
119
-
120
-
121
-
122
-
123
-
124
-
125
-
126
-
127
-
128
-
 129
129 -
 130
130 -
 131
131 -
 132
132 -
 133
133 -
 134
134 -
 135
135 -
 136
136 -
 137
137 -
 138
138 -
 139
139 -
140
-
141
-
142
-
143
-
144
-
145
-
146
-
147
-
148
-
149
-
150
-
151
-
152
-
153
-
154
-
155
-
156
-
157
-
158
-
159
-
160
-
161
-
162
-
163
-
164
-
165
-
166
-
167
-
168
-
169
-
170
-
171
-
172
-
173
-
174
-
175
-
176
-
177
-
178
-
179
-
180
-
181
-
182
-
183
-
184
-
185
-
186
-
187
-
188
-
189
-
190
-
191
-
192
-
193
-
194
-
195
-
196
-
197
-
198
-
199
-
200
-
201
-
202
-
203
-
204
-
205
-
206
-
207
-
208
-
209
 |
 |