1996 Nissan Altima Owner's Manual - Page 53
1996 Nissan Altima Manual

Page 53 highlights
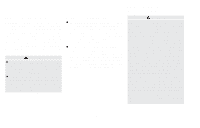
material. There are pre-cut circles at each anchor point location that should break away from the shelf support material when pressure is applied to them. Remove the bolt after you feel the pre-cut circle separate from the shelf support material. 2. Cut a small slit through the parcel shelf fabric at the anchor point location. Reach through the fabric with a tool such as a pair of needle-nose pliers and remove the pre-cut circle in the parcel shelf support material. 3. Install the bolt through the top strap hook and into the anchor point nut. 4. Be sure to follow all of the instructions that accompany the top strap attaching hardware. APD0108 APD0503 Anchor point locations Anchor points are located under the rear parcel shelf finisher. To use attaching hardware for child restraints with top straps, follow these instructions carefully: 1. Open the trunk and find the anchor point nuts on the underside of the rear parcel shelf. Thread a bolt (8.0 mm diameter, 1.25 pitch) up through the nut behind the seating position where the child restraint will be installed and use it to break through the rear parcel shelf support Installation on front passenger seat WARNING Never install a rear-facing child restraint in the front passenger seat. Air bags inflate with great force. A rearfacing child restraint could be struck by the air bag in a crash and could seriously injure or kill your child. If you install a forward-facing child restraint in the front passenger seat, place the passenger seat as far back as possible. 2-28
-
 1
1 -
2
-
3
-
4
-
5
-
6
-
7
-
8
-
9
-
10
-
11
-
12
-
13
-
14
-
15
-
16
-
17
-
18
-
19
-
20
-
21
-
22
-
23
-
24
-
25
-
26
-
27
-
28
-
29
-
30
-
31
-
32
-
33
-
34
-
35
-
36
-
37
-
38
-
39
-
40
-
41
-
42
-
43
-
44
-
45
-
46
-
47
-
 48
48 -
 49
49 -
 50
50 -
 51
51 -
 52
52 -
 53
53 -
 54
54 -
 55
55 -
 56
56 -
 57
57 -
 58
58 -
59
-
60
-
61
-
62
-
63
-
64
-
65
-
66
-
67
-
68
-
69
-
70
-
71
-
72
-
73
-
74
-
75
-
76
-
77
-
78
-
79
-
80
-
81
-
82
-
83
-
84
-
85
-
86
-
87
-
88
-
89
-
90
-
91
-
92
-
93
-
94
-
95
-
96
-
97
-
98
-
99
-
100
-
101
-
102
-
103
-
104
-
105
-
106
-
107
-
108
-
109
-
110
-
111
-
112
-
113
-
114
-
115
-
116
-
117
-
118
-
119
-
120
-
121
-
122
-
123
-
124
-
125
-
126
-
127
-
128
-
129
-
130
-
131
-
132
-
133
-
134
-
135
-
136
-
137
-
138
-
139
-
140
-
141
-
142
-
143
-
144
-
145
-
146
-
147
-
148
-
149
-
150
-
151
-
152
-
153
-
154
-
155
-
156
-
157
-
158
-
159
-
160
-
161
-
162
-
163
-
164
-
165
-
166
-
167
-
168
-
169
-
170
-
171
-
172
-
173
-
174
-
175
-
176
-
177
-
178
-
179
-
180
-
181
-
182
-
183
 |
 |
