2003 Nissan Altima Owner's Manual - Page 135
2003 Nissan Altima Manual
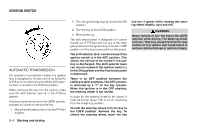
Page 135 highlights
Volume control switches Push or the volume. to increase or decrease Tuning Memory change (radio): Push the tuning switch or for less than 1.5 seconds to change to the next preset station in memory. Seek tuning (radio): LHA0049 WHA0210 CD CARE AND CLEANING ● Handle a CD by its edges. Do not bend the disc. Never touch the surface of the disc. ● Always place the discs in the storage case when they are not being used. ● To clean a disc, wipe the surface from the center to the outer edge using a clean, soft cloth. Do not wipe the disc using a circular motion. ● Do not use a conventional record cleaner or alcohol intended for industrial use. ● A new disc may be rough on the inner and outer edges. Remove the rough edges by rubbing the inner and outer edges with the side of a pen or pencil as illustrated. 1. 2. 3. 4. 5. Volume control switch (up) Volume control switch (down) Down Mode select switch Up Push the tuning switch or for more than 1.5 seconds to seek the next or previous radio station. Next/Previous track (CD): Push the tuning switch or for less than 1.5 seconds to return to the beginning of the present track or skip to the next track. Push several times to skip back or skip through tracks. This system searches for the blank intervals between selections. If there is a blank interval within 1 program or there is no interval between programs, the system may not stop in the desired or expected location. STEERING WHEEL SWITCH FOR AUDIO CONTROL (if so equipped) "MODE" select switch Push the mode select switch to change the modes: PRESET A → PRESET B → PRESET C → Insert CD (if so equipped) Heater, air conditioner and audio systems 4-27
-
 1
1 -
2
-
3
-
4
-
5
-
6
-
7
-
8
-
9
-
10
-
11
-
12
-
13
-
14
-
15
-
16
-
17
-
18
-
19
-
20
-
21
-
22
-
23
-
24
-
25
-
26
-
27
-
28
-
29
-
30
-
31
-
32
-
33
-
34
-
35
-
36
-
37
-
38
-
39
-
40
-
41
-
42
-
43
-
44
-
45
-
46
-
47
-
48
-
49
-
50
-
51
-
52
-
53
-
54
-
55
-
56
-
57
-
58
-
59
-
60
-
61
-
62
-
63
-
64
-
65
-
66
-
67
-
68
-
69
-
70
-
71
-
72
-
73
-
74
-
75
-
76
-
77
-
78
-
79
-
80
-
81
-
82
-
83
-
84
-
85
-
86
-
87
-
88
-
89
-
90
-
91
-
92
-
93
-
94
-
95
-
96
-
97
-
98
-
99
-
100
-
101
-
102
-
103
-
104
-
105
-
106
-
107
-
108
-
109
-
110
-
111
-
112
-
113
-
114
-
115
-
116
-
117
-
118
-
119
-
120
-
121
-
122
-
123
-
124
-
125
-
126
-
127
-
128
-
129
-
 130
130 -
 131
131 -
 132
132 -
 133
133 -
 134
134 -
 135
135 -
 136
136 -
 137
137 -
 138
138 -
 139
139 -
 140
140 -
141
-
142
-
143
-
144
-
145
-
146
-
147
-
148
-
149
-
150
-
151
-
152
-
153
-
154
-
155
-
156
-
157
-
158
-
159
-
160
-
161
-
162
-
163
-
164
-
165
-
166
-
167
-
168
-
169
-
170
-
171
-
172
-
173
-
174
-
175
-
176
-
177
-
178
-
179
-
180
-
181
-
182
-
183
-
184
-
185
-
186
-
187
-
188
-
189
-
190
-
191
-
192
-
193
-
194
-
195
-
196
-
197
-
198
-
199
-
200
-
201
-
202
-
203
-
204
-
205
-
206
-
207
-
208
-
209
-
210
-
211
-
212
-
213
-
214
-
215
-
216
-
217
-
218
-
219
-
220
-
221
-
222
-
223
-
224
-
225
-
226
-
227
-
228
-
229
-
230
-
231
-
232
-
233
-
234
-
235
-
236
-
237
-
238
-
239
-
240
-
241
-
242
-
243
-
244
-
245
-
246
-
247
-
248
-
249
-
250
-
251
-
252
-
253
-
254
-
255
-
256
 |
 |
