2004 Nissan Altima Owner's Manual - Page 210
2004 Nissan Altima Manual
Page 210 highlights
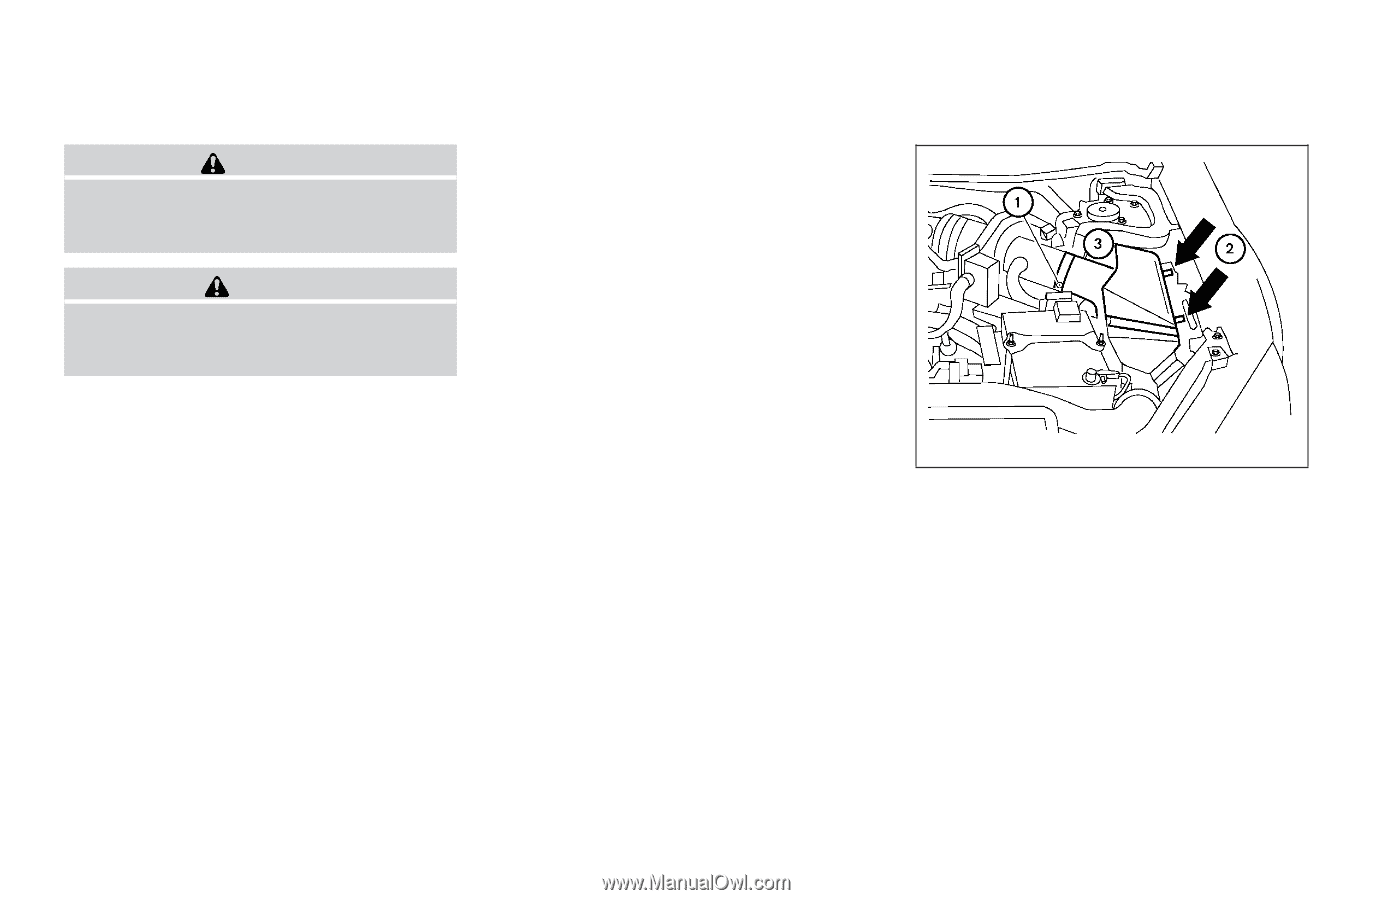
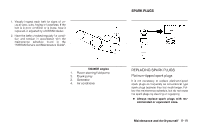
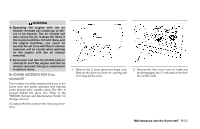
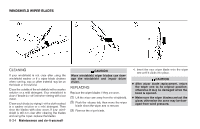
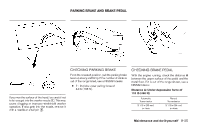
AIR CLEANER 6. Fit the new plugs, one at a time, into the spark plug socket and install them. Use only the specified spark plugs. Turn each plug several full turns by hand, then tighten with the spark plug socket to the correct torque. Do not overtighten. Spark plug tightening torque: 14 - 22 ft-lb (20 - 29 N·m) 7. Install the coil pack/spark plug boot on the spark plug by pushing it on until you feel a snap. 8. Install the coil pack bolt. Coil pack tightening torque: 48 - 65 in-lb (5.4 - 7.3 N·m) 9. Install the engine cover. 10. Connect the negative battery cable. WDI0401 WARNING Be sure the engine and ignition switch are off and that the parking brake is engaged securely. CAUTION Be sure to use the correct socket to remove the spark plugs. An incorrect socket can damage the spark plugs. QR25DE 1. Disconnect the negative battery cable. 2. Remove the engine cover. 3. Remove the coil pack bolt. 4. Remove the coil pack/spark plug boot from the spark plug. 5. Remove the spark plugs with a spark plug socket. The plug socket has a rubber seal that holds the spark plug so it does not fall when it is pulled out. Make sure each spark plug is snugly fitted into the spark plug socket. VQ35DE If replacement is required, please see your NISSAN dealer for assistance. The air cleaner filter should not be cleaned and reused. Replace it according to the maintenance intervals shown in the "NISSAN Service and Maintenance Guide." When replacing the filter, wipe the inside of the air cleaner filter housing and the cover with a damp cloth. To remove the air cleaner filter: 1 2 3 Loosen the screw clamp. Push down on the clips. Disconnect the electrical connector. 4. Remove the air cleaner housing. 8-20 Maintenance and do-it-yourself
-
 1
1 -
2
-
3
-
4
-
5
-
6
-
7
-
8
-
9
-
10
-
11
-
12
-
13
-
14
-
15
-
16
-
17
-
18
-
19
-
20
-
21
-
22
-
23
-
24
-
25
-
26
-
27
-
28
-
29
-
30
-
31
-
32
-
33
-
34
-
35
-
36
-
37
-
38
-
39
-
40
-
41
-
42
-
43
-
44
-
45
-
46
-
47
-
48
-
49
-
50
-
51
-
52
-
53
-
54
-
55
-
56
-
57
-
58
-
59
-
60
-
61
-
62
-
63
-
64
-
65
-
66
-
67
-
68
-
69
-
70
-
71
-
72
-
73
-
74
-
75
-
76
-
77
-
78
-
79
-
80
-
81
-
82
-
83
-
84
-
85
-
86
-
87
-
88
-
89
-
90
-
91
-
92
-
93
-
94
-
95
-
96
-
97
-
98
-
99
-
100
-
101
-
102
-
103
-
104
-
105
-
106
-
107
-
108
-
109
-
110
-
111
-
112
-
113
-
114
-
115
-
116
-
117
-
118
-
119
-
120
-
121
-
122
-
123
-
124
-
125
-
126
-
127
-
128
-
129
-
130
-
131
-
132
-
133
-
134
-
135
-
136
-
137
-
138
-
139
-
140
-
141
-
142
-
143
-
144
-
145
-
146
-
147
-
148
-
149
-
150
-
151
-
152
-
153
-
154
-
155
-
156
-
157
-
158
-
159
-
160
-
161
-
162
-
163
-
164
-
165
-
166
-
167
-
168
-
169
-
170
-
171
-
172
-
173
-
174
-
175
-
176
-
177
-
178
-
179
-
180
-
181
-
182
-
183
-
184
-
185
-
186
-
187
-
188
-
189
-
190
-
191
-
192
-
193
-
194
-
195
-
196
-
197
-
198
-
199
-
200
-
201
-
202
-
203
-
204
-
 205
205 -
 206
206 -
 207
207 -
 208
208 -
 209
209 -
 210
210 -
 211
211 -
 212
212 -
 213
213 -
 214
214 -
 215
215 -
216
-
217
-
218
-
219
-
220
-
221
-
222
-
223
-
224
-
225
-
226
-
227
-
228
-
229
-
230
-
231
-
232
-
233
-
234
-
235
-
236
-
237
-
238
-
239
-
240
-
241
-
242
-
243
-
244
-
245
-
246
-
247
-
248
-
249
-
250
-
251
-
252
-
253
-
254
-
255
-
256
-
257
-
258
-
259
-
260
-
261
-
262
-
263
-
264
 |
 |