3Com 3CRWE454G75 Quick Start Guide - Page 6
Mounting the Access Point
 |
UPC - 662705506654
View all 3Com 3CRWE454G75 manuals
Add to My Manuals
Save this manual to your list of manuals |
Page 6 highlights
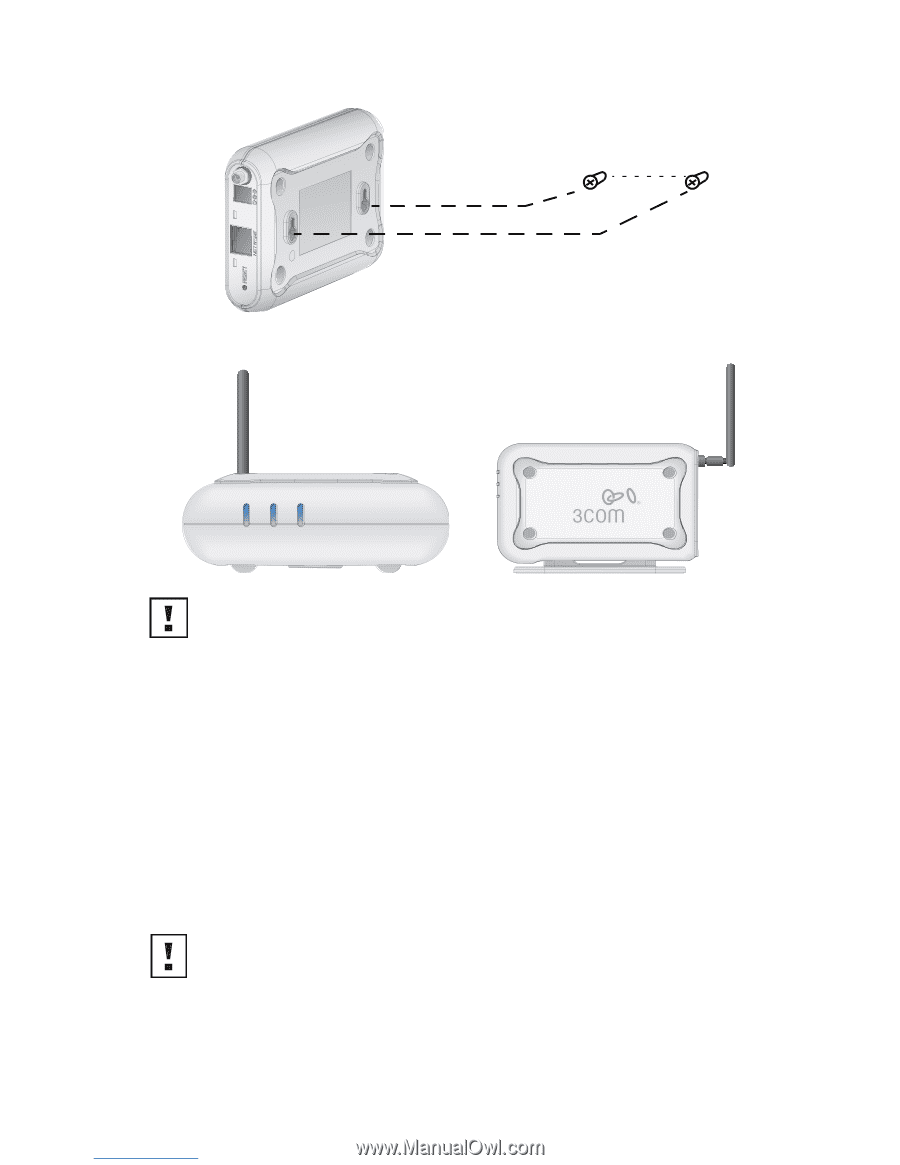
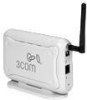
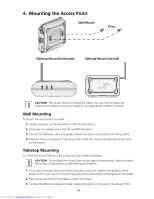
4. Mounting the Access Point Wall Mount 85 mm Tabletop Mount (horizontal) Tabletop Mount (vertical) . CAUTION: The Access Point is intended for indoor use only. Do not install the Access Point outdoors unless you install it in an appropriate outdoor enclosure. Wall Mounting To mount the Access Point to a wall: 1 Locate a position on the wall which is free of obstructions. 2 Screw two mounting screws into the wall 85 mm apart. 3 Connect the Ethernet cable and power cable to the ports on the side of the Access Point. 4 Align the holes on the back of the Access Point with the screws and hang the Access Point on the screws. Tabletop Mounting To install the Access Point on a flat surface such as a table or desktop: CAUTION: Do not place the Access Point on any type of metal surface. Select a location that is clear of obstructions and provides good reception. 1 If you want to mount the Access Point vertically, secure the cradle to the bottom of the Access Point. If you want to mount the Access Point horizontally, simply leave off the cradle. 2 Place the Access Point on the table or other flat surface. 3 Connect the Ethernet cable and power cable to the ports on the side of the Access Point. 4 Downloaded from www.Manualslib.com manuals search engine
-
 1
1 -
 2
2 -
 3
3 -
 4
4 -
 5
5 -
 6
6 -
 7
7 -
 8
8 -
 9
9 -
 10
10 -
 11
11 -
 12
12 -
13
-
14
-
15
-
16
-
17
-
18
-
19
-
20
-
21
-
22
-
23
-
24
-
25
-
26
-
27
-
28
-
29
-
30
-
31
-
32
-
33
-
34
-
35
-
36
-
37
-
38
-
39
-
40
-
41
-
42
-
43
-
44
-
45
-
46
-
47
-
48
 |
 |