3Ware 8006-2LP User Guide - Page 72
Installing the ATA RAID controller on systems that boot from a different device
 |
UPC - 000060227379
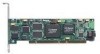
View all 3Ware 8006-2LP manuals
Add to My Manuals
Save this manual to your list of manuals |
Page 72 highlights
Linux Installation RAID 1 or 10 array result in the data from one drive (or set of drives) being compared to the other drive (or set of drives). RAID 5 arrays are immediately initialized after being created in the BIOS by writing zeroes to all array members. The user can reboot the system before this is complete in order to use the RAID 5 array immediately. Once booted to the operating system, the RAID 5 array goes into initialization mode after a delay of up to ten minutes. The advantage of this procedure is that the RAID 5 array can be used immediately, but it will not be fault tolerant until the initialization is complete. The disadvantage of this is that it takes longer for the array to become fully redundant, because it takes longer to initialize an array than it does to write zeroes to the array. Install and run 3DM disk management utility Refer to the 3DM Disk Management Utility chapter. If you are using the 3ware Command Line Interface, refer to the 3ware CLI User Guide. Installing the ATA RAID controller on systems that boot from a different device Materials required: ■ 3ware CD-ROM (You will be required to create a 3ware Linux Driver Installation Diskette from the files located on the 3ware CD-ROM. Please refer to the "Readme.txt" file on the 3ware CD-ROM for directions.) Create disk arrays Refer to the 3ware Hardware Installation and 3ware Disk Array Configuration Utility chapters. Install the 3ware driver Note: In the instructions below, refers to the kernel version (i.e., 2.4.2-2 smp) Check 3ware's website for supported versions. When you need to type the kernel string, you can press the Tab key to populate the kernel string version (if there is only one), or to list the kernel versions (if there are multiple kernels). 1 Type: mount -t msdos /dev/fd0 /mnt/floppy 64 3ware Escalade ATA RAID Controller User Guide
-
 1
1 -
2
-
3
-
4
-
5
-
6
-
7
-
8
-
9
-
10
-
11
-
12
-
13
-
14
-
15
-
16
-
17
-
18
-
19
-
20
-
21
-
22
-
23
-
24
-
25
-
26
-
27
-
28
-
29
-
30
-
31
-
32
-
33
-
34
-
35
-
36
-
37
-
38
-
39
-
40
-
41
-
42
-
43
-
44
-
45
-
46
-
47
-
48
-
49
-
50
-
51
-
52
-
53
-
54
-
55
-
56
-
57
-
58
-
59
-
60
-
61
-
62
-
63
-
64
-
65
-
66
-
 67
67 -
 68
68 -
 69
69 -
 70
70 -
 71
71 -
 72
72 -
 73
73 -
 74
74 -
 75
75 -
 76
76 -
 77
77 -
78
-
79
-
80
-
81
-
82
-
83
-
84
-
85
-
86
-
87
-
88
-
89
-
90
-
91
-
92
-
93
-
94
-
95
-
96
-
97
-
98
-
99
-
100
-
101
-
102
-
103
-
104
-
105
-
106
-
107
-
108
-
109
-
110
-
111
-
112
-
113
-
114
-
115
-
116
-
117
-
118
-
119
-
120
-
121
-
122
-
123
-
124
-
125
-
126
 |
 |
