AIWA CX-NAJ54 Operating Instructions
AIWA CX-NAJ54 Manual
 |
View all AIWA CX-NAJ54 manuals
Add to My Manuals
Save this manual to your list of manuals |
AIWA CX-NAJ54 manual content summary:
- AIWA CX-NAJ54 | Operating Instructions - Page 1
STEREO SYSTEM SISTEMA ESTEREO CON REPRODUCTOR DE DISCOS COMPACTOS CHAINE STEREO AVEC LECTEUR DE DISQUES COMPACTS CX-NAJ54 -For NSX-AJ54 and NSX-AJ55 OPERATING INSTRUCTIONS MANUAL to them when you contact your Aiwa dealer in case of difficulty. Model No. Serial No. For assistance and information - AIWA CX-NAJ54 | Operating Instructions - Page 2
user to the presence of important operating and maintenance (servicing) instructions in the literature accompanying the appliance. NOTE This equipment has been tested and found to comply with the limits for a Class B digital device, pursuant to Part spot - The heating system has just been turned - AIWA CX-NAJ54 | Operating Instructions - Page 3
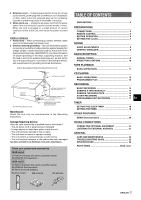
DO NOT ATTEMPT TO SERVICE THE UNIT YOURSELF. Check your system and accessories NSX-AJ54 CX-NAJ54 Compact disc stereo cassette receiver SX-WNAJ53 Front speakers NSX-AJ55 CX-NAJ54 Compact disc stereo cassette receiver SX-WNAJ53 Front speakers SX-R275 Surround speakers Remote control AM antenna - AIWA CX-NAJ54 | Operating Instructions - Page 4
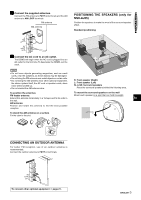
PREPARATIONS CONNECTIONS Before connecting the AC cord The rated voltage of your unit shown on the rear panel is 120 V AC. Check that the rated voltage matches your local voltage. IMPORTANT Connect the speakers, antennas, and all optional equipment first. Then connect the AC cord. 1 Connect the - AIWA CX-NAJ54 | Operating Instructions - Page 5
be damaged. • Do not bring the FM antenna near metal objects or curtain rails. • Do not bring the AM antenna near other optional equipment, the stereo system itself, the AC cord or speaker cords, since noise will be picked up. • Do not unwind the AM antenna wire. R: Front speaker (Right) L: Front - AIWA CX-NAJ54 | Operating Instructions - Page 6
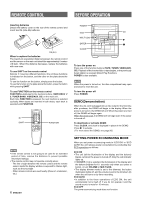
simply press the button. To use the function on the plate above the button, press the button while pressing SHIFT. To use FUNCTION on the remote control FUNCTION substitutes for the function buttons (TAPE DECK 1/ 2, TUNER BAND, VIDEO/AUX, CD) on the main unit. Each time FUNCTION is pressed, the next - AIWA CX-NAJ54 | Operating Instructions - Page 7
. To turn off the light of the top window, press s while pressing CD. To turn back on, repeat the above. 1 Press CLOCK. When using the remote control, press CLOCK while pressing SHIFT. The clock is displayed. (The ":" between the hours and minutes flashes.) 2 Within 4 seconds, turn MULTI JOG to - AIWA CX-NAJ54 | Operating Instructions - Page 8
remote control. The volume level is displayed as a number from 0 to MAX (31). The volume level is automatically set to 16 when the power is turned off with the volume level set to 17 or more. BBE SYSTEM The BBE system to the PHONES jack with a standard stereo plug (ø6.3 mm, 1/4 inch). No sound - AIWA CX-NAJ54 | Operating Instructions - Page 9
SOUND RADIO RECEPTION RADIO RECEPTION MANUAL TUNING When an FM stereo broadcast contains noise Press MONO TUNER on the remote control while pressing SHIFT so that "MONO" appears on the display. Noise is reduced, although reception is monaural. To restore stereo reception, repeat the above so that - AIWA CX-NAJ54 | Operating Instructions - Page 10
preset number beginning from 1 in consecutive order for each band is assigned to the station. Frequency Preset number PRESET NUMBER TUNING Use the remote control to select the preset number directly. 1 Press BAND while pressing SHIFT to select a band. 2 Press numbered buttons 0-9 and +10 to select - AIWA CX-NAJ54 | Operating Instructions - Page 11
playback sound for Type II tapes. However, "SOFT" playback will be canceled if any graphic equalizer is selected (page 8), the unit is switched to a different audio source, the cassette holder is open, or when the power is turned off. En Tape counter ENGLISH 11 - AIWA CX-NAJ54 | Operating Instructions - Page 12
finish playing is displayed. To restore the playing time display, repeat the above. When using the remote control, press CD EDIT/CHECK while pressing SHIFT. Selecting a track with the remote control 1 Press DISC DIRECT PLAY 1-3 to select a disc. 2 Press numbered buttons 0-9 and +10 to select a track - AIWA CX-NAJ54 | Operating Instructions - Page 13
CD PLAYING RANDOM/REPEAT PLAY Use the remote control. RANDOM play All the tracks on the . Small dot PROGRAMMED PLAY Up to 30 tracks can be programmed from any of the inserted discs. Use the remote control. 1 Press PRGM while pressing SHIFT in stop mode. "PRG" is displayed . 2 Press DISC DIRECT - AIWA CX-NAJ54 | Operating Instructions - Page 14
RECORDING BASIC RECORDING This section explains how to record from the tuner, CD player, or external equipment. INSERTING BLANK SPACES Insertion of 4-second blank spaces enables you to activate the Music Sensor function. (Applicable when the source is TUNER or VIDEO/AUX.) 1 Press w REC/REC MUTE - AIWA CX-NAJ54 | Operating Instructions - Page 15
RECORDING DUBBING A TAPE MANUALLY DUBBING THE WHOLE TAPE • Set the tape to the point where recording will start. • Note that recording will be done on one side of the - AIWA CX-NAJ54 | Operating Instructions - Page 16
side to be recorded on first facing out from the unit. 2 Press CD and load the disc(s). 3 Press CD EDIT/CHECK once. When using the remote control, press CD EDIT/CHECK once while pressing SHIFT. "EDIT" and "AI" are displayed. • When "PRGM" is displayed, press CD EDIT/CHECK. 4 Press DISC DIRECT - AIWA CX-NAJ54 | Operating Instructions - Page 17
CHECK twice while pressing SHIFT. "EDIT" and "PRGM" are displayed. • When "AI" is displayed, press CD EDIT/CHECK again. 4 Press numbered buttons on the remote control to designate the tape length. 10 to 99 minutes can be specified. • f, g or MULTI JOG are also available to designate the tape length - AIWA CX-NAJ54 | Operating Instructions - Page 18
of the function buttons to select a source. 2 Press TIMER repeatedly until 5 appears on the display. When using the remote control, press TIMER while pressing SHIFT. Time and audio source name flash alternately. While the timer is in operation, the display indication is dimmer than usual. To check - AIWA CX-NAJ54 | Operating Instructions - Page 19
TIMER 5 Adjust the volume. The source sound will play at the volume level set in this step when the power is turned on by the timer. If the volume level is set to 17 or higher, however, it will automatically be set to 16 when the power is turned on. 6 Prepare the source. To listen to a CD, load the - AIWA CX-NAJ54 | Operating Instructions - Page 20
equalizing. Built-in Subwoofer System The built-in subwoofer System has a separate subwoofer cavity area that is part of the loudspeaker cabinet signals. And AIWA's built-in subwoofer system incorporates a subwoofer capable of powerful, satisfying bass performance with true stereo separation. • - AIWA CX-NAJ54 | Operating Instructions - Page 21
instructions of the connected equipment for details. • The connecting cords are not supplied. Obtain the necessary connecting cords. • Consult your local Aiwa DIGITAL OUT (OPTICAL) JACK This unit can output CD digital sound signals through this jack. Use an optical cable to connect digital audio - AIWA CX-NAJ54 | Operating Instructions - Page 22
TROUBLESHOOTING GUIDE If the unit fails to perform as described in these Operating Instructions, check the following guide. GENERAL There is no sound. • Is the AC cord noise interferences or the sound is distorted. • Is the system picking up external noise or multipath distortion? © Change the - AIWA CX-NAJ54 | Operating Instructions - Page 23
CX-NAJ54 (10 W, 1 kHz, 8 ohms, DIN AUDIO) 60 W + 60 W (50 Hz - 200 Hz, THD less than 1%, 6 ohms) 0.1 % (30 W, 130 Hz, 6 ohms, DIN AUDIO) VIDEO/AUX: 500 mV SPEAKERS HIGH FREQ: deck section Track format Frequency response Recording system Heads 4 tracks, 2 channels stereo 50 Hz - 15000 Hz AC bias - AIWA CX-NAJ54 | Operating Instructions - Page 24
INDEX INDICE DE LAS PARTES NOMENCLATURE Name/Nombre/Nom Page/Página/Page 1 POWER 6,18-22 ECO 6,7 2 MULTI JOG 6-8,10-12,16-18 3 GEQ 8 T-BASS 8 BBE 8 4 PHONES 8 5 ENTER 6,7,18 TIMER 18 - AIWA CX-NAJ54 | Operating Instructions - Page 25
la ventilación apropiada quede asegurada. Deje un espacio libre de 10 cm por la parte posterior y superior de la unidad, y 5 cm por cada lado. - No Conecte solamente esta unidad a las fuentes de alimentación especificadas en el manual de instrucciones, y como está marcado en la unidad. 2 Polarizaci - AIWA CX-NAJ54 | Operating Instructions - Page 26
RELOJ 7 SONIDO AJUSTES DE AUDIO 8 ECUALIZADOR GRAFICO 8 RECEPCION DE LA RADIO SINTONIZACION MANUAL 9 PREAJUSTE DE EMISORAS 10 ESPECIFICACIONES 23 INDICE DE LAS PARTES Cubierta trasera Compruebe su sistema y los accesorios NSX-AJ54 CX-NAJ54 Sintonizador, amplificador, platina de - AIWA CX-NAJ54 | Operating Instructions - Page 27
PREPARATIVOS CONEXIONES Antes de conectar el cable de CA La tensión nominal de su unidad, mostrada en el panel trasero, es de 120 V CA. Compruebe que esta tensión nominal concuerde con la tensión de su localidad. IMPORTANTE Conecte primero los altavoces, las antenas y todos los demás equipos - AIWA CX-NAJ54 | Operating Instructions - Page 28
PREPARATIVOS 4 Conecte las antenas suministradas. Conecte la antena de FM a los terminales FM 75 Ω y la de AM a los terminales AM LOOP. Antena de FM Antena de AM POSICIONAMIENTO DE LOS ALTAVOCES (Sólo para el NSX-AJ55) Coloque los altavoces para sacar el mayor provecho del efecto de los altavoces - AIWA CX-NAJ54 | Operating Instructions - Page 29
CONTROL REMOTO ANTES DE LA OPERACION Inserción de las pilas Quite la tapa de las pilas, ubicada en la parte trasera del control remoto, e inserte dos pilas R6 (tamaño AA). Cuándo reemplazar las pilas La distancia máxima de operación entre el control remoto y el - AIWA CX-NAJ54 | Operating Instructions - Page 30
el analizador de espectro, la ventana de la parte superior de la unidad y la iluminación de los botones se apagarán. VENTANILLA PARPADEANTE La ventanilla de la parte superior de la unidad se encenderá o parpadeará mientras la unidad - AIWA CX-NAJ54 | Operating Instructions - Page 31
SONIDO AJUSTES DE AUDIO ECUALIZADOR GRAFICO CONTROL DE VOLUMEN Gire VOLUME de la unidad principal o pulse VOL del control remoto. El nivel de sonido se visualiza como un número - AIWA CX-NAJ54 | Operating Instructions - Page 32
SONIDO RECEPCION DE LA RADIO RECEPCION DE LA RADIO SINTONIZACION MANUAL Cuando una radiodifusión estéreo por FM tenga ruido Pulse MONO TUNER del control remoto mientras pulsa SHIFT para que "MONO" aparezca en el visualizador. - AIWA CX-NAJ54 | Operating Instructions - Page 33
PREAJUSTE DE EMISORAS La unidad puede almacenar un total de 32 emisoras. Cuando almacene una emisora, a esa emisora se le asignará un número de preajuste. Utilice el número de preajuste para sintonizar directamente una emisora preajustada. 1 Pulse TUNER BAND para seleccionar una banda, y pulse f - AIWA CX-NAJ54 | Operating Instructions - Page 34
II. Sin embargo, la reproducción "SOFT" se cancelará si se selecciona cualquier En ajuste del ecualizador gráfico (página 8), la unidad cambia a una fuente de audio diferente, el portacasete se abre o la alimentación se desconecta. E Contador de cinta ESPAÑOL 11 - AIWA CX-NAJ54 | Operating Instructions - Page 35
REPRODUCCION DE DISCOS COMPACTOS OPERACIONES BASICAS INTRODUCCION DE DISCOS Pulse CD, y luego pulse z OPEN/CLOSE para abrir el compartimiento de los discos. Introduzca el(los) disco(s) con el lado de la etiqueta hacia arriba. Para reproducir uno o dos discos, ponga los discos en las bandejas 1 y 2. - AIWA CX-NAJ54 | Operating Instructions - Page 36
se saltarán, y el sonido se reproducirá sin interrupción. Si una canción termina con desvanecimiento (el sonido va disminuyendo gradualmente), la parte con desvanecimiento también se saltará. Para volver a la reproducción normal Pulse de nuevo CD BLANK SKIP y el punto del visualizador desaparecer - AIWA CX-NAJ54 | Operating Instructions - Page 37
GRABACION GRABACION BASICA Esta sección explica cómo grabar del sintonizador, del reproductor de discos compactos o de un equipo exterior. Preparación • Utilice cintas tipo I (normales) solamente. • Ponga la cinta en el punto donde vaya a iniciar la grabación. • Tenga en cuenta que la grabación sólo - AIWA CX-NAJ54 | Operating Instructions - Page 38
GRABACION COPIADO MANUAL DE UNA CINTA COPIADO DE TODA LA CINTA • Ponga la cinta en el punto donde vaya a empezar la grabación. • Tenga en cuenta que la grabación - AIWA CX-NAJ54 | Operating Instructions - Page 39
GRABACION CON EDICION AI 6 Pulse w REC/REC MUTE para iniciar la grabación de la primera cara. La cinta se rebobinará hasta el principio de la primera cara, el segmento guía avanzará durante 10 segundos y la grabación empezará. Cuando termine de grabarse la última canción programada para la cara A, - AIWA CX-NAJ54 | Operating Instructions - Page 40
GRABACION CON EDICION PROGRAMADA 6 Repita el paso 5 para el resto de las canciones para la cara A. Una canción cuyo tiempo de grabación sea superior al tiempo restante no podrá ser programada. 7 Pulse CD EDIT/CHECK para seleccionar la cara B y programe las canciones para la cara B. Después de - AIWA CX-NAJ54 | Operating Instructions - Page 41
TEMPORIZADOR AJUSTE DEL TEMPORIZADOR PARA DORMIR AJUSTE DEL TEMPORIZADOR La unidad se podrá apagar automáticamente después de transcurrido un tiempo especificado. Utilice el control remoto. 1 Pulse SLEEP mientras pulsa SHIFT. 2 Antes de que pasen 4 segundos, pulse f DOWN o g UP para especificar el - AIWA CX-NAJ54 | Operating Instructions - Page 42
TEMPORIZADOR 5 Ajuste el volumen. El sonido de la fuente se reproducirá al nivel de sonido ajustado en este paso cuando la alimentación sea conectada por el temporizador. Sin embargo, si el nivel del sonido se ajusta a 17 o más, éste se ajustará automáticamente a 16 cuando se conecte la alimentaci - AIWA CX-NAJ54 | Operating Instructions - Page 43
subgraves incorporado tiene una cavidad de altavoz de subgraves separada que forma parte de la estructura de la caja del altavoz, y que actúa alta claras y bien definidas. Y el sistema de altavoz de subgraves AIWA incorporado incluye un altavoz de subgraves capaz de reproducir graves potentes y - AIWA CX-NAJ54 | Operating Instructions - Page 44
CARACTERISTICAS Consulte el manual de instrucciones Cuando conecte un giradiscos Utilice un giradiscos Aiwa equipado con amplificador ecualizador incorporado. Para audio digital (platina de cinta audiodigital, grabadora de minidiscos, etc.). Quite la tapa contra el polvo a de la toma CD DIGITAL - AIWA CX-NAJ54 | Operating Instructions - Page 45
de un automóvil estacionado bajo la luz directa del sol. 22 ESPAÑOL Si la unidad no funciona como se describe en este manual de instrucciones, compruebe la guía siguiente: GENERALIDADES No hay sonido • ¿Está correctamente conectado el cable de alimentación de CA? • ¿Hay alguna conexión mal hecha - AIWA CX-NAJ54 | Operating Instructions - Page 46
GENERALIDADES ESPECIFICACIONES Unidad principal CX-NAJ54 Sección del sintonizador de FM Gama de total inferior al 1%, 8 ohmios) Distorsión armónica total 0,1% (10 W, 1 kHz, 8 ohmios, DIN AUDIO) Amplificador de baja frecuencia Potencia de salida 60 W + 60 W (50 Hz - 200 Hz, distorsión arm - AIWA CX-NAJ54 | Operating Instructions - Page 47
ral sert à prévenir l'utilisateur de la présence d'instructions importantes concernant l'utilisation et l'entretien (ou la réparation) de appareil pas les orifices de ventilation. 6 Chariot et support - Si l'appareil est posé ou monté sur un support ou un chariot, déplacer ce dernier avec précaution - AIWA CX-NAJ54 | Operating Instructions - Page 48
la mise à la terre du mât, de la structure de support et du conducteur arrivant à l'unité de décharge d'antenne et HORLOGE 7 SON REGLAGES AUDIO 8 EGALISEUR GRAPHIQUE 8 PROBLEME 22 SPECIFICATIONS 23 NOMENCLATURE Couverture du dos Contrôler la chaîne et les accessoires. NSX-AJ54 CX-NAJ54 - AIWA CX-NAJ54 | Operating Instructions - Page 49
PREPARATIONS CONNEXIONS Avant de brancher le cordon secteur La tension nominale d'alimentation de l'appareil, indiquée au dos de ce dernier, est de 120 V. S'assurer que cette tension nominale correspond à celle du secteur local. IMPORTANT Commencer par connecter les enceintes, les antennes et tout - AIWA CX-NAJ54 | Operating Instructions - Page 50
Mettre les enceintes surround derrière la zone d'écoute. Pour fixer les enceintes surround à un mur Fixer chaque enceinte à un endroit qui peut supporter son poids. F CONNEXION D'UNE ANTENNE EXTERIEURE Pour obtenir une meilleure réception FM, il est recommandé d'utiliser une antenne FM extérieure - AIWA CX-NAJ54 | Operating Instructions - Page 51
affichée à la place du mode DEMO. Appuyer sur c pour activer. (Pour plus de détails au sujet du mode DEMO, voir page 20.) MISE EN SERVICE DU MODE ECONOMIE D'ENERGIE Quand on règle le mode économie d'énergie sur "ECO ON" ou "ECO AUTO", l'appareil diminue sa consommation électrique en effectuant les - AIWA CX-NAJ54 | Operating Instructions - Page 52
sur CLOCK F avant de terminer l'étape 3. Ceci annule tout nouveau réglage. Pour faire apparaître l'horloge quand un autre affichage est en service Appuyer sur CLOCK. L'heure est affichée pendant quatre secondes puis l'affichage initial réapparaît. Toutefois, l'heure ne peut pas être affichée pendant - AIWA CX-NAJ54 | Operating Instructions - Page 53
AUDIO un des trois niveaux ou la position de repos, comme on préfère. SYSTEME SUPER T-BASS Le système T-BASS augmente le réalisme du son aux basses enregistrée avec BBE, il est conseillé de mettre le système BBE hors service pour éviter une distorsion du son aux fréquences élevées. • Le - AIWA CX-NAJ54 | Operating Instructions - Page 54
SON RECEPTION RADIO RECEPTION RADIO ACCORD MANUEL Quand une émission FM stéréo contient des parasites Appuyer sur MONO TUNER tout en appuyant sur SHIFT de la télécommande de manière que "MONO" apparaisse sur l'affichage. Les parasites sont réduits, mais la réception est monophonique. Pour ré - AIWA CX-NAJ54 | Operating Instructions - Page 55
MEMORISATION DE STATIONS L'appareil peut mémoriser un total de 32 stations. Quand une station est mémorisée, un numéro de préréglage lui est affecté. Pour accorder directement l'appareil sur une station mémorisée, utiliser le numéro de préréglage correspondant. 1 Appuyer sur TUNER BAND pour sé - AIWA CX-NAJ54 | Operating Instructions - Page 56
II. Toutefois, la lecture de type "SOFT" est annulée si un mode d'égalisation graphique est sélectionné (voir page 8), si l'appareil est réglé sur une source audio différente, si on ouvre le portecassette, ou si l'alimentation est coupée. F Compteur FRANÇAIS 11 - AIWA CX-NAJ54 | Operating Instructions - Page 57
LECTURE DE DISQUES COMPACTS OPERATIONS DE BASE MISE EN PLACE DE DISQUES Appuyer sur CD, puis appuyer sur z OPEN/CLOSE pour ouvrir le compartiment à disques. Mettre le(s) disque(s) en place avec le côté portant l'étiquette en haut. Pour lire un ou deux disques, mettre les disques sur les plateaux 1 - AIWA CX-NAJ54 | Operating Instructions - Page 58
LECTURE ALEATOIRE/REPETEE Utiliser la télécommande. Lecture aléatoire Toutes les plages du disque sélectionné ou tous les disques peuvent être lus dans un ordre aléatoire. Lecture répétée Un seul disque ou tous les disques peuvent être lus à plusieurs reprises. Appuyer sur RANDOM/REPEAT tout en - AIWA CX-NAJ54 | Operating Instructions - Page 59
ENREGISTREMENT ENREGISTREMENT DE BASE Cette partie explique comment enregistrer à partir du tuner, du lecteur de disques compacts ou d'un appareil externe. Préparation • Utiliser uniquement des cassettes de type I (normales). • Bobiner la cassette jusqu'à l'endroit où on veut démarrer l' - AIWA CX-NAJ54 | Operating Instructions - Page 60
ENREGISTREMENT DUPLICATION MANUELLE D'UNE CASSETTE DUPLICATION DE LA TOTALITE D'UNE CASSETTE • Bobiner la cassette jusqu'à l'endroit où on veut démarrer l'enregistrement. • Remarquer que l'enregistrement ne sera fait que sur une face de la cassette. 1 Appuyer sur TAPE. 2 Insérer la cassette - AIWA CX-NAJ54 | Operating Instructions - Page 61
ENREGISTREMENT AVEC MONTAGE ET CALCUL DU TEMPS La fonction enregistrement avec montage et calcul du temps permet d'enregistrer à partir de disques compacts sans se préoccuper de la durée de la cassette et de la durée des plages. Quand un disque compact est en place, l'appareil calcule - AIWA CX-NAJ54 | Operating Instructions - Page 62
ENREGISTREMENT ENREGISTREMENT AVEC MONTAGE PROGRAMME 6 Répéter l'étape 5 pour le reste des plages de la face A. Une plage dont la durée de lecture est supérieure au temps restant ne peut pas être programmée. 7 Appuyer sur CD EDIT/CHECK pour sélectionner la face B, puis programmer les plages pour - AIWA CX-NAJ54 | Operating Instructions - Page 63
5 apparaisse sur l'affichage. Quand on utilise la télécommande, appuyer sur TIMER tout en appuyant sur SHIFT. L'heure et le nom de la source audio clignotent alternativement. 3 Dans les six secondes, tourner MULTI JOG pour spécifier l'heure de la mise sous tension par la minuterie, puis appuyer sur - AIWA CX-NAJ54 | Operating Instructions - Page 64
MINUTERIE 5 Régler le volume. Lors de la mise sous tension par la minuterie, le son de la source sera reproduit au niveau du volume réglé à cette étape. Toutefois, si le niveau du volume est réglé à 17 ou plus, il sera automatiquement réglé à 16 lors de la mise sous tension. 6 Préparer la source. - AIWA CX-NAJ54 | Operating Instructions - Page 65
claire et riche à la reproduction des basses tout en permettant des signaux de fréquences moyennes à élevées clairs et nets. Le système AIWA à haut-parleur infragrave intégré comprend un haut-parleur infragrave donnant une reproduction puissante et claire des basses avec une vraie séparation st - AIWA CX-NAJ54 | Operating Instructions - Page 66
. Utiliser un câble à fiches phono RCA pour connecter un appareil audio (tourne-disque, lecteur de disque laser, lecteur de minidisque, magné un tourne-disque Utiliser un tourne-disque Aiwa muni d'un amplificateur à égaliseur intégré. PRISE CD DIGITAL OUT (OPTICAL) Cet appareil peut sortir les - AIWA CX-NAJ54 | Operating Instructions - Page 67
CAS DE PROBLEME Un Si l'appareil ne fonctionne pas comme décrit dans ce mode d'emploi, contlôler le guide suivant. GENERALITES Il n'y a pas de son. • Le cordon secteur est-il branch enceinte. • Une touche de fonction incorrecte n'est-elle pas en service? Le son ne sort que par une seule enceinte. • - AIWA CX-NAJ54 | Operating Instructions - Page 68
GENERALITES SPECIFICATIONS Appareil principal CX-NAJ54 Partie tuner FM Plage d'accord Sensibilité utile ( inférieure à 1%, 6 ohms) Distorsion harmonique totale 0,1% (30 W, 130 Hz, 6 ohms, DIN AUDIO) Entrées VIDEO/AUX: 500 mV Sorties SPEAKERS HIGH FREQ: acceptent des enceintes de 8 ohms ou
-
 1
1 -
 2
2 -
 3
3 -
 4
4 -
 5
5 -
 6
6 -
 7
7 -
8
-
9
-
10
-
11
-
12
-
13
-
14
-
15
-
16
-
17
-
18
-
19
-
20
-
21
-
22
-
23
-
24
-
25
-
26
-
27
-
28
-
29
-
30
-
31
-
32
-
33
-
34
-
35
-
36
-
37
-
38
-
39
-
40
-
41
-
42
-
43
-
44
-
45
-
46
-
47
-
48
-
49
-
50
-
51
-
52
-
53
-
54
-
55
-
56
-
57
-
58
-
59
-
60
-
61
-
62
-
63
-
64
-
65
-
66
-
67
-
68
 |
 |
COMPACT DISC STEREO SYSTEM
SISTEMA ESTEREO CON REPRODUCTOR DE DISCOS COMPACTOS
CHAINE STEREO AVEC LECTEUR DE DISQUES COMPACTS
CX-NAJ54
-For NSX-AJ54 and NSX-AJ55
OPERATING INSTRUCTIONS
MANUAL DE INSTRUCCIONES
MODE D’EMPLOI
U
En
(English)
E
(Español)
8A-NFJ-903-01
000102AMI-U-B
F
(Français)
For assistance and information
(United States and Puerto Rico)
Owner’s record
For your convenience, record the model number and serial number (you will find them on the
rear of your set) in the space provided below. Please refer to them when you contact your
Aiwa dealer in case of difficulty.
Model No.
Serial No.