ASRock FM2A88M BTC RAID Installation Guide - Page 11
Single disk, RAIDAble
 |
View all ASRock FM2A88M BTC manuals
Add to My Manuals
Save this manual to your list of manuals |
Page 11 highlights
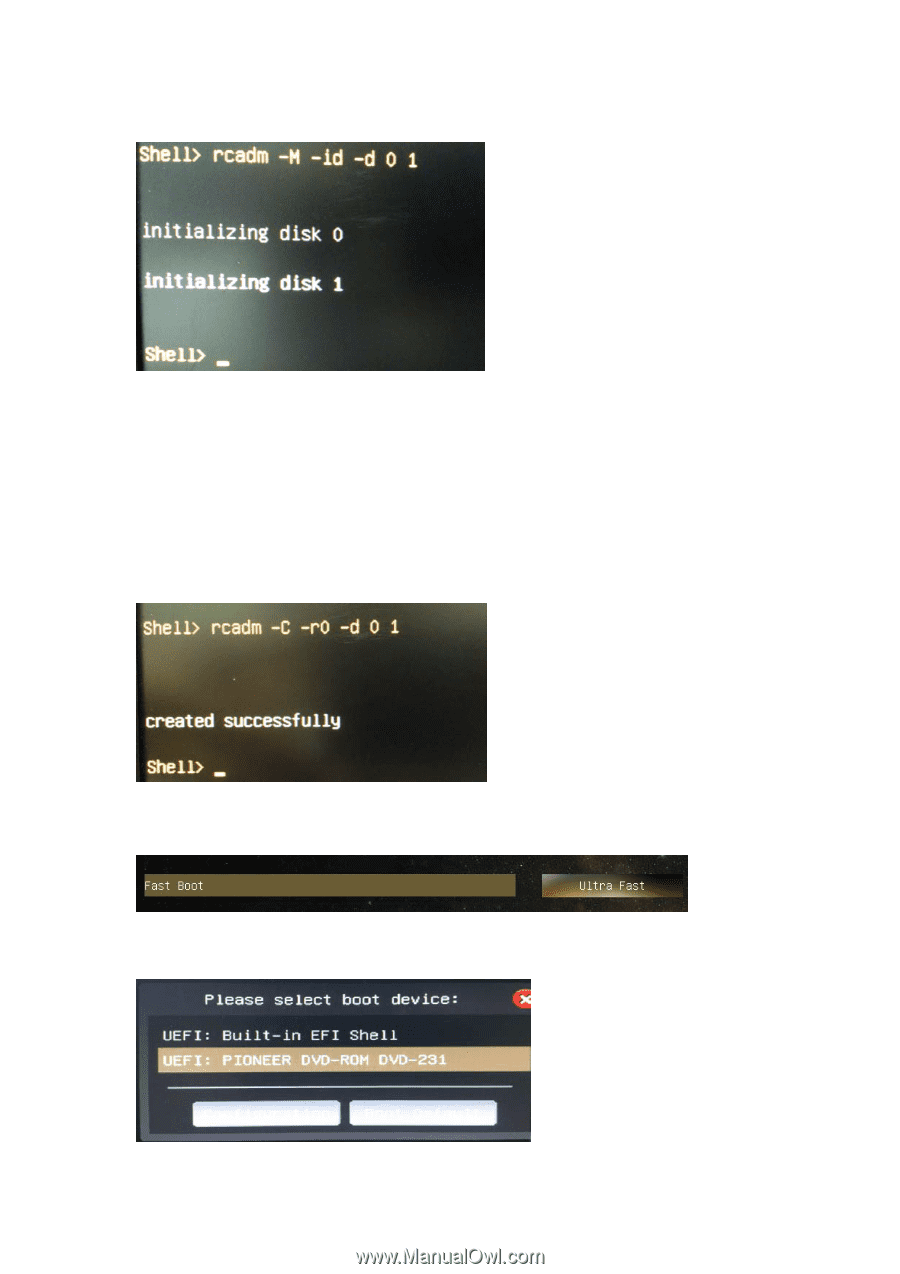
G. When the following screen appears, enter "rcadm -M -id -d" and click to initialize disk. H. Enter "rcadm -C -d " and click to create RAID disk. RAID Types: --volume, -v Single disk or concatenation of disks (JBOD) --raidable, -ra Single disk, RAIDAble --raid0, -r0 Stripe of two or more disks --raid1, -r1 Mirror of two disks --raid10, -r10 Stripe set of mirror sets --raid5, -r5 Stripe set with parity, three to sixteen disks I. Enter UEFI SETUP UTILITY → Boot to set the "Fast Boot" option to . Press to save change and exit. STEP 2: Windows® 8 64-bit / 8.1 64-bit OS installation Click to enter boot menu and select "UEFI" DVD-ROM to install OS. 11
-
 1
1 -
2
-
3
-
4
-
5
-
 6
6 -
 7
7 -
 8
8 -
 9
9 -
 10
10 -
 11
11 -
 12
12 -
 13
13 -
 14
14 -
 15
15 -
 16
16 -
17
-
18
-
19
-
20
-
21
-
22
-
23
-
24
-
25
-
26
-
27
-
28
-
29
-
30
-
31
-
32
-
33
-
34
-
35
-
36
-
37
-
38
-
39
 |
 |
11
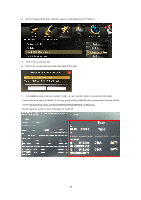
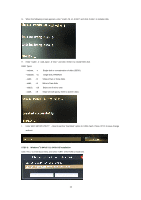
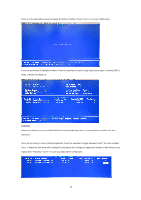
G.
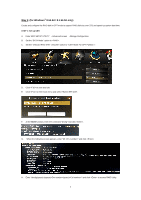
When the following screen appears, enter “rcadm -M -id -d<list>” and click <Enter> to initialize disk.
H.
Enter “rcadm -C <raid_type> -d <list>” and click <Enter> to create RAID disk.
RAID Types:
--volume,
-v
Single disk or concatenation of disks (JBOD)
--raidable,
-ra
Single disk, RAIDAble
--raid0,
-r0
Stripe of two or more disks
--raid1,
-r1
Mirror of two disks
--raid10,
-r10
Stripe set of mirror sets
--raid5,
-r5
Stripe set with parity, three to sixteen disks
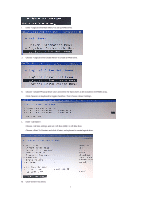
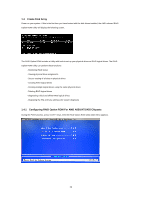
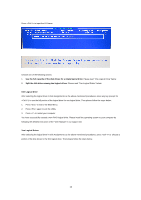
I.
Enter UEFI SETUP UTILITY → Boot to set the “Fast Boot” option to <Ultra Fast>. Press <F10> to save change
and exit.
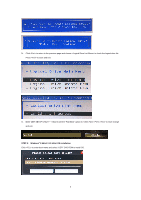
STEP 2:
Windows
®
8 64-bit / 8.1 64-bit OS installation
Click <F11> to enter boot menu and select “UEFI” DVD-ROM to install OS.