ASRock FM2A88M BTC RAID Installation Guide - Page 6
Way 2, for Windows, 64-bit / 8.1 64-bit only
 |
View all ASRock FM2A88M BTC manuals
Add to My Manuals
Save this manual to your list of manuals |
Page 6 highlights
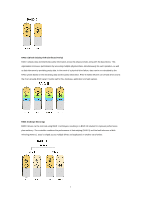
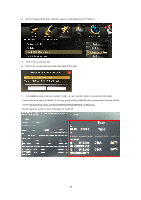
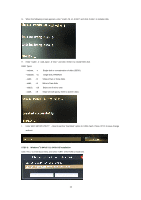
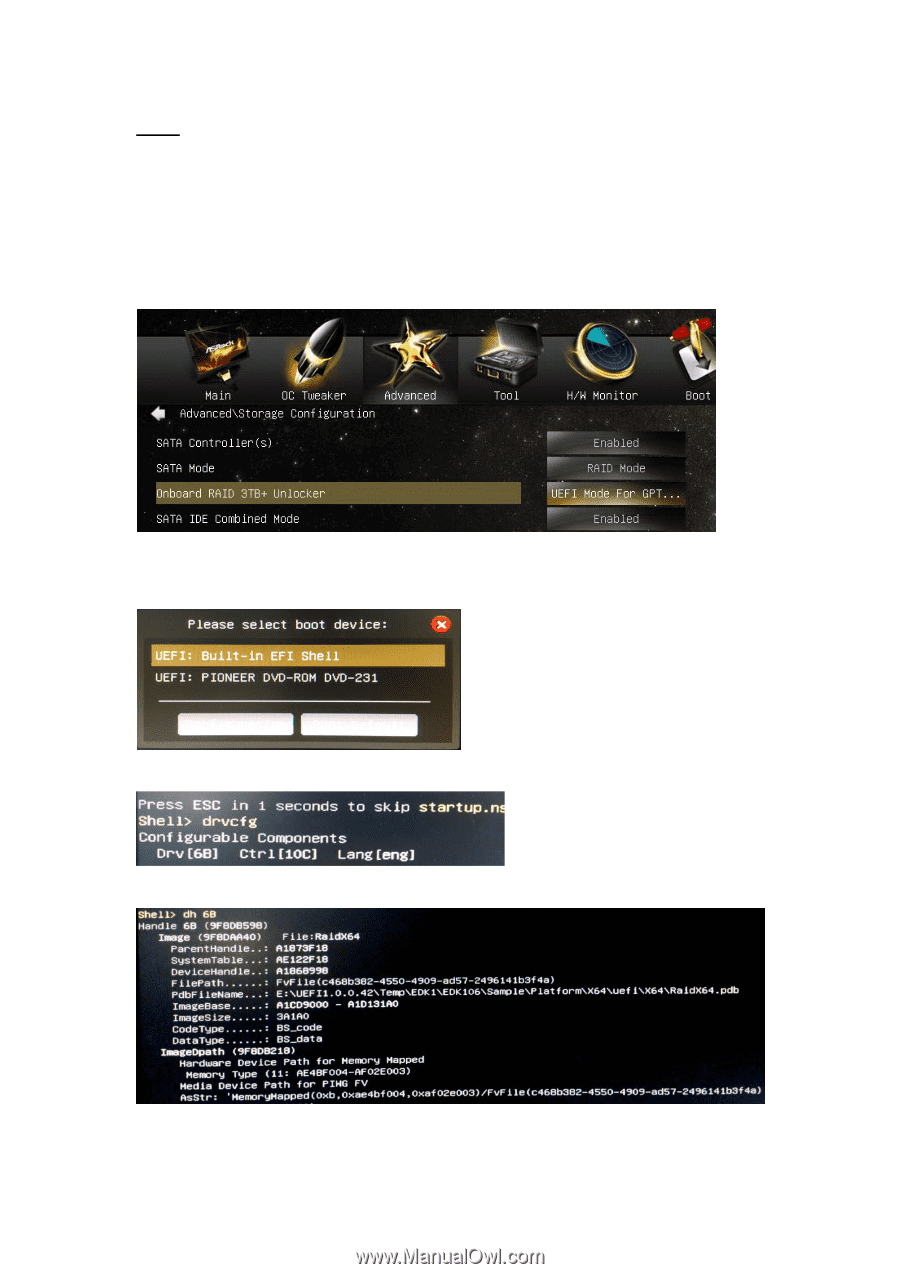
Way 2: (for Windows® 8 64-bit / 8.1 64-bit only) Create and configure the RAID disk in GPT mode to support RAID disk size over 2TB and speed up system boot time. STEP 1: Set up UEFI A. Enter UEFI SETUP UTILITY → Advanced screen → Storage Configuration. B. Set the "SATA Mode" option to . C. Set the "Onboard RAID 3TB+ Unlocker" option to . D. Click to save and exit. E. Click to enter boot menu and select "Built-in EFI shell". F. At the Shell> prompt, enter the command "drvcfg" and click . G. When the following screen appears, enter "dh " and click . H. Enter "drvcfg(space)-s(space)(space)" and click to access RAID Utility. 6
-
 1
1 -
 2
2 -
 3
3 -
 4
4 -
 5
5 -
 6
6 -
 7
7 -
 8
8 -
 9
9 -
 10
10 -
 11
11 -
 12
12 -
13
-
14
-
15
-
16
-
17
-
18
-
19
-
20
-
21
-
22
-
23
-
24
-
25
-
26
-
27
-
28
-
29
-
30
-
31
-
32
-
33
-
34
-
35
-
36
-
37
-
38
-
39
 |
 |
6
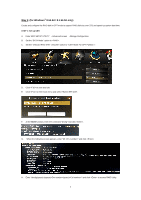
Way 2
:
(for Windows
®
8 64-bit / 8.1 64-bit only)
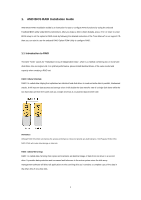
Create and configure the RAID disk in GPT mode to support RAID disk size over 2TB and speed up system boot time.
STEP 1: Set up UEFI
A.
Enter UEFI SETUP UTILITY → Advanced screen → Storage Configuration.
B.
Set the “SATA Mode” option to <RAID>.
C.
Set the “Onboard RAID 3TB+ Unlocker” option to <UEFI Mode For GPT Partition >.
D.
Click <F10> to save and exit.
E.
Click <F11> to enter boot menu and select “Built-in EFI shell”.
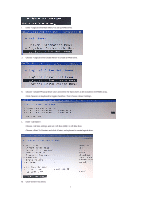
F.
At the
Shell>
prompt, enter the command “drvcfg” and click <Enter>.
G.
When the following screen appears, enter “dh <Drv number>” and click <Enter>.
H.
Enter “drvcfg(space)-s(space)<Drv number>(space)<Ctrl number>” and click <Enter> to access RAID Utility.