Acer PH530 PH530 User's Guide EN - Page 15
Adjusting the Projected Image
 |
View all Acer PH530 manuals
Add to My Manuals
Save this manual to your list of manuals |
Page 15 highlights
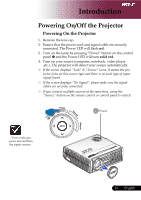
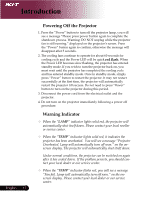
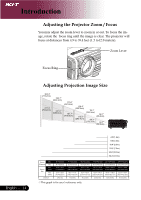
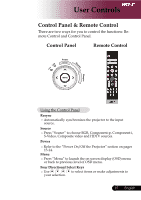
Introduction Adjusting the Projected Image Adjusting the Projector Image Height The projector is equipped with an elevator foot for adjusting the image height. To raise the image: 1. Press the elevator button . 2. Raise the image to the desired height and angle , then release the button to lock the elevator foot into position. 3. Use to fine-tune the display angle. To lower the image: 1. Press the elevator button. 2. Lower the image, then release the button to lock the el- evator feet into position. 3. Use to fine-tune the display angle. 1 Elevator Button 2 Elevator Foot 3 Tilt Adjusting Wheel 13 ... English
-
 1
1 -
2
-
3
-
4
-
5
-
6
-
7
-
8
-
9
-
 10
10 -
 11
11 -
 12
12 -
 13
13 -
 14
14 -
 15
15 -
 16
16 -
 17
17 -
 18
18 -
 19
19 -
 20
20 -
21
-
22
-
23
-
24
-
25
-
26
-
27
-
28
-
29
-
30
-
31
-
32
-
33
-
34
-
35
-
36
-
37
-
38
-
39
-
40
-
41
 |
 |

±³
... English
Introduction
Adjusting the Projected Image
Adjusting the Projector Image Height
The projector is equipped with an elevator foot for ad-
justing the image height.
To raise the image:
1. Press the elevator button
.
2. Raise the image to the desired height and angle
, then
release the button to lock the elevator foot into position.
3. Use
to fine-tune the display angle.
To lower the image:
1. Press the elevator button.
2. Lower the image, then release the button to lock the el
-
evator feet into position.
3. Use
to fine-tune the display angle.
Tilt Adjusting Wheel
3
Elevator Foot
Elevator Button
2
1