Acer Veriton M661 Intel Matrix Storage and RAID - Page 19
Start Menu ->All Programs -> Intel Matrix Storage Manager -> Intel Matrix Storage
 |
View all Acer Veriton M661 manuals
Add to My Manuals
Save this manual to your list of manuals |
Page 19 highlights
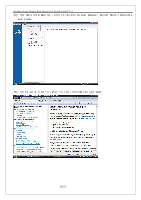
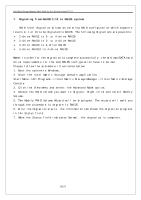
Intel Matrix Storage Manager Quick Guide for Acer Selected Veriton PC V1.1 7. Migrating from RAID0/1/10 to RAID5 system RAID level migration allows an existing RAID configuration which supports levels 0, 1 or 10 to be migrated to RAID5. The following migrations are possible: ¾ 2-drive RAID1 to 3- or 4-drive RAID5 ¾ 2-drive RAID0 to 3- or 4-drive RAID5 ¾ 3-drive RAID0 to 4-drive RAID5 ¾ 4-drive RAID10 to 4-drive RAID5 Note: In order for the migration to complete successfully, the minimum SATA hard drive requirements for the new RAID5 configuration have to be met. Please follow the procedure illustrated below: 1. Boot the system to Windows. 2. Start the Intel Matrix Storage Console application: Start Menu ->All Programs -> Intel Matrix Storage Manager -> Intel Matrix Storage Console 3. Click the View menu and select the Advanced Mode option. 4. Choose the RAID volume you want to migrate. Right-click and select Modify Volume. 5. The Modify RAID Volume Wizard will be displayed. The wizard will walk you through the procedure to migrate to RAID5. 6. After the migration starts, the Information tab shows the migration progress in the Status field. 7. When the Status field indicates Normal, the migration is complete. 19/21
-
 1
1 -
2
-
3
-
4
-
5
-
6
-
7
-
8
-
9
-
10
-
11
-
12
-
13
-
 14
14 -
 15
15 -
 16
16 -
 17
17 -
 18
18 -
 19
19 -
 20
20 -
 21
21
 |
 |
