Adaptec AHA-2940U2 User Guide - Page 4
Check the SCSI IDs, Terminate the Ends - 2940u2w jumpers
 |
View all Adaptec AHA-2940U2 manuals
Add to My Manuals
Save this manual to your list of manuals |
Page 4 highlights
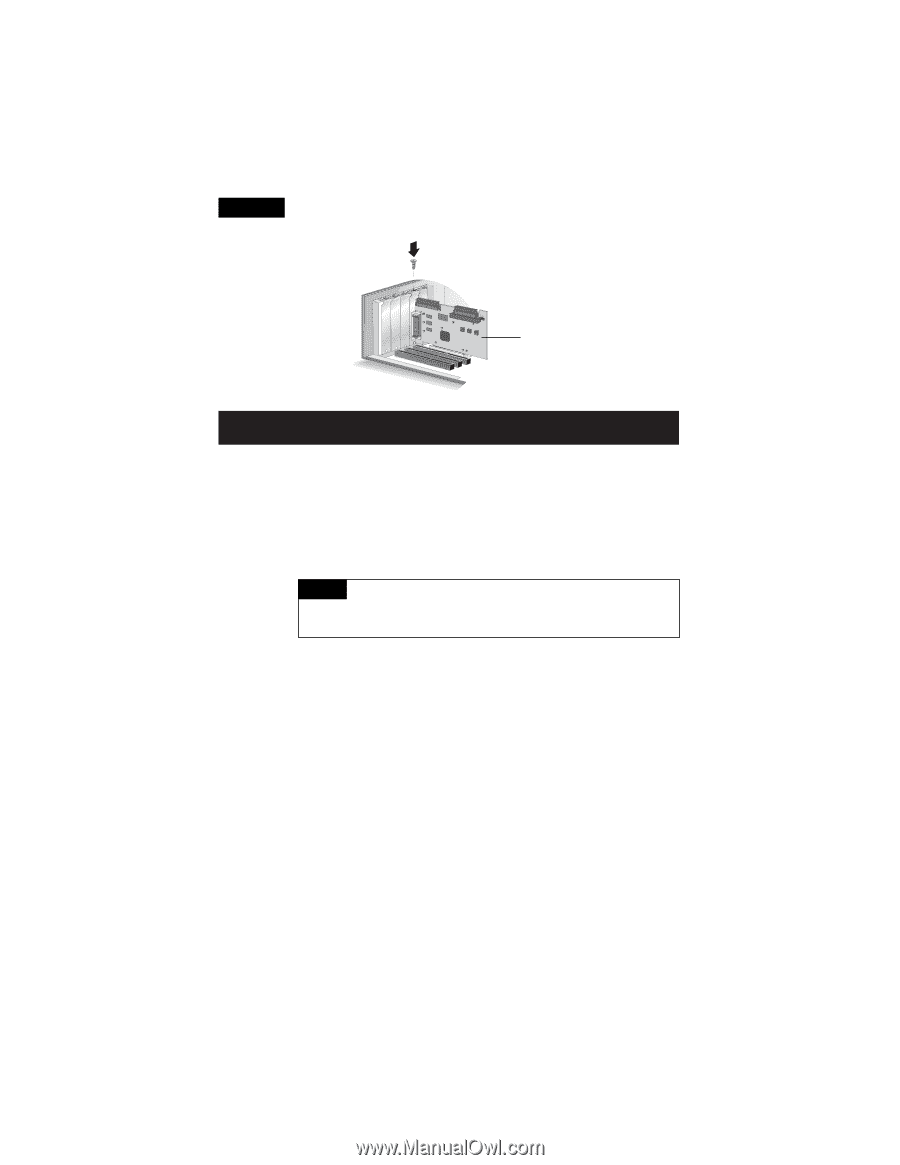
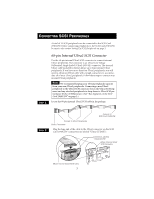
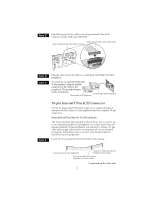
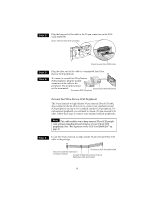
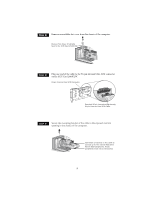
STEP 4 Insert the SCSI Card 2940U2W into the PCI expansion slot; press down firmly until it clicks into place, then replace the slot cover screw. SCSI Card 2940U2W Installed in a PCI Expansion Slot SETTING UP SCSI PERIPHERALS Setting up SCSI peripherals before attaching them to the SCSI Card 2940U2W typically involves setting SCSI IDs and termination, mounting internal peripherals inside your computer, and connecting power cables to each peripheral. Since setup can vary from peripheral to peripheral, always refer to the peripheral's documentation for specific instructions. Below are some guidelines for setting SCSI IDs and termination on your peripherals. NOTE If you refer to the peripheral's documentation for installation instructions, be sure to return to this document to continue with installation of the software included in the package. Check the SCSI IDs The SCSI Card 2940U2W and each peripheral you connect to it requires a unique SCSI ID number ranging from 0 to 15. ID numbers don't have to be sequential, as long as the SCSI Card 2940U2W and each peripheral has a different number. The SCSI Card 2940U2W is preset to ID 7 and should not be changed. If you will be booting from a SCSI hard disk, it's best to set the disk's ID at 0 or 1. Most SCSI hard disks come from the factory preset to ID 0. The IDs for internal peripherals are usually set with jumpers; external peripherals are usually set with a switch on the back of the peripheral. Terminate the Ends To ensure reliable communication on the SCSI bus, the peripheral at the end of each cable, or the end of the cable itself, must have a terminator installed (or enabled). The peripherals between the ends of each cable must have the terminator removed (or disabled). 4
-
 1
1 -
 2
2 -
 3
3 -
 4
4 -
 5
5 -
 6
6 -
 7
7 -
 8
8 -
 9
9 -
 10
10 -
11
-
12
-
13
-
14
 |
 |