Alpine 7893 Owners Manual - Page 30
XM Radio Operation
 |
View all Alpine 7893 manuals
Add to My Manuals
Save this manual to your list of manuals |
Page 30 highlights
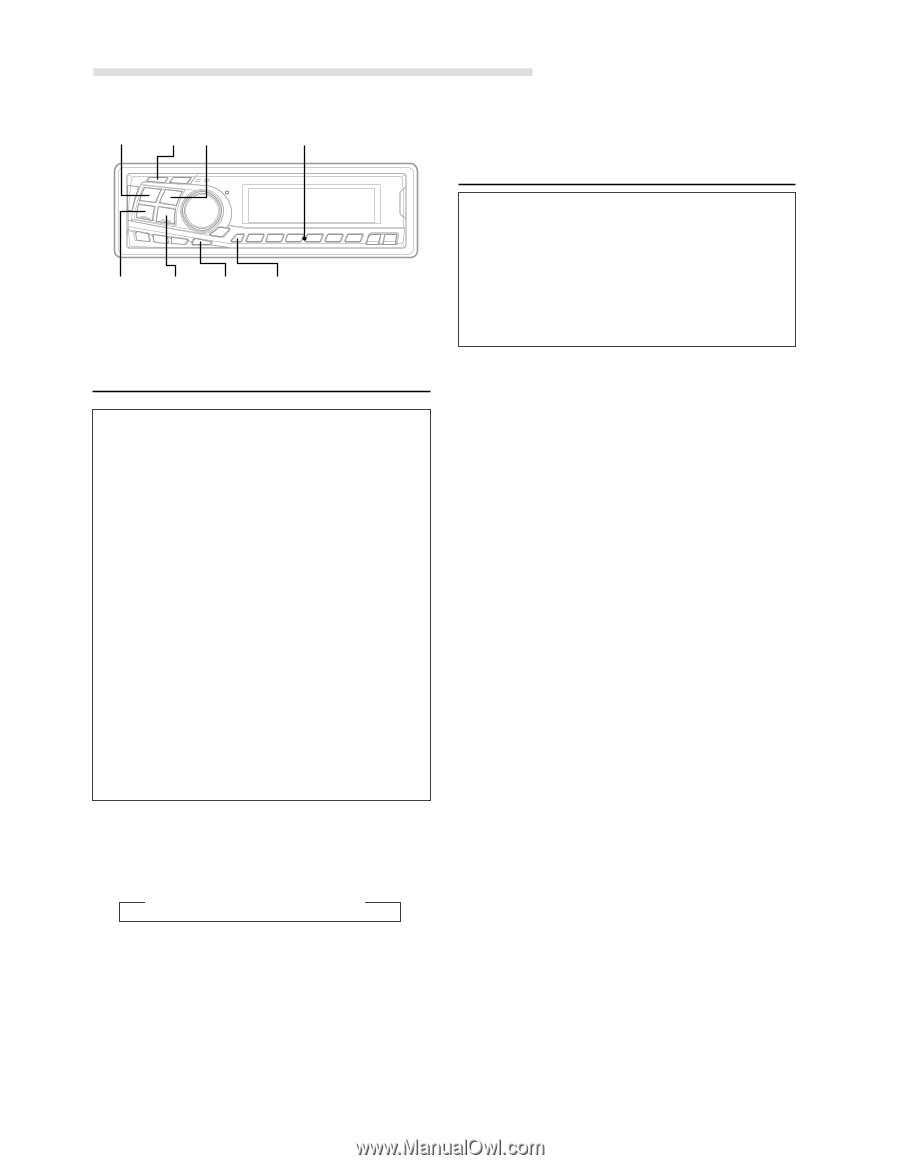
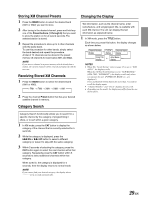
XM Radio Operation SOURCE CAT BAND Preset buttons (1 through 6) g DN f UP TITLE SETUP Receiving XM Channels with the XM Receiver (Optional) XM Satellite Radio∗ is the next generation of audio entertainment, with up to 100 brand-new digital channels. For a small monthly fee, subscribers can hear crystal-clear music, sports, news and talk, coast-tocoast via satellite. For more information, visit XM's website at www.xmradio.com or call 1-877-XMRADIO. An optional XM Satellite Radio Receiver (TUA-T020XM) may be connected to the CDA-7995/CDA-7894/CDA7893/CDA-7892 if it is Ai-NET compatible. With an XM Receiver connected to the Ai-NET input of the CDA7995/CDA-7894/CDA-7893/CDA-7892, the XM Receiver will be controllable from theCDA-7995/CDA-7894/CDA7893/CDA-7892. ∗ XM and its corresponding logos are trademarks of XM Satellite Radio Inc. NOTES • The controls on the CDA-7995/CDA-7894/CDA-7893/ CDA-7892 for XM Receiver operation are operative only when an XM Receiver is connected. • The XM1 or XM2 band illuminates when in XM mode. 1 Press the SOURCE button to select RADIO Mode. 2 Press the BAND button to select XM1 or XM2. Each press changes the band: → FM1 → FM2 → XM1 → XM2 → AM 3 Press the g DN or f UP button to select the desired channel. Holding the g DN or f UP buttons will change channels continuously. Checking the XM Radio ID Number You need to provide XM with the unique XM Radio ID number for your XM Radio Receiver in order to subscribe to XM's programming. This number is an 8 character alphanumeric number that is printed on a label directly on the XM Receiver. It can also be displayed on the screen of the CDA-7995/ CDA-7894/CDA-7893/CDA-7892 in the following way. 1 While receiving XM1/XM2, press the g DN or f UP button to select channel "0." 2 The unit alternately displays "RADIO ID" for 2 seconds, then the ID number for 10 seconds. 3 To cancel the ID number display, set the channel to other than "0." Tips There is another way to display your ID number. 1. Press and hold the SETUP button for at least 3 seconds. 2. Press the f UP or g DN button repeatedly to select "ID." 3. Press the BAND button to display your ID number. 4. After checking your ID number, press the SETUP button to return to the normal display. NOTES • You cannot use "O," "S,"" I," or "F" for the ID Number. • You can check your ID number printed on the label on the package of your XM Satellite Radio Receiver (TUA-T020XM). 28-EN
-
 1
1 -
2
-
3
-
4
-
5
-
6
-
7
-
8
-
9
-
10
-
11
-
12
-
13
-
14
-
15
-
16
-
17
-
18
-
19
-
20
-
21
-
22
-
23
-
24
-
 25
25 -
 26
26 -
 27
27 -
 28
28 -
 29
29 -
 30
30 -
 31
31 -
 32
32 -
 33
33 -
 34
34 -
 35
35 -
36
-
37
-
38
-
39
-
40
-
41
-
42
-
43
-
44
-
45
-
46
-
47
 |
 |