Alpine CDA-9847 Owners Manual - Page 7
Getting Started - remote
 |
View all Alpine CDA-9847 manuals
Add to My Manuals
Save this manual to your list of manuals |
Page 7 highlights
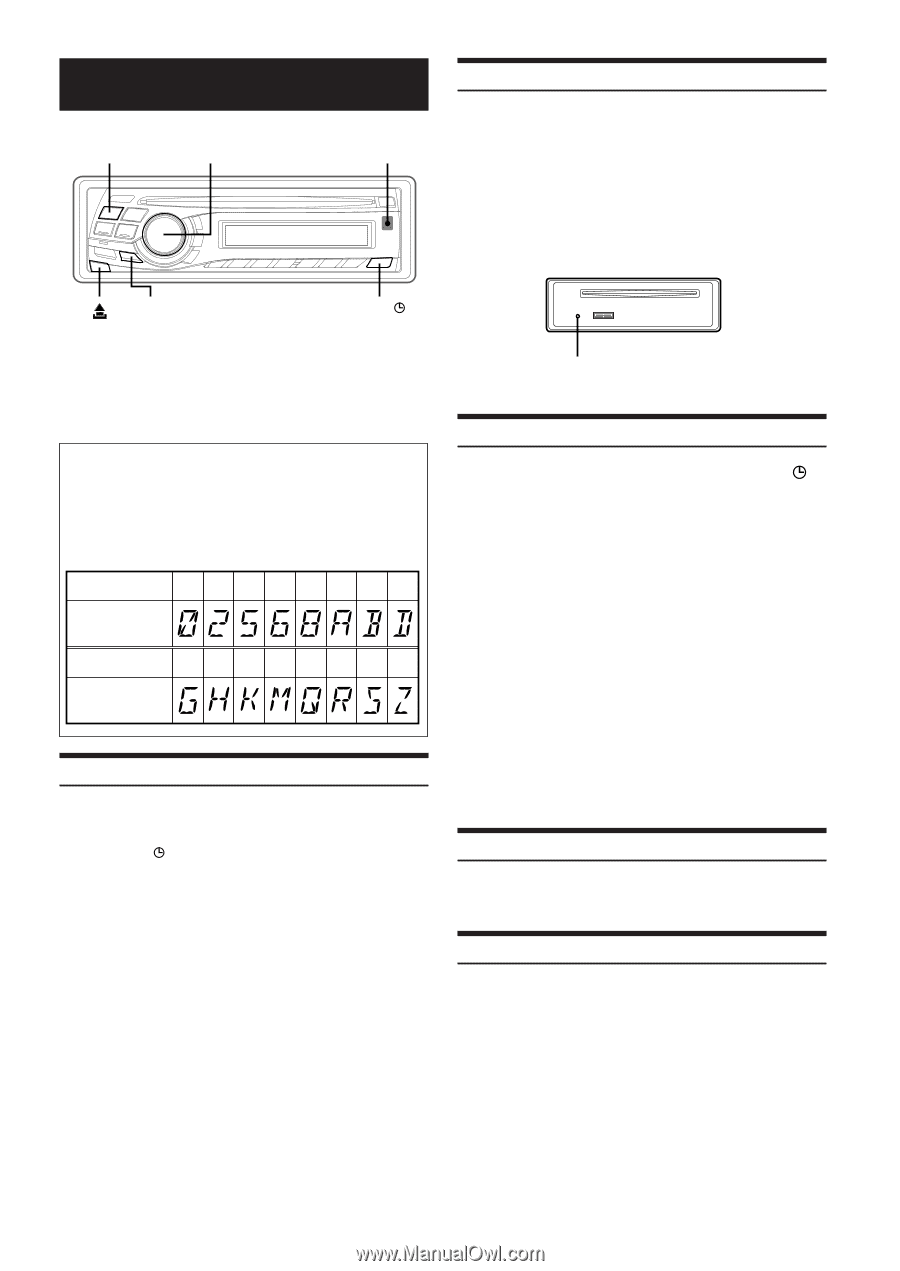
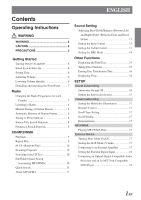
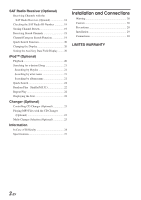
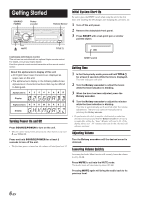
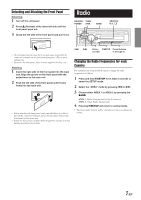
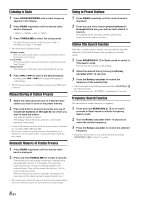
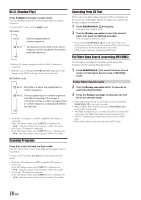
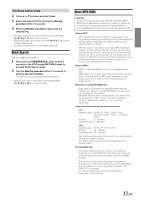
Getting Started SOURCE/ POWER Rotary encoder Remote Sensor Initial System Start-Up Be sure to press the RESET switch when using the unit for the first time, after installing the CD changer, after changing the car battery, etc. 1 Turn off the unit power. 2 Remove the detachable front panel. 3 Press RESET with a ball-point pen or similar pointed object. MUTE TITLE 1 Controllable with Remote Control This unit can be controlled with an optional Alpine remote control. For details, consult your Alpine dealer. Point the optional remote control transmitter at the remote control sensor. About the alphanumeric display of this unit • All English lower case characters are displayed as upper case on this unit. • The alphanumeric display in the following table shows alphanumeric characters/numbers that may be difficult to distinguish. Alphanumeric 0 2 5 6 8 A B D Display Alphanumeric G H K M Q R S Z Display Turning Power On and Off Press SOURCE/POWER to turn on the unit. • The unit can be turned on by pressing any other button except eject c and TITLE . Press and hold SOURCE/POWER for at least 2 seconds to turn off the unit. • The first time power is turned on, the volume will start from level 12. RESET switch Setting Time 1 In the Clock priority mode, press and hold TITLE for at least 2 seconds while the time is displayed. The time indication will blink. 2 Turn the Rotary encoder to adjust the hours while the time indication is blinking. 3 When the hour has been adjusted, press the Rotary encoder. 4 Turn the Rotary encoder to adjust the minutes while the time indication is blinking. The time is automatically set 5 seconds after the minute adjustment. The time can also be manually set by pressing the Rotary encoder. • To synchronize the clock to another clock/watch or radio time announcement, press and hold the Rotary encoder for at least 2 seconds after setting the "hour." Minutes will reset to 00. If the display shows over "30" minutes when you do this, the time will advance one hour. Adjusting Volume Turn the Rotary encoder until the desired sound is obtained. Lowering Volume Quickly Activating the Audio Mute function will instantly lower the volume level by 20 dB. Press MUTE to activate the MUTE mode. The audio level will decrease by about 20 dB. Pressing MUTE again will bring the audio back to its previous level. 6-EN
-
 1
1 -
 2
2 -
 3
3 -
 4
4 -
 5
5 -
 6
6 -
 7
7 -
 8
8 -
 9
9 -
 10
10 -
 11
11 -
 12
12 -
13
-
14
-
15
-
16
-
17
-
18
-
19
-
20
-
21
-
22
-
23
-
24
-
25
-
26
-
27
-
28
-
29
-
30
-
31
-
32
-
33
-
34
-
35
-
36
-
37
-
38
-
39
-
40
-
41
-
42
-
43
-
44
-
45
-
46
-
47
-
48
-
49
-
50
-
51
-
52
-
53
-
54
-
55
-
56
-
57
-
58
-
59
-
60
-
61
-
62
-
63
-
64
-
65
-
66
-
67
-
68
-
69
-
70
-
71
-
72
-
73
-
74
-
75
-
76
-
77
-
78
-
79
-
80
-
81
-
82
-
83
-
84
-
85
-
86
-
87
-
88
-
89
-
90
-
91
-
92
-
93
-
94
-
95
-
96
-
97
 |
 |