Alpine PXE-X09 Owners Manual - Page 26
Subwoofer Volume SUBW, Sound Effect Presets PRESET
 |
View all Alpine PXE-X09 manuals
Add to My Manuals
Save this manual to your list of manuals |
Page 26 highlights
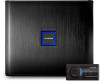
Wired Controller Subwoofer Volume (SUBW) After selecting the mix sound source, press the button briefly to enter the Subwoofer volume (SUBW) interface, as shown in Figure 5. Turn the button of the wired controller to adjust the subwoofer volume. Turning it clockwise can increase the volume, while turning it counterclockwise will reduce the volume (the adjustment range is from 0 to 15). If no operation is performed for about 5 seconds, it will exit from the interface to the main interface (Master Volume Interface). Figure 5 Sound Effect Presets (PRESET) After adjusting the subwoofer volume, press the button briefly to enter the sound effect presets (PRESET) interface, as shown in Figure 6-1. The number after PRESET refers to the sound effect data currently used by the DSP. Figure 6-1 Turn the button to select the sound effect. When the cursor moves to a number, press the button briefly to load the sound effect presets, as shown in Figure 6-2. After the data is loaded, it will exit from the interface to the main interface (Master Volume Interface). Figure 6-2 24
-
 1
1 -
2
-
3
-
4
-
5
-
6
-
7
-
8
-
9
-
10
-
11
-
12
-
13
-
14
-
15
-
16
-
17
-
18
-
19
-
20
-
 21
21 -
 22
22 -
 23
23 -
 24
24 -
 25
25 -
 26
26 -
 27
27 -
 28
28 -
 29
29
 |
 |
