Alpine X009-GM2 Owner's Manual (english) - Page 77
Camera Operation (Optional), Rear Camera Operation, Displaying the rear view video while the car is
 |
View all Alpine X009-GM2 manuals
Add to My Manuals
Save this manual to your list of manuals |
Page 77 highlights
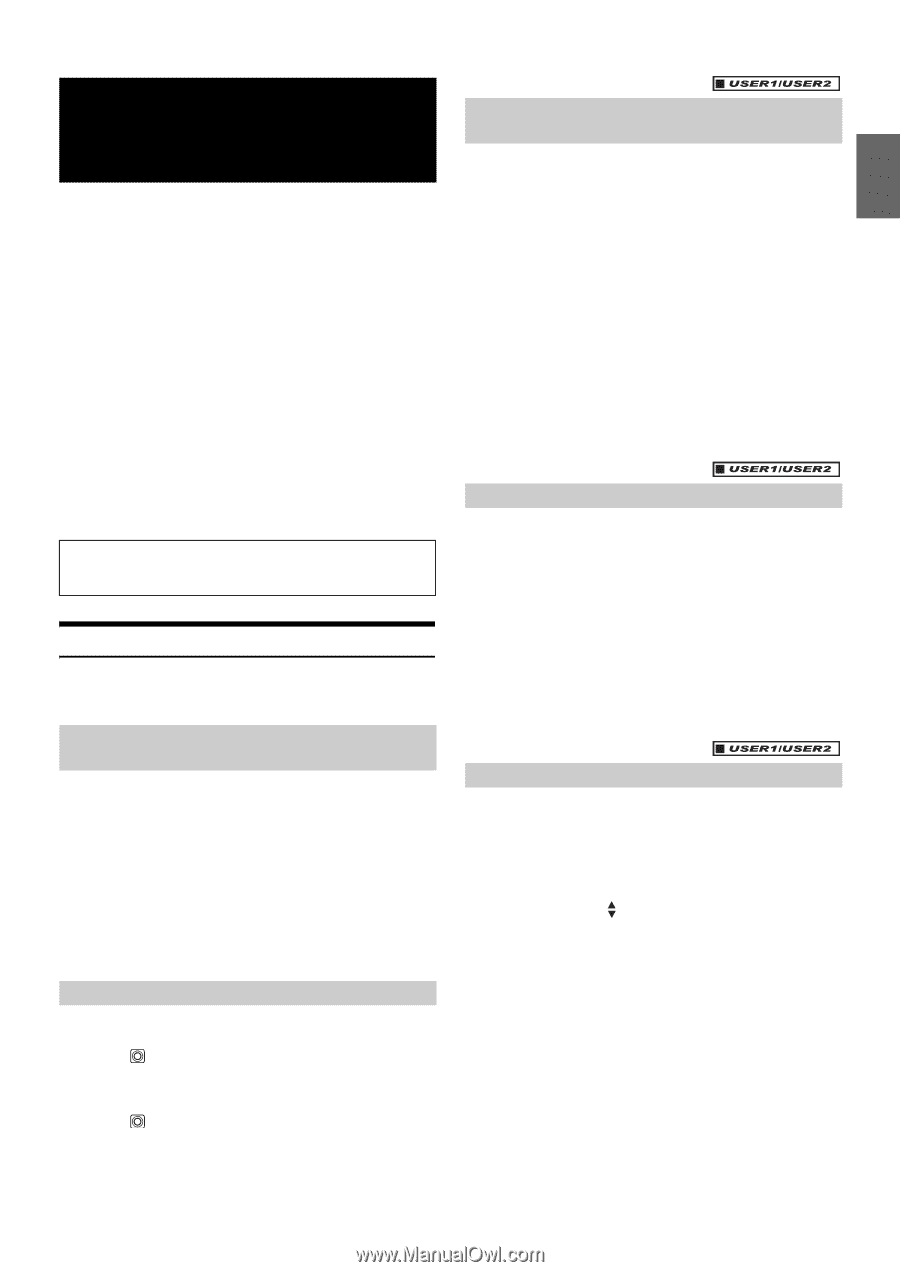
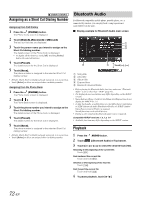
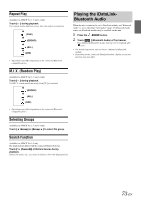
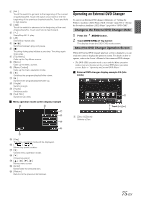
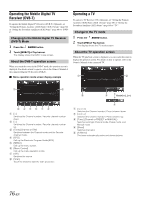
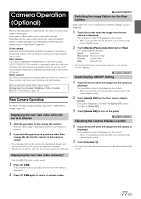
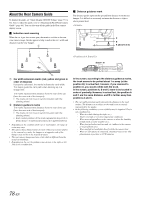
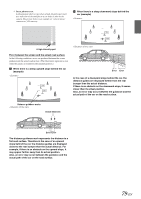
Camera Operation (Optional) When an optional camera is connected, the view video of camera can be output to the monitor. Front camera or Rear camera can be connected to this unit. Depending on your camera, please choose the connection method (Direct or AUX) and camera type (Front, Rear or Other) first. For details, refer to "Camera Setup" (page 64). Front camera: When the HCE-C212F/HCE-C200F is connected, conditions in front of the vehicle, such as objects, people and other hazards, can be seen. Rear camera: If an HCE-C210RD/HCE-C200R/HCE-C117D/HCE-C107D/ HCE-C115/HCE-C105 camera is connected, when the vehicle is reversed, the rear camera view (guide marks for vehicle width and available distance) is displayed automatically on the screen of this unit. Other camera: Set when connecting to a camera other than the Front camera or Rear camera, such as a room camera and side camera. You can adjust the quality of the camera image. Setting items: Live Contrast / Brightness / Color / Contrast Refer to "Visual Setting" (page 45). Rear Camera Operation Set "Rear" for "Direct Camera Setting" (page 64) or "AUX Camera Setting" (page 65). Displaying the rear view video while the car is in reverse 1 Shift the gear lever to the reverse (R) position. The rear view image is displayed while the car remains in reverse. 2 If you shift the gear lever to a position other than reverse (R), the monitor returns to the previous screen. • Never depend solely on the camera when backing up. Always turn and look and only use the camera for additional assistance. • This function is effective when the reverse wire is properly connected. Switching the Image Pattern for the Rear Camera If the camera has a view switch function, the Direct Change switch is displayed. 1 Touch the screen when the image from the rear camera is displayed. The operation screen is displayed on the screen. • After a 5-second time-out, the operation screen returns to the camera display screen. 2 Touch [Back], [Panorama], [Corner] or [Top]. The image pattern changes. [Back]: Rear View [Panorama]: Panorama View [Corner]: Corner View [Top]: Ground View • For detailed information about image patterns, see the camera Owner's Manual. Guide Display ON/OFF Setting 1 Touch the screen when the image from the camera is displayed. The operation screen is displayed on the screen. • After a 5-second time-out, the operation screen returns to the camera display screen. 2 Touch [Guide OFF] on the Rear camera display screen. The guide disappears, and then the [Guide OFF] switch changes to [Guide ON]. 3 Touch [Guide ON] to turn on the guide. Adjusting the Caution Display Location 1 Touch the screen when the image from the camera is displayed. The operation screen is displayed on the screen. • After a 5-second time-out, the operation screen returns to the camera display screen. 2 Touch [Caution ]. • For each touch, the caution location moves to the top or bottom of the screen. Displaying the rear view video manually* * Only for GMC/Chevrolet or other model. 1 Press CAM. The Camera mode is activated and the rear view video is displayed. 2 Press CAM again to return to normal screen. 77-EN
-
 1
1 -
2
-
3
-
4
-
5
-
6
-
7
-
8
-
9
-
10
-
11
-
12
-
13
-
14
-
15
-
16
-
17
-
18
-
19
-
20
-
21
-
22
-
23
-
24
-
25
-
26
-
27
-
28
-
29
-
30
-
31
-
32
-
33
-
34
-
35
-
36
-
37
-
38
-
39
-
40
-
41
-
42
-
43
-
44
-
45
-
46
-
47
-
48
-
49
-
50
-
51
-
52
-
53
-
54
-
55
-
56
-
57
-
58
-
59
-
60
-
61
-
62
-
63
-
64
-
65
-
66
-
67
-
68
-
69
-
70
-
71
-
 72
72 -
 73
73 -
 74
74 -
 75
75 -
 76
76 -
 77
77 -
 78
78 -
 79
79 -
 80
80 -
 81
81 -
 82
82 -
83
-
84
-
85
-
86
-
87
-
88
-
89
-
90
-
91
-
92
-
93
-
94
-
95
-
96
-
97
-
98
-
99
-
100
-
101
-
102
-
103
-
104
-
105
-
106
-
107
-
108
-
109
-
110
-
111
-
112
-
113
-
114
-
115
-
116
-
117
-
118
-
119
-
120
-
121
 |
 |