Apple MA409LL/A Setup Guide - Page 13
Assemble the Mounting Rails, Step 2
 |
UPC - 885909098316
View all Apple MA409LL/A manuals
Add to My Manuals
Save this manual to your list of manuals |
Page 13 highlights
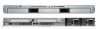
Step 2: Assemble the Mounting Rails The Xserve comes with both short and long extensions that you combine with standard front rails to create a pair of rails that are the right depth for your rack. Short extension These pegs engage the slots in the extension. Rail Long extension 1 Slide a matching rear extension onto each of the two front rails. Engage the pegs in both slots. The extension goes on the outside of the rail. This end is up. This notch should be on the bottom. Chapter 1 Installing the Xserve 13
-
 1
1 -
2
-
3
-
4
-
5
-
6
-
7
-
 8
8 -
 9
9 -
 10
10 -
 11
11 -
 12
12 -
 13
13 -
 14
14 -
 15
15 -
 16
16 -
 17
17 -
 18
18 -
19
-
20
-
21
-
22
-
23
-
24
-
25
-
26
-
27
-
28
-
29
-
30
-
31
-
32
-
33
-
34
-
35
-
36
-
37
-
38
-
39
-
40
-
41
-
42
-
43
-
44
-
45
-
46
-
47
-
48
-
49
-
50
-
51
-
52
-
53
-
54
-
55
-
56
-
57
-
58
-
59
-
60
 |
 |

Chapter 1
Installing the Xserve
13
Step 2:
Assemble the Mounting Rails
The Xserve comes with both short and long extensions that you combine with
standard front rails to create a pair of rails that are the right depth for your rack.
1
Slide a matching rear extension onto each of the two front rails.
Long extension
Short extension
These pegs engage the
slots in the extension.
Rail
The extension goes on
the outside of the rail.
Engage the pegs
in both slots.
This notch should
be on the bottom.
This end is up.