Apple MA409LL/A Setup Guide - Page 16
Align and Secure the Rails, Step 4
 |
UPC - 885909098316
View all Apple MA409LL/A manuals
Add to My Manuals
Save this manual to your list of manuals |
Page 16 highlights
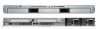
Step 4: Align and Secure the Rails To make sure the Xserve slides easily in and out of the rack, use the alignment guide to position the rails in the rack before tightening the mounting screws. 1 Insert the alignment guide in the front of the rails. Insert the alignment guide into the rails and tighten all the screws. 2 Tighten the front mounting screws Important: If you have a square-hole rack, make sure the raised alignment block on the back of each mounting spacer is seated properly in the hole in the rack post as you tighten the screws. 3 Tighten the rear mounting screws. 4 Remove the alignment guide. 16 Chapter 1 Installing the Xserve
-
 1
1 -
2
-
3
-
4
-
5
-
6
-
7
-
8
-
9
-
10
-
 11
11 -
 12
12 -
 13
13 -
 14
14 -
 15
15 -
 16
16 -
 17
17 -
 18
18 -
 19
19 -
 20
20 -
 21
21 -
22
-
23
-
24
-
25
-
26
-
27
-
28
-
29
-
30
-
31
-
32
-
33
-
34
-
35
-
36
-
37
-
38
-
39
-
40
-
41
-
42
-
43
-
44
-
45
-
46
-
47
-
48
-
49
-
50
-
51
-
52
-
53
-
54
-
55
-
56
-
57
-
58
-
59
-
60
 |
 |

16
Chapter 1
Installing the Xserve
Step 4:
Align and Secure the Rails
To make sure the Xserve slides easily in and out of the rack, use the alignment guide to
position the rails in the rack before tightening the mounting screws.
1
Insert the alignment guide in the front of the rails.
2
Tighten the front mounting screws
Important:
If you have a square-hole rack, make sure the raised alignment block on the
back of each mounting spacer is seated properly in the hole in the rack post as you
tighten the screws.
3
Tighten the rear mounting screws.
4
Remove the alignment guide.
Insert the alignment
guide into the rails
and tighten all the screws.