Asus A7V-E Motherboard DIY Troubleshooting Guide - Page 18
ASUS A7V-E User's Manual, CPU External Frequency Setting SW1 Switches 1-5, Frequency Selection - bios update
 |
View all Asus A7V-E manuals
Add to My Manuals
Save this manual to your list of manuals |
Page 18 highlights
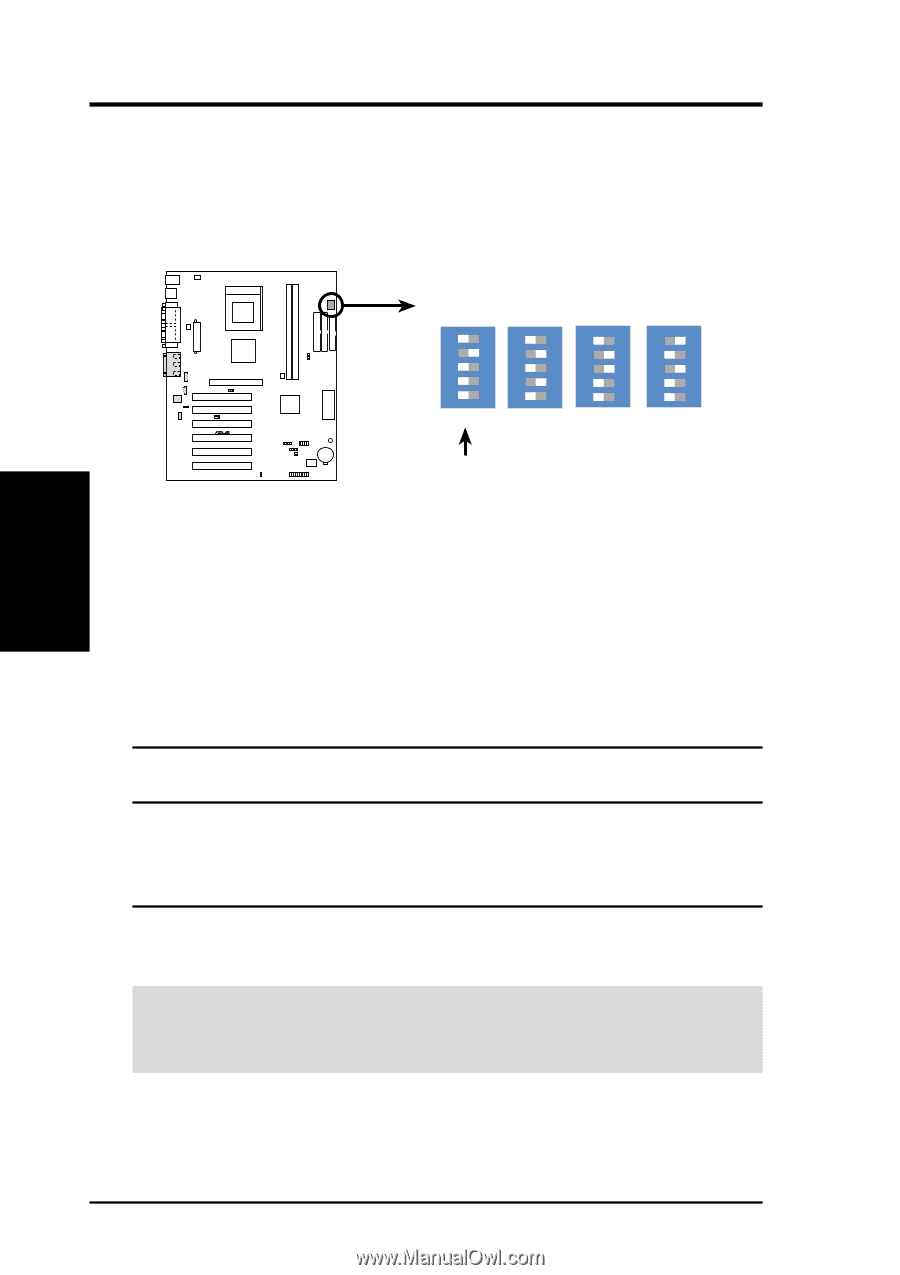
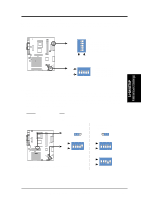
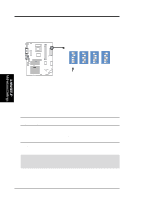
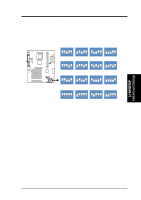
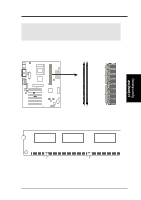
3. H/W SETUP Motherboard Settings 3. HARDWARE SETUP 2) CPU External Frequency Setting (SW1 Switches 1-5) This option tells the clock generator what frequency to send to the CPU, SDRAM, and the chipset. This allows the selection of the CPU's External frequency. The CPU External Frequency multiplied by the Frequency Multiple equals the CPU's Internal frequency (the advertised CPU speed). For JumperFree Mode, the default setting enabling BIOS control is 100 MHz. CLOCK TABLE 01 01 ON 1234 5 ON 1234 5 ON 1234 5 ON 1234 5 CPU 100MHz 103MHz 105MHz 110MHz ® JumperFree A7V-E Mode(Default) A7V-E CPU External Frequency Selection IMPORTANT: 1. To use this feature, JEN must be set to Jumper Mode: [1-2]; [See section 1]. 2. Otherwise, if JumperFree mode is enabled, use BIOS setup in place of these switches (set Operating Frequency Setting to User Define under 4.4 Advanced Menu in BIOS Setup so you can set the CPU Frequency). External Frequency Table CPU (MHz) 100.00 103.00 105.00 110.00 PCI (MHz) 33.57 34.33 35.00 36.67 1 [ON] [ON] [ON] [ON] Frequency Selection Switches 2 3 4 5 [ON] [OFF] [ON] [ON] [ON] [ON] [OFF] [OFF] [OFF] [OFF] [OFF] [ON] [ON] [ON] [ON] [OFF] NOTE: For updated processor settings, visit the ASUS web site (see ASUS CONTACT INFORMATION). WARNING! Frequencies other than the recommended CPU bus frequencies are not guaranteed to be stable. Overclocking your processor is not recommended. It may result in a slower speed and premature wearing of the processor. 18 ASUS A7V-E User's Manual
-
 1
1 -
2
-
3
-
4
-
5
-
6
-
7
-
8
-
9
-
10
-
11
-
12
-
 13
13 -
 14
14 -
 15
15 -
 16
16 -
 17
17 -
 18
18 -
 19
19 -
 20
20 -
 21
21 -
 22
22 -
 23
23 -
24
-
25
-
26
-
27
-
28
-
29
-
30
-
31
-
32
-
33
-
34
-
35
-
36
-
37
-
38
-
39
-
40
-
41
-
42
-
43
-
44
-
45
-
46
-
47
-
48
-
49
-
50
-
51
-
52
-
53
-
54
-
55
-
56
-
57
-
58
-
59
-
60
-
61
-
62
-
63
-
64
-
65
-
66
-
67
-
68
-
69
-
70
-
71
-
72
-
73
-
74
-
75
-
76
-
77
-
78
-
79
-
80
-
81
-
82
-
83
-
84
 |
 |