Asus AP140R AP140R User Manual English Edition - Page 22
Installing a Hard Disk Drive
 |
View all Asus AP140R manuals
Add to My Manuals
Save this manual to your list of manuals |
Page 22 highlights
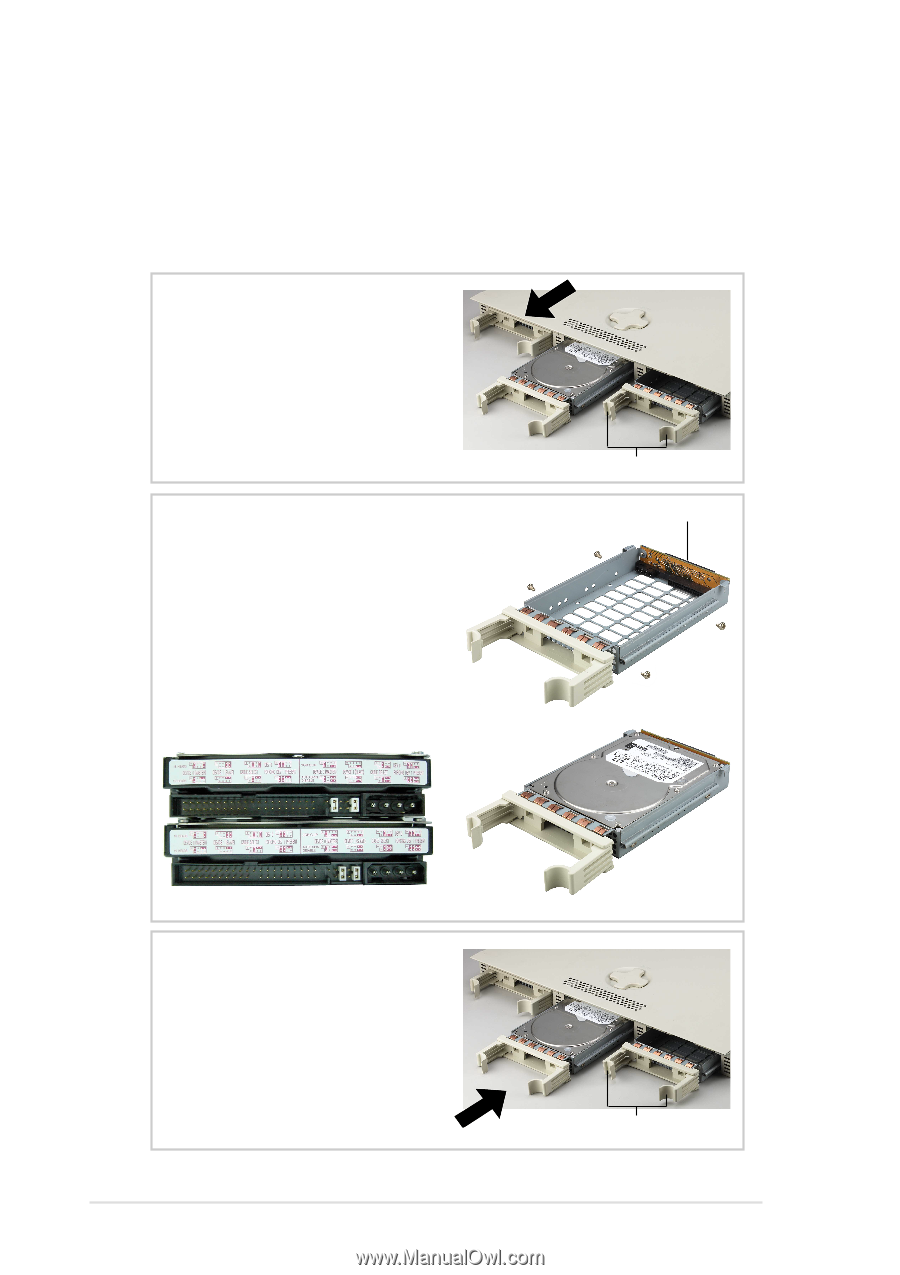
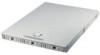
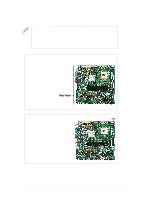
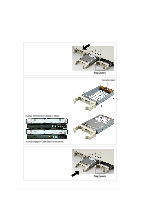
2.5 Installing a Hard Disk Drive The server comes with three externally accessible drive bays. Due to mechanical issues, the drive tray's connector board may not fit some hard drives. Make sure the connector board will fit the hard drive before purchasing. Do not force the connector board onto the hard drive. Drive Trays In each of the drive bays is a removable tray for mounting a hard disk drive. Flip open the tray levers to release the tray, then pull the tray out of the chassis. Tray Levers Mount the Hard Drive 1. Set hard drive to "Cable Select". 2. Remove the connector board. 3. Place hard drive into drive tray. 4. Secure the drive using 4 screws. 5. Attach connector board to drive. 6. Secure the connector board using the original two screws. Example: IBM hard drive's default is "Master". Connector Board You must change to "Cable Select" for this server. Install the Hard Drive After the drive is secured to the tray, carefully insert the drive into the bay, then push the levers back into place. Tray Levers 22 Chapter 2: Hardware Setup
-
 1
1 -
2
-
3
-
4
-
5
-
6
-
7
-
8
-
9
-
10
-
11
-
12
-
13
-
14
-
15
-
16
-
 17
17 -
 18
18 -
 19
19 -
 20
20 -
 21
21 -
 22
22 -
 23
23 -
 24
24 -
 25
25 -
 26
26 -
 27
27 -
28
-
29
-
30
-
31
-
32
-
33
-
34
-
35
-
36
-
37
-
38
-
39
-
40
-
41
-
42
-
43
-
44
 |
 |