Asus AP1710-I5 AP1710-I5 English Manual - Page 34
Removing floppy disk drive tray
 |
View all Asus AP1710-I5 manuals
Add to My Manuals
Save this manual to your list of manuals |
Page 34 highlights
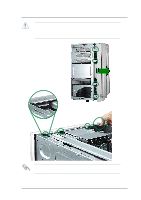
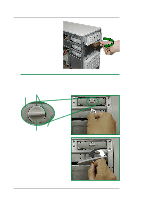
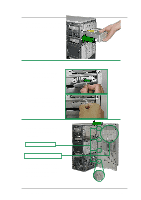
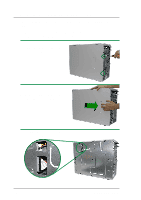
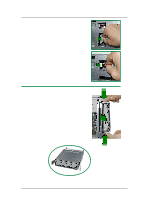
2.5.3 Removing floppy disk drive tray The following procedures describe how to remove the floppy disk drive tray. 1. Remove the front cover panel. Perform step #1 in section "2.5.2 Installing a 5.25 device" on page 2-13. 2. Remove the two screws that secure the right side chassis cover. 3. Pull out and detach the right side chassis cover and set aside. 4. Locate the floppy disk drive cable and power connectors. 2-16 ASUS AP1710-I5
-
 1
1 -
2
-
3
-
4
-
5
-
6
-
7
-
8
-
9
-
10
-
11
-
12
-
13
-
14
-
15
-
16
-
17
-
18
-
19
-
20
-
21
-
22
-
23
-
24
-
25
-
26
-
27
-
28
-
 29
29 -
 30
30 -
 31
31 -
 32
32 -
 33
33 -
 34
34 -
 35
35 -
 36
36 -
 37
37 -
 38
38 -
 39
39 -
40
-
41
-
42
-
43
-
44
-
45
-
46
-
47
-
48
-
49
-
50
-
51
-
52
-
53
-
54
-
55
-
56
-
57
-
58
-
59
-
60
 |
 |

2-16
ASUS AP1710-I5
2.5.3
Removing floppy disk drive tray
2.
Remove the two screws that
secure the right side chassis
cover.
The following procedures describe how to remove the floppy disk drive
tray.
1.
Remove the front cover panel. Perform step #1 in section
“2.5.2 Installing a 5.25 device” on page 2-13.
3.
Pull out and detach the right
side chassis cover and set
aside.
4.
Locate the floppy disk drive
cable and power connectors.