Asus AP1710-I5 AP1710-I5 English Manual - Page 37
Placing an ATA133 IDE hard disk drive to tray
 |
View all Asus AP1710-I5 manuals
Add to My Manuals
Save this manual to your list of manuals |
Page 37 highlights
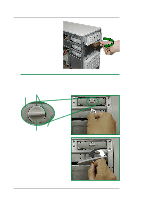
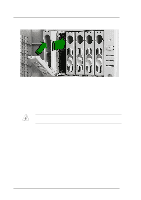
2.6.1 Placing an ATA133 IDE hard disk drive to tray The following steps describes the installation of a hard disk drive into the drive tray. Rear bracket Middle bracket 1. Place the hard disk tray on a flat clean surface. Prepare Philips (cross) screwdriver. Drive tray rail 2. Remove middle bracket. To release from pin, unscrew rear bracket and slowly detach middle bracket. Take caution in handling the drive tray, the plastic drive tray rail may break. 3. Replace the rear bracket and fasten with screws. User's Manual 2-19
-
 1
1 -
2
-
3
-
4
-
5
-
6
-
7
-
8
-
9
-
10
-
11
-
12
-
13
-
14
-
15
-
16
-
17
-
18
-
19
-
20
-
21
-
22
-
23
-
24
-
25
-
26
-
27
-
28
-
29
-
30
-
31
-
 32
32 -
 33
33 -
 34
34 -
 35
35 -
 36
36 -
 37
37 -
 38
38 -
 39
39 -
 40
40 -
 41
41 -
 42
42 -
43
-
44
-
45
-
46
-
47
-
48
-
49
-
50
-
51
-
52
-
53
-
54
-
55
-
56
-
57
-
58
-
59
-
60
 |
 |

User’s Manual
2-19
2.6.1 Placing an ATA133 IDE hard disk drive to tray
The following steps describes the installation of a hard disk drive into the
drive tray.
1. Place the hard disk tray on a flat
clean surface. Prepare Philips
(cross) screwdriver.
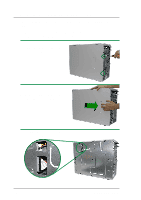
3. Replace the rear bracket and
fasten with screws.
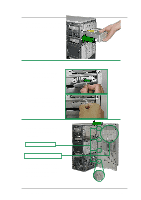
Rear bracket
Middle bracket
2. Remove middle bracket. To
release from pin, unscrew rear
bracket and slowly detach middle
bracket. Take caution in handling
the drive tray, the plastic drive
tray rail may break.
Drive tray rail