Asus ET2011E User Manual - Page 28
Positioning your All-in-one PC, Placing on the desktop, Mounting to the wall (optional) - et2011 wall mount
 |
View all Asus ET2011E manuals
Add to My Manuals
Save this manual to your list of manuals |
Page 28 highlights
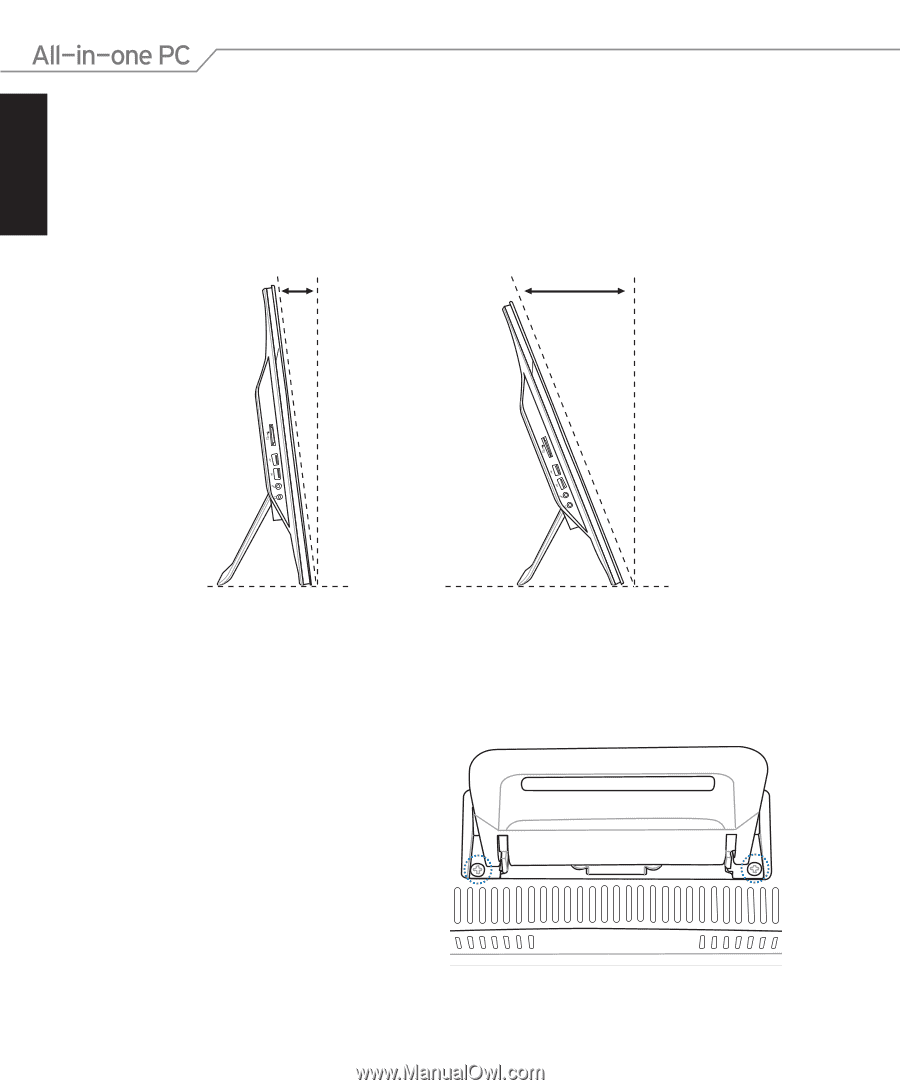
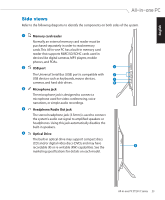
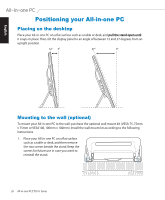
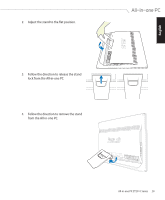
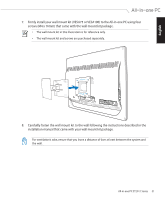
English Positioning your All-in-one PC Placing on the desktop Place your All-in-one PC on a flat surface such as a table or desk, and �p�u�l�l�t�h�e��s�t�a�n��d��o�p�e��n��u�n�t�i�l it snaps in place. Then, tilt the display panel to an angle of between 12 and 27 degrees from an upright position. 12O 0O 27O 0O Mounting to the wall (optional) To mount your All-in-one PC to the wall, purchase the optional wall mount kit (VESA 75, 75mm x 75mm or VESA100, 100mm x 100mm). Install the wall mount kit according to the following instructions. 1. Place your All-in-one PC on a flat surface such as a table or desk, and then remove the two screws beside the stand. Keep the screws for future use in case you want to reinstall the stand. 28 All-in-one PC ET2011 Series
-
 1
1 -
2
-
3
-
4
-
5
-
6
-
7
-
8
-
9
-
10
-
11
-
12
-
13
-
14
-
15
-
16
-
17
-
18
-
19
-
20
-
21
-
22
-
 23
23 -
 24
24 -
 25
25 -
 26
26 -
 27
27 -
 28
28 -
 29
29 -
 30
30 -
 31
31 -
 32
32 -
 33
33 -
34
-
35
-
36
-
37
-
38
-
39
-
40
-
41
-
42
-
43
-
44
 |
 |