Asus ET2011E User Manual - Page 32
Setting up your All-in-one PC, Connecting the wired keyboard and mouse
 |
View all Asus ET2011E manuals
Add to My Manuals
Save this manual to your list of manuals |
Page 32 highlights
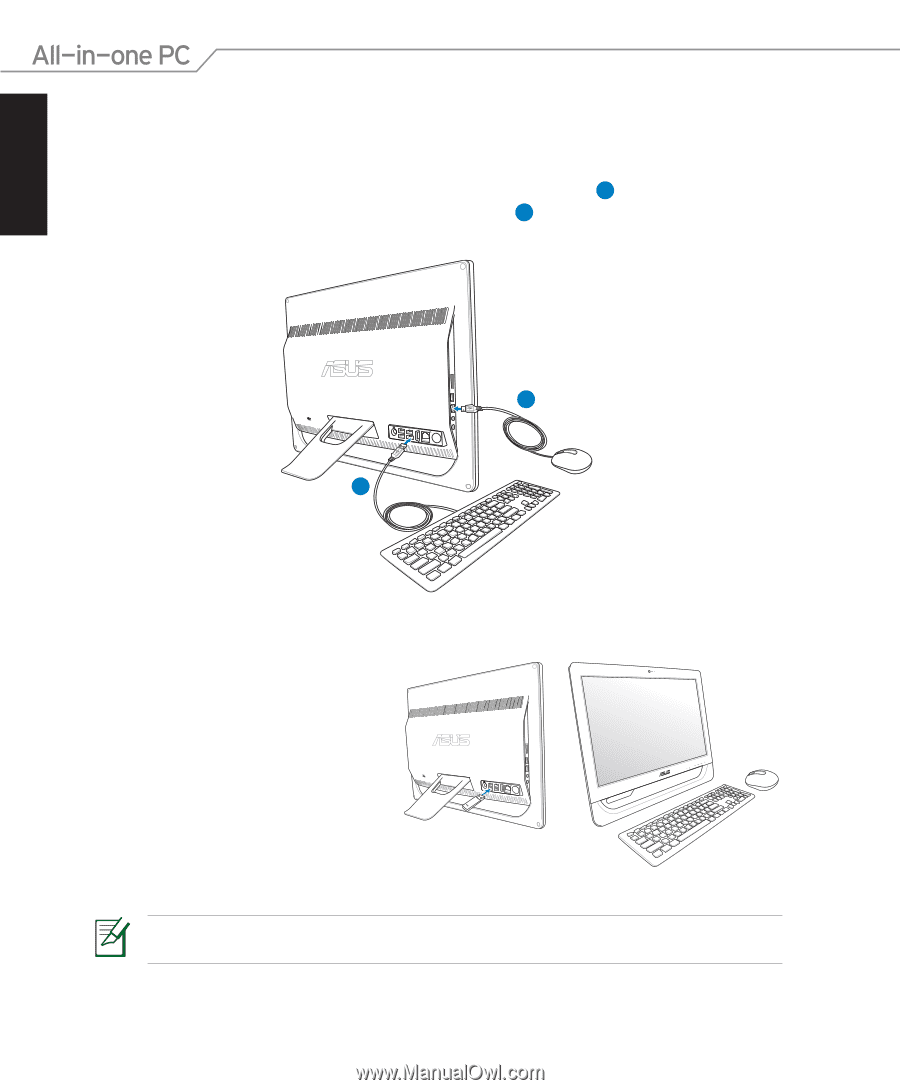
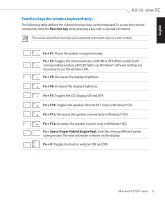
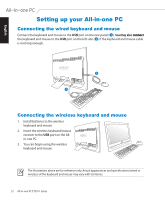
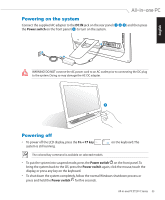
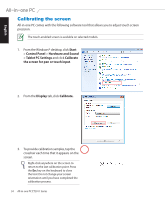
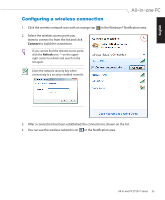
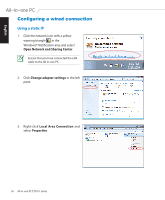
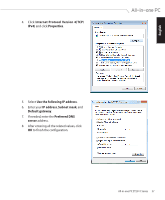
English Setting up your All-in-one PC Connecting the wired keyboard and mouse Connect the keyboard and mouse to the USB port on the rear panel ( 1 ).Yo��u��m��a�y�a�l�s�o��c�o�n�n�e��c�t the keyboard and mouse to the USB port on the left side ( 2 ) if the keyboard and mouse cable is not long enough.� 1 HDMI ANT/CABLE 2 Connecting the wireless keyboard and mouse 1. Install batteries to the wireless keyboard and mouse. 2. Insert the wireless keyboard/mouse receiver to the USB port on the Allin-one PC. 3. You can begin using the wireless HDMI ANT/CABLE keyboard and mouse. The illustrations above are for reference only. Actual appearances and specifications (wired or wireless) of the keyboard and mouse may vary with territories. 32 All-in-one PC ET2011 Series
-
 1
1 -
2
-
3
-
4
-
5
-
6
-
7
-
8
-
9
-
10
-
11
-
12
-
13
-
14
-
15
-
16
-
17
-
18
-
19
-
20
-
21
-
22
-
23
-
24
-
25
-
26
-
 27
27 -
 28
28 -
 29
29 -
 30
30 -
 31
31 -
 32
32 -
 33
33 -
 34
34 -
 35
35 -
 36
36 -
 37
37 -
38
-
39
-
40
-
41
-
42
-
43
-
44
 |
 |