Asus KFN5-Q User Guide - Page 124
Creating a RAID 1 set Mirrored
 |
UPC - 610839149490
View all Asus KFN5-Q manuals
Add to My Manuals
Save this manual to your list of manuals |
Page 124 highlights
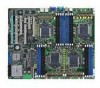
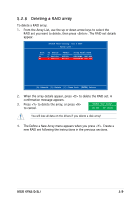
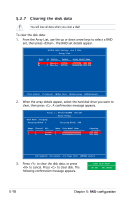
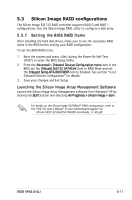
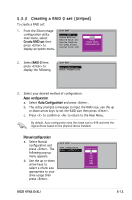
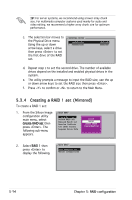
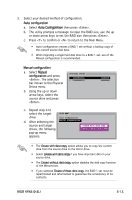
TIP: For server systems, we recommend using a lower array chunk size. For multimedia computer systems used mainly for audio and video editing, we recommend a higher array chunk size for optimum performance. c. The selection bar moves to the Physical Drive menu. Using the up or down arrow keys, select a drive then press to set the first drive of the RAID set. PHYSICAL DRIVE 0 XXXXXXXXXXX 1 XXXXXXXXXXX XXXXXXMB XXXXXXMB d. Repeat step c to set the second drive. The number of available drives depend on the installed and enabled physical drives in the system. e. The utility prompts a message to input the RAID size, use the up or down arrow keys to set the RAID size then press . f. Press to confirm or to return to the Main Menu. 5.3.4 Creating a RAID 1 set (Mirrored) To create a RAID 1 set: 1. From the Silicon Image configuration utility main menu, select Create RAID set then press . The following sub-menu appears. MAIN MENU Create RAID set Delete RAID set Rebuild Raid1 set Resolve Conflicts Low Level Format Logical Drive Info RAID0 RAID1 SPARRAEIDD1R0IVE COSNPCAARTEENDARTIIVOEN 2. Select RAID 1 then press to display the following. MAIN MENU Auto configuration Manual configuration 5-14 Chapter 5: RAID configuration
-
 1
1 -
2
-
3
-
4
-
5
-
6
-
7
-
8
-
9
-
10
-
11
-
12
-
13
-
14
-
15
-
16
-
17
-
18
-
19
-
20
-
21
-
22
-
23
-
24
-
25
-
26
-
27
-
28
-
29
-
30
-
31
-
32
-
33
-
34
-
35
-
36
-
37
-
38
-
39
-
40
-
41
-
42
-
43
-
44
-
45
-
46
-
47
-
48
-
49
-
50
-
51
-
52
-
53
-
54
-
55
-
56
-
57
-
58
-
59
-
60
-
61
-
62
-
63
-
64
-
65
-
66
-
67
-
68
-
69
-
70
-
71
-
72
-
73
-
74
-
75
-
76
-
77
-
78
-
79
-
80
-
81
-
82
-
83
-
84
-
85
-
86
-
87
-
88
-
89
-
90
-
91
-
92
-
93
-
94
-
95
-
96
-
97
-
98
-
99
-
100
-
101
-
102
-
103
-
104
-
105
-
106
-
107
-
108
-
109
-
110
-
111
-
112
-
113
-
114
-
115
-
116
-
117
-
118
-
 119
119 -
 120
120 -
 121
121 -
 122
122 -
 123
123 -
 124
124 -
 125
125 -
 126
126 -
 127
127 -
 128
128 -
 129
129 -
130
-
131
-
132
-
133
-
134
-
135
-
136
-
137
-
138
-
139
-
140
-
141
-
142
-
143
-
144
-
145
-
146
 |
 |