Asus N80Vc User Manual - Page 76
Windows Vista Software Recovery Cont., Using DVD on selected models
 |
View all Asus N80Vc manuals
Add to My Manuals
Save this manual to your list of manuals |
Page 76 highlights
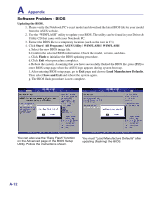
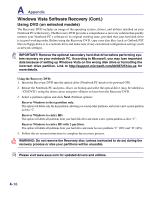
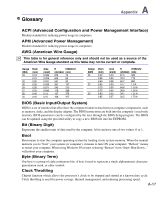
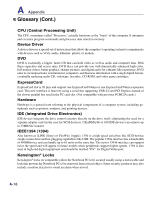
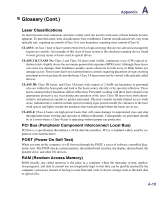
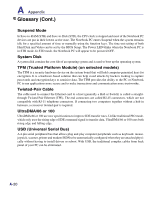
A Appendix Windows Vista Software Recovery (Cont.) Using DVD (on selected models) The Recovery DVD includes an image of the operating system, drivers, and utilities installed on your Notebook PC at the factory. The Recovery DVD provides a comprehensive recovery solution that quickly restores your Notebook PC's software to its original working state, provided that your hard disk drive is in good working order. Before using the Recovery DVD, copy your data files (such as Outlook PST files) to floppy disks or to a network drive and make note of any customized configuration settings (such as network settings). IMPORTANT! Remove the optional secondary hard disk drive before performing system recovery on your notebook PC. According to Microsoft, you may lose important data because of setting up Windows Vista on the wrong disk drive or formatting the incorrect drive partition. Link to http://support.microsoft.com/kb/937251/en-us for more details. Using the Recovery DVD: 1. Insert the Recovery DVD into the optical drive (Notebook PC needs to be powered ON). 2. Restart the Notebook PC and press on bootup and select the optical drive (may be labeled as "CD/DVD") using the down cursor and press to boot from the Recovery DVD. 3. Select a partition option and click Next. Partition options: Recover Windows to first partition only. This option will delete only the first partition, allowing you to keep other partitions, and create a new system partition as drive "C". Recover Windows to entire HD. This option will delete all partitions from your hard disk drive and create a new system partition as drive "C". Recover Windows to entire HD with 2 partition. This option will delete all partitions from your hard drive and create two new partitions "C" (60%) and "D" (40%). 4. Follow the on-screen instructions to complete the recovery process. WARNING: Do not remove the Recovery disc (unless instructed to do so) during the recovery process or else your partitions will be unusable. Please visit www.asus.com for updated drivers and utilities. A-16
-
 1
1 -
2
-
3
-
4
-
5
-
6
-
7
-
8
-
9
-
10
-
11
-
12
-
13
-
14
-
15
-
16
-
17
-
18
-
19
-
20
-
21
-
22
-
23
-
24
-
25
-
26
-
27
-
28
-
29
-
30
-
31
-
32
-
33
-
34
-
35
-
36
-
37
-
38
-
39
-
40
-
41
-
42
-
43
-
44
-
45
-
46
-
47
-
48
-
49
-
50
-
51
-
52
-
53
-
54
-
55
-
56
-
57
-
58
-
59
-
60
-
61
-
62
-
63
-
64
-
65
-
66
-
67
-
68
-
69
-
70
-
 71
71 -
 72
72 -
 73
73 -
 74
74 -
 75
75 -
 76
76 -
 77
77 -
 78
78 -
 79
79 -
 80
80 -
 81
81 -
82
-
83
-
84
-
85
-
86
-
87
-
88
-
89
-
90
-
91
-
92
-
93
-
94
 |
 |